In this manual, you will find information about the following elements in the GUI:
Note:
You can also edit a device in the following ways:
a.) Edit a computer from the Actions menu (in the web portal)
b.) Edit a computer in the Administration section (on the web portal)
Video Tutorial
"+" Button
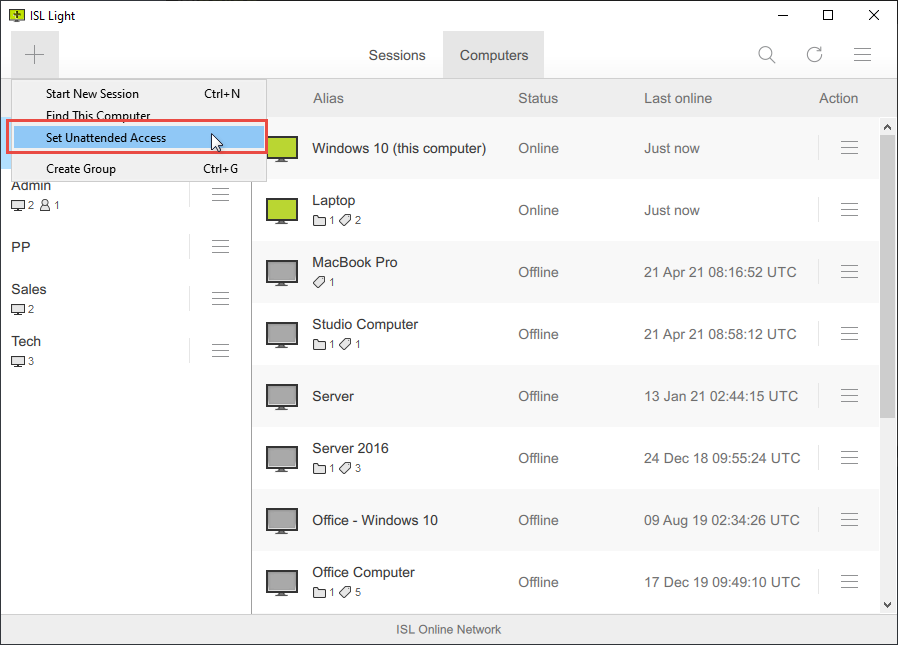
The "+" button opens a menu with the following options:
- Start New Session - Initiate a new remote session by generating a unique session code to connect with a client.
- Add This Computer / Find This Computer - Configure unattended access on the local computer or locate this computer in the list of devices.
- Set Unattended Access - Configure unattended access on a remote computer via email, link, or session code.
- Create Group - Create a new "Computer Group" and move computers to the group for better organization.
Sessions Tab
Please refer to the Overview (Sessions) manual for more information about computers tab.
Computers Tab
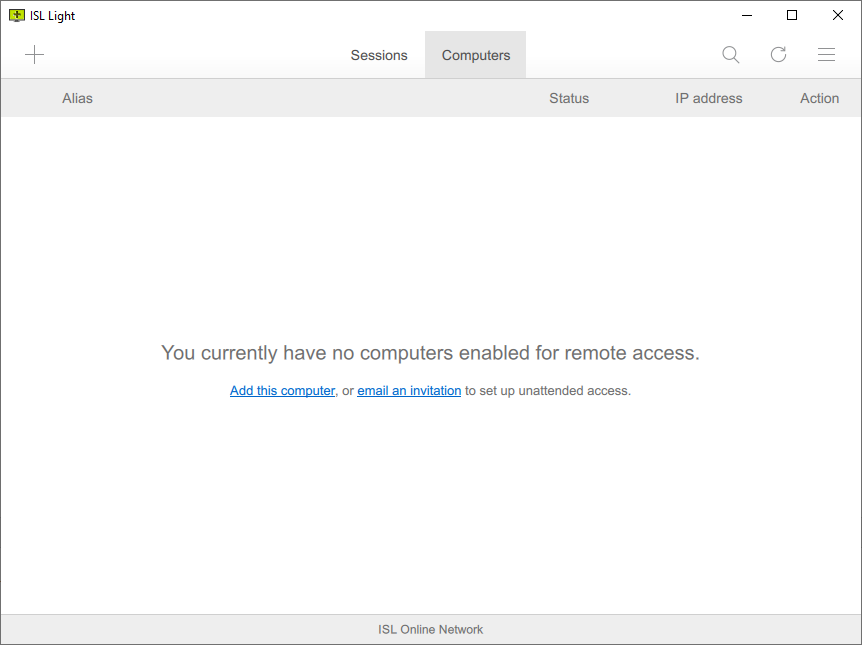
View with No Computers

If there are no computers added, the Computers tab will appear empty. Click "Add this computer" or "email an invitation" to set up unattended access.
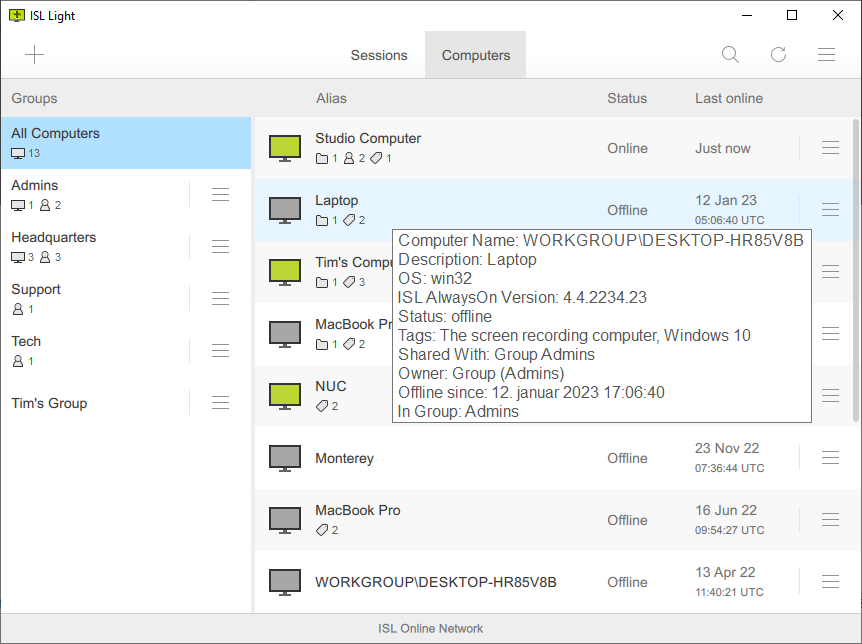
View with Computers

In the computers tab, you can connect to and manage computers that were added to your account trough ISL AlwaysOn installation.
Once you've set up unattended access, your computers and computer groups will be listed in the Computers tab.
The table header contains the following columns:
- Alias - This column displays the "Original computer name" or "Alias" if set.
-
Status- This column displays the status as "Offline," "Online," "Active," or "Connected."
- Offline - The computer is not available to connect. ISL AlwaysOn is either disabled, not running, or the internet connection is unavailable on the remote computer.
- Online - The computer is available for connection.
- Active - A remote desktop session is currently running by you.
- Connected - A remote desktop session is currently running by another user.
- Last online - This column displays the last time the computer was online, and the connection with ISL AlwaysOn was last detected.
- IP Address - This column displays the IP Address of the remote computer.
- Actions - This column provides a menu of actions for each particular remote computer.
Note: Hover your mouse over a computer row to display a tooltip with additional information regarding the computer, such as the operating system (platform), ISL AlwaysOn version, computer tags, computer group, computer owner, etc.
Note: Right-click on the table header to hide or show specific columns according to your preferences.
Menu

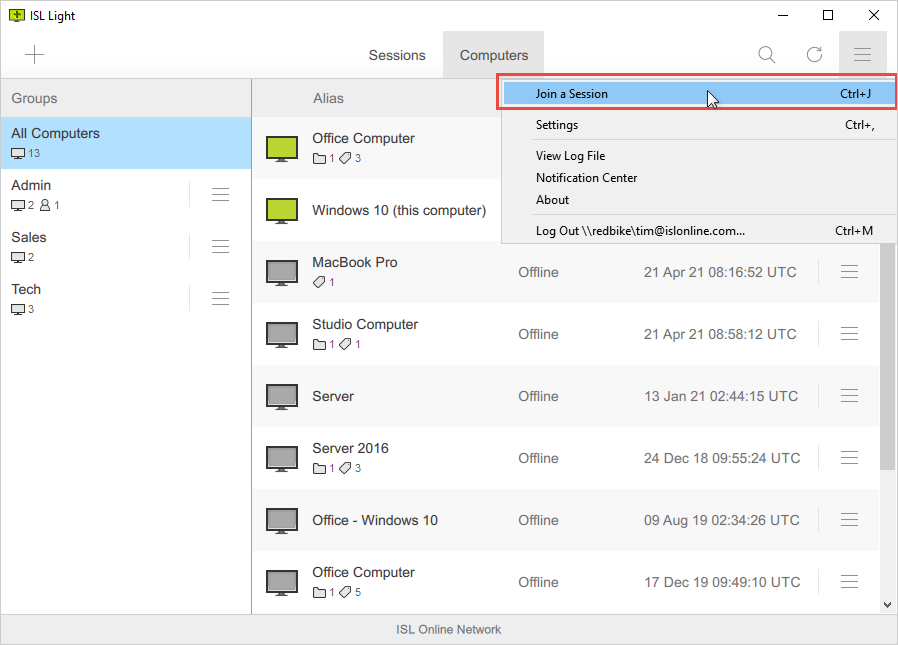
Under the menu, you have additional options related to the ISL Light application:
- Join a session - Click to enter a session code provided by the operator and join a session as a client.
- Settings - Click to access the settings for ISL Light. More information can be found in the Settings chapter.
- View Log File - Click to access the log file, providing additional information about previous connections. If any problems should arise, you may be asked to forward the log file to an ISL Online support agent.
- Notification Center - Click to view all notifications related to your account.
- About - Click to access the About window, where the current version of ISL Light will be displayed, and the program will automatically check for available updates.
- Log Out - Click to log out and end all sessions.
Actions

The following Actions are available for each remote computer:
- Connect - Enter the access password and connect to the remote computer using ISL Light
- Connect via... - Establish a tunneled connection to the remote computer using ISL Light
- Upgrade ISL AlwaysOn - Upgrade ISL AlwaysOn running on the remote computer
- Send WOL - Only available if the computer is offline - Send Wake On LAN command and try to wake the computer so it becomes available
- Edit - Edit the computer alias and add tags to it
- Share - Share the computer with users and user groups, allowing them to connect to the remote computer
- Change Password - Change the access password of the remote computer
- Change Owner - Change the owner of the remote computer
- Restart / Shutdown - Restart or shut down the remote computer
- Move to Group - Move computer to a computer group (Left column "Groups" in ISL Light)
- Create Shortcut - Clicking this option will create a preconfigured ISL Light shortcut on your desktop. When you click the shortcut, ISL Light will automatically connect to the specified remote computer.
- Computer History - Open the "Computer History" dialog, where you can view past connections made to the remote computer.
- Options - Configure connection options for remote computers that take effect once the connection is established (e.g., stream quality, remote sound...)
- Delete - Delete the remote computer from your Computer list
