In this manual, you will find information about the following elements in the top bar:
Video Tutorial
"+" Button

The "+" button opens a menu with the following options:
- New Session - Initiate a new remote session by generating a unique session code to connect with a client.
- Add this Computer / Find This Computer - Configure unattended access on the local computer or locate this computer in the list of devices.
- Set Unattended Access - Configure unattended access on a remote computer via email, link, or session code.
- Create Group - Create a new "Computer Group" and move computers to the group for better organization.
Sessions Tab
View with no created sessions

If there are no ongoing sessions, the Sessions tab will appear empty. Click "Start New Session" to create a new session.
View with created sessions
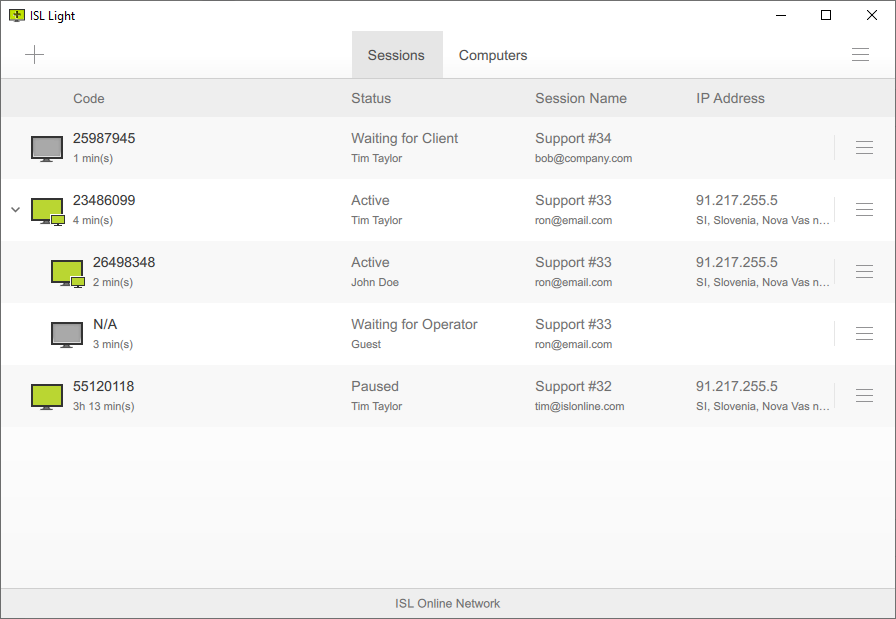
In the "Sessions" dashboard, you can view and manage all of the created sessions. The following columns are available:
- Code - The "Code" column displays a unique "Session code" generated for each session. This session code serves as a one-time access key used to connect with the customer's remote computer.
-
Status
- Waiting for Client - Indicates that the session has been started, but the client has not yet initiated the session on the remote computer.
- Active - Indicates an ongoing remote desktop session.
- Paused - Indicates a paused remote desktop session.
- Waiting for Operator - Indicates that you have invited an operator to join the session.
- Session Name - The column displays the "Session name" and "Client's email," which can be set via the "Edit" option in the menu.
- IP Address - The column displays the IP Address and location of the remote computer.
Computers Tab
Please refer to the Overview (Computers) manual for more information about computers tab.
Menu

Under the menu, you have additional options related to the ISL Light application:
- Join via Code - Click to enter a session code provided by operator and join a session as a client.
- Settings - Click to access the settings for ISL Light. More information can be found in Settings chapter.
- View Log File - Click to access the log file, providing additional information about previous connections, if any problems should arise, you may be asked to forward the log file to an ISL Online support agent.
- Notification Center - Click to view all notifications related to your account.
- About - Click to access the About window, where the current version of ISL Light will be displayed, and the program will automatically check for available updates.
- Log Out - Click to log out and end all sessions.