RDP connection can be made to Windows machine from computers running other operating systems by using the native RDP client software.
Big Sur 11 macOS and Monterey 12 macOS
In this example we will be using Parallels Client for macOS that can be downloaded from Mac App Store: Parallels Client, however there are other clients you can configure and use.
Note: Due to changes introduced in macOS 11 and macOS 12 the functionality described in this article is currently not supported on M1 Processor with Big Sur and Monterey.
Step 1

Download and install Parallels Client from Mac App Store. Installing this client will register it for opening the rdp links.
Note: Link above points to Apple's App Store - US version, depending on which Apple's App Store you are using you might need to search for "RDP" in the search bar instead of following the link.
Step 2

Log into ISL Light and open the "Settings".
Step 3

In the Port Forward section change the Default rdp schema to the following:
/usr/bin/open -W -n "tuxclient:///?Command=LaunchApp&ConnType=4&Server=localhost&Port={PORT}&Connect=YES&Save=NO"and hit "Enter".
Step 4
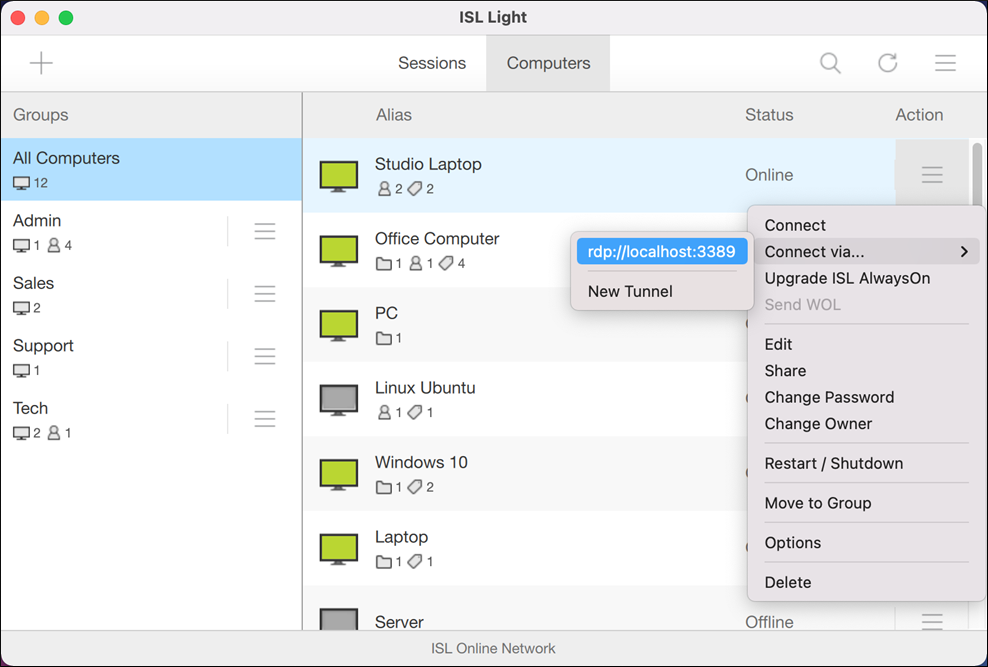
Click on the "Action" button next to the computer you want to connect to and select the "Connect via..." option then "rdp://localhost:3389".
Step 5
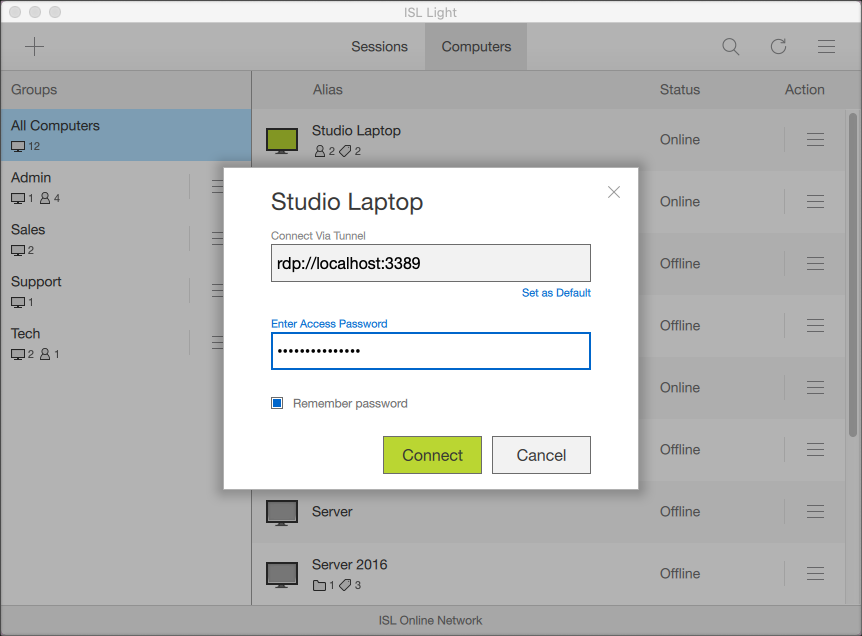
Enter the access password for the remote computer then click "Connect".
Note: Access password you enter here is the ISL AlwaysOn access password and not yet the user account password used for creating an RDP session.
Step 6

Enter the user account information for the remote computer and click "Done".
Step 7

You can now control the remote Windows computer using RDP session from your macOS Big Sur 11 device.
Other MacOS Computers
In this example we will be using the official Windows App for macOS that can be downloaded from Mac App Store: Windows App (Previously Microsoft Remote Desktop), however there are other clients you can configure and use.
Step 1

Download and install Windows App (Previously Microsoft Remote Desktop) from Apple's App Store. Installing this client will register it for opening the rdp links.
Note: Link above points to Apple's App Store - US version, depending on which Apple's App Store you are using you might need to search for "RDP" in the search bar instead of following the link.
Step 2

Log into ISL Light and open the "Settings".
Step 3

In the Port Forward section change the Default rdp schema to the following:
/usr/bin/open -W -n "rdp://full%20address%3Ds%3Alocalhost%3A{PORT}"and hit "Enter".
Step 4
Click on the "Action" button next to the computer you want to connect to and select the "Connect via..." option then "rdp://localhost:3389".
Step 5

Enter the access password for the remote computer then click "Connect".
Note: Access password you enter here is the ISL AlwaysOn access password and not yet the user account password used for creating an RDP session.
Step 6

Enter the user account information for the remote computer and click "Done".
Step 7

You can now control the remote Windows computer using RDP session from your macOS device.
Related Articles: