Video Tutorial
To connect to macOS systems using unattended access, it's essential to enable macOS permissions (TCC - Transparency, Consent, and Control) for ISL AlwaysOn.
TCC (Transparency, Consent, and Control) is a mechanism in macOS to limit and control application access to certain features, usually from a privacy perspective. This can include location services, contacts, photos, microphones, cameras, accessibility, full disk access, and more.
Important: It's important to understand that macOS permissions are only granted upon request by the application, not in advance. Therefore, it's recommended to connect to the remote computer after installing ISL AlwaysOn on a new macOS computer. This ensures that a remote user can promptly confirm permission requests.
Note: To create a privacy policy exception and automatically have the macOS permissions enabled, you can deploy ISL AlwaysOn through the MDM system. MDM solutions are primarily meant to be used by system administrators responsible for setting up and configuring many machines. With Apple's MDM solutions you can, among other things pre-approve certain applications to access system resources without the user having to approve a checkbox on the application requests.
Begin the installation process by obtaining the ISL AlwaysOn executable on the macOS computer you wish to access remotely. Select one of the methods and follow the step-by-step instructions inside each link:
Note: All below methods, except the direct download (via Downloads), require the user to be logged in to their ISL account. The user is added to the ISL AlwaysOn remote users as part of the installation. At the same time, the remote PC appears on the user's list of ISL computers. If a computer group is defined in the Custom Deployment Link, the computer will be added to that group, replacing the user who set up the Custom Deployment Link as the owner of this PC.
via ISL Light:
- Add this Computer
- Set Unattended Access via Email
- Set Unattended Access via Link
- Set Unattended Access via Code
- Set Unattended Access in Session
via Web Portal:
via Downloads:
- Downloads
Important: When using the direct download link the ISL AlwaysOn will be installed without granting access to a user. Remote users can be added via ISL AlwaysOn settings or following the installation methods above.
Note: Regardless of the download method used the appropriate OS version of the executable is automatically detected by the browser. For example, if you want to download the macOS version on a Windows PC (for later distribution), you can use the alternative download method on the following page https://www.islonline.net/start
After obtaining the executable, run it and follow the steps below:
Step 1
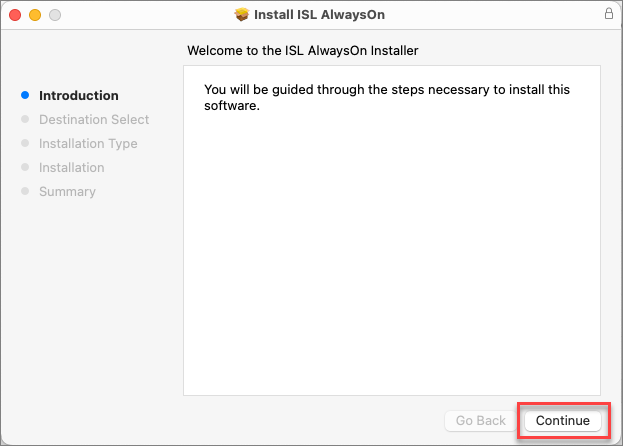
Click the "Continue" button.
Step 2
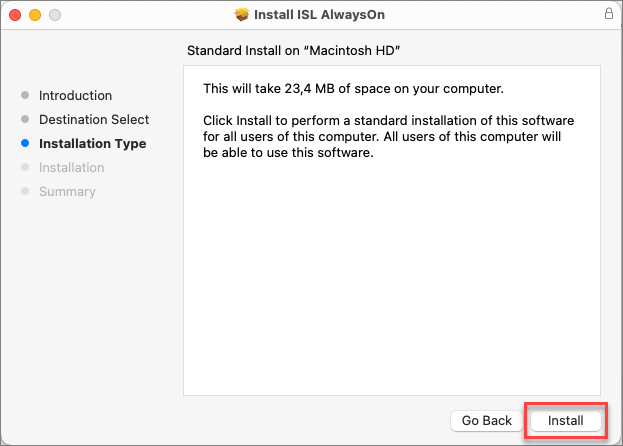
Click the "Install" button.
Step 3
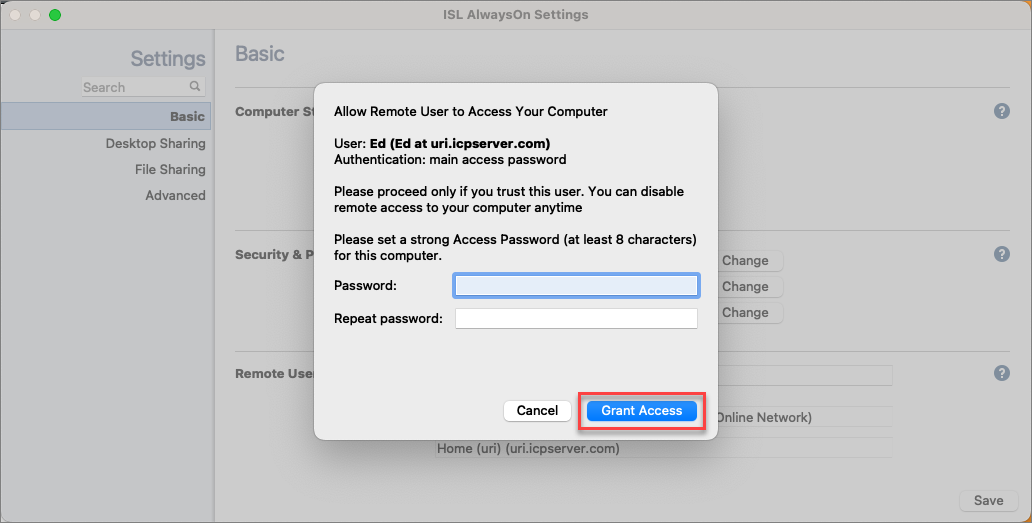
Set up an Access Password and click the "Grant Access" button.
Note: If this is the first time the ISL AlwaysOn is being installed on this computer then you will be asked to come up with the Access Password for the computer as well. Access password must be entered whenever you want to connect to the unattended computer.
Step 4
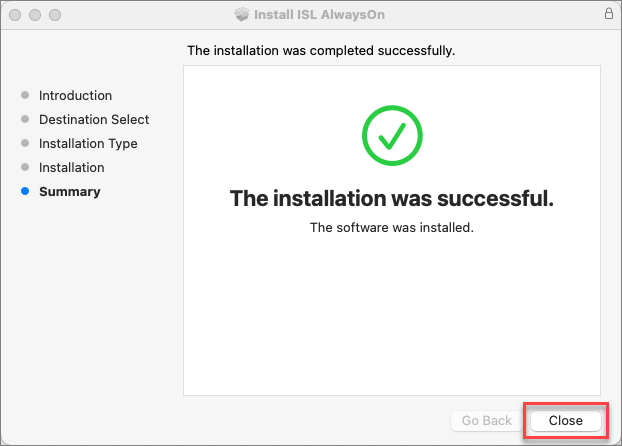
Click the "Close" button.
Step 5
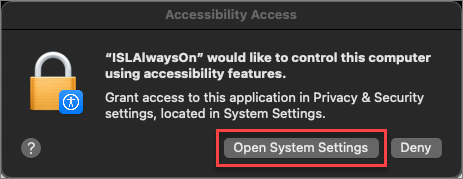
To remotely access the macOS computer(s) you need to enable TCC (Transparency, Consent, and Control) for the ISL AlwaysOn application on macOS. On the initial install, ISL Light AlwaysOn will be required to enable macOS permissions.
Click “Open System Settings”.
Alternatively, you can find a "Security & Privacy" section in ISL AlwaysOn settings:
- Accessibility (to enable remote control)
- Screen Recording (to enable screen view)
- Disk Access (to enable file transfer)
If the status for these settings is DISABLED, ISL AlwaysOn does not have consent to either remote control the computer, view the screen, or transfer files with a remote computer.
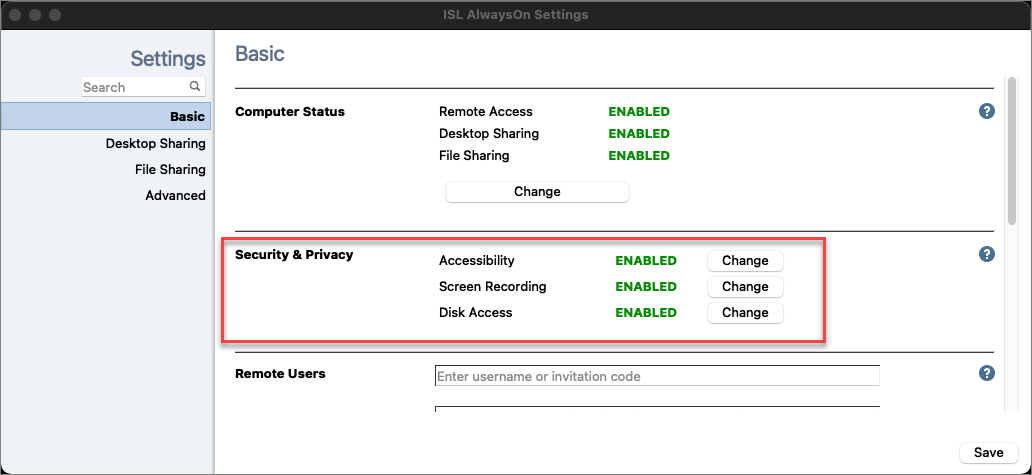
Open “ISL AlwaysOn” on the remote computer and click any “Change” button from the “Security & Privacy” section.
Step 6 (remote computer)
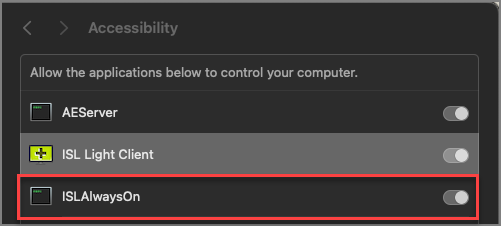
Open the “Security & Privacy > Accessibility” settings on your Mac and enable “ISL AlwaysOn” to allow the control of the mouse and keyboard.
Important: Permission in macOS, can only be approved when the permission itself is requested by the application and not in advance. In the case of ISL AlwaysOn, it is advisable to start a session as soon as you install ISL AlwaysOn on a new machine since a client will be there to confirm the permission requests. If this is not done you will be able to connect to a remote computer successfully, however, you will not be able to see its screen or control it until somebody on the remote side confirms the necessary permissions.
Once you grant permissions for ISL AlwaysOn you won't have to grant them again in subsequent sessions.
Step 7 (remote computer)
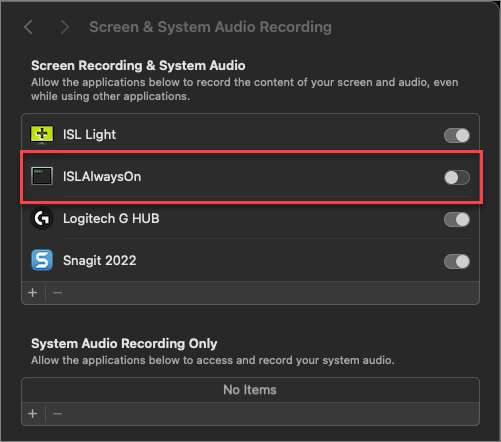
Open the “Security & Privacy > Screen & System Audio Recording” settings on your Mac and enable “ISL AlwaysOn” to allow the operator to view your screen.
Step 8 (ISL Light)

Once permissions on the macOS are granted, the Operator will have access and control of the remote computer. Open ISL Light "Computers list" in the dashboard. The remote computer is available for connection in ISL Light.
Note: Consider renaming the new computer so it is easier to find it next time e.g. Ed's MacMini.