To connect to unattended computer(s) you need to install a remote agent (ISL AlwaysOn) via the methods you prefer.
via ISL Light
- Add this Computer
- Set Unattended Access via Email
- Set Unattended Access via Link
- Set Unattended Access via Code
- Set Unattended Access in Session
via My Account
via Direct download link
Important: When using the direct download link unattended access needs to be set manually via methods described above or in ISL AlwaysOn > Add Remote User.
Add Remote Computer
Step 1
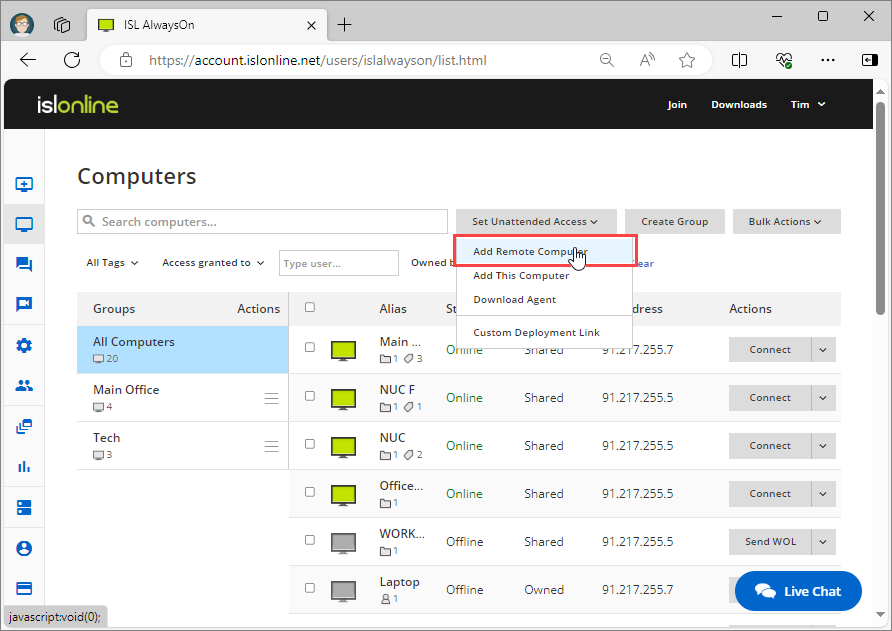
Click on the "Add Remote Computer" button.
Step 2
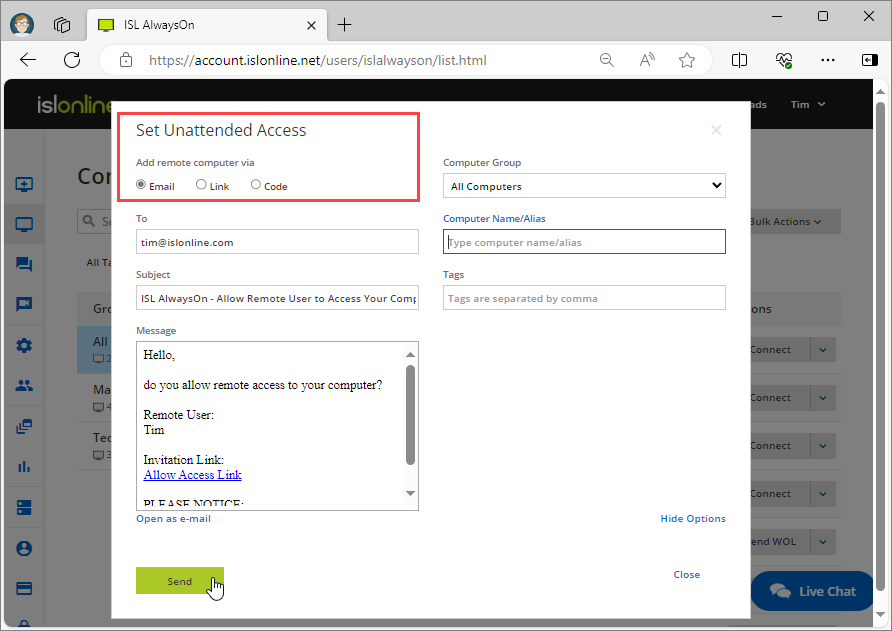
The following dialog shows multiple options to add a remote computer to your list.
- Email: Type in the recipient's email address and click "Send".
- Grant Access Link: Run this link on the computer where you would like to enable unattended access.
- Grant Access Code: Ask your client to type in the code at www.islonline.net/join to enable unattended access to their computer.
Step 3 (Remote User)
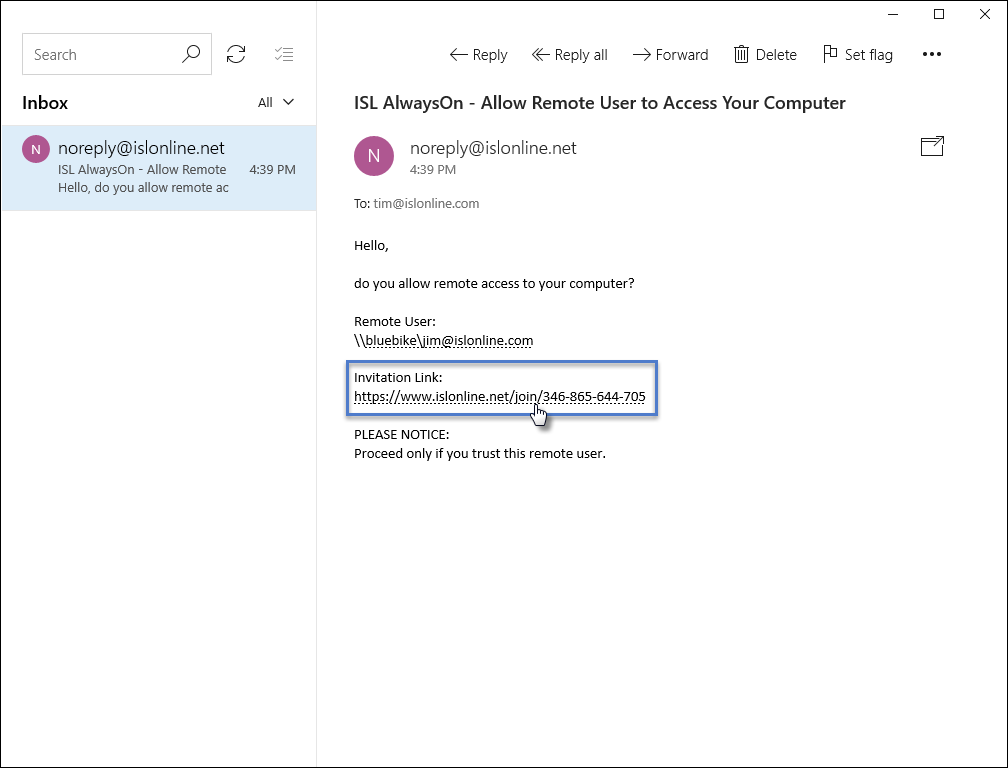
Click "Invitation Link" from your email inbox.
Important: The invitation link should be clicked on the remote computer you are adding to your ISL AlwaysOn access list.
Step 4 (Remote User)
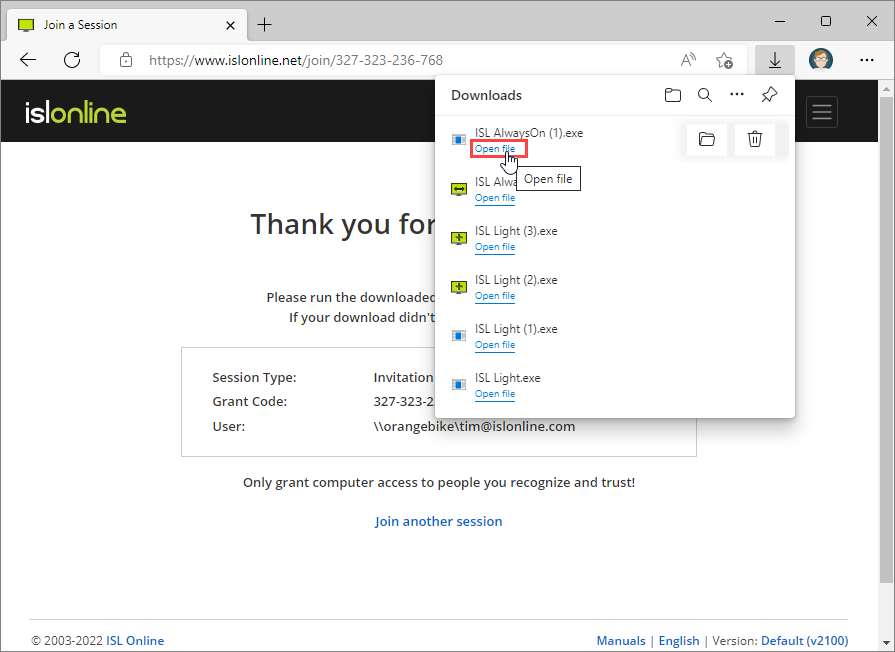
Click the "Run" button in the security warning window to open ISL AlwaysOn.
Step 5 (Remote User)

Click the "Next" button.
Step 6 (Remote User)

Click the "Finish" button.
Step 7 (Remote User)

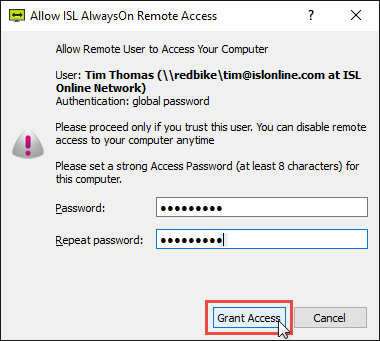
Set up an Access Password and click the "Grant Access" button. The computer is now accessible via ISL AlwaysOn.
Add This Computer
Step 1
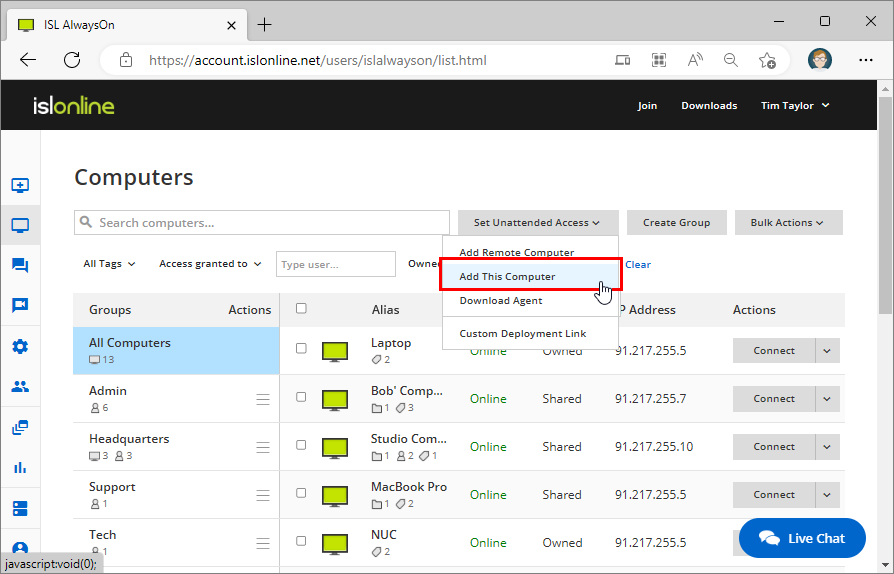
Click "Add this Computer" from the Set Unattended Access dropdown menu.
Step 2
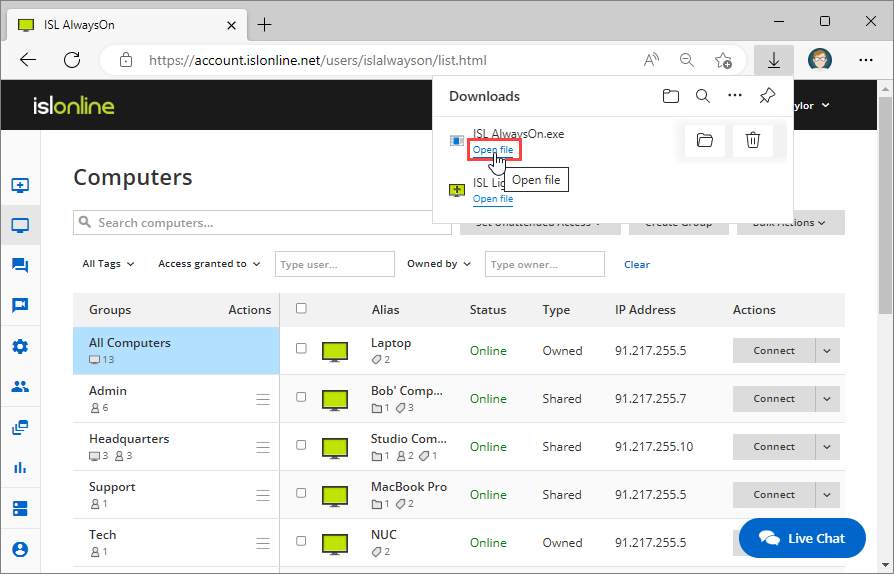
Click the downloaded file to start the installation process.
On macOS click on the .dmg file to mount it and click the "ISL AlwaysOn" icon to begin the installation.
Important: To install ISL AlwaysOn, administrative privileges are required!
Important: In an environment where a Web Proxy is used, ISL Light and ISL AlwaysOn use Internet Explorer connection settings. Since ISL AlwaysOn and ISL Light (with restart and resume enabled) run under the system account, they use Internet Explorer settings for the system account. It might happen that Internet Explorer settings have not been set for the system account.
Step 3
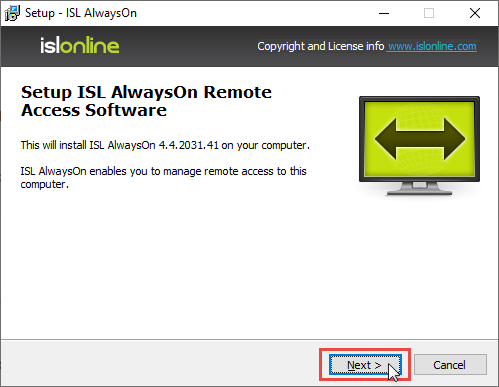
Click the "Next" button.
Step 4
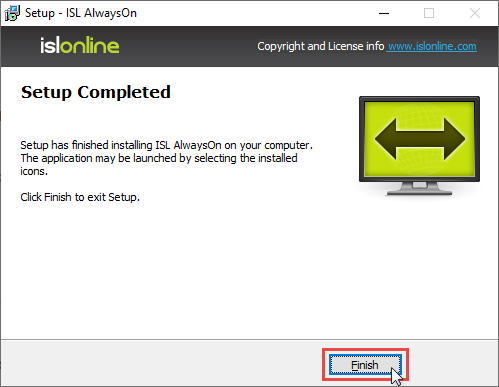
Click the "Finish" button.
Step 5
Set up an Access Password and click the "Grant Access" button. The computer is now accessible via ISL AlwaysOn.
The ISL AlwaysOn icon appears in the tray after the installation of ISL AlwaysOn.
![]()
Note: As an important part of security, you need to set a strong access password. You will need to provide the access password each time you try to access the remote computer. The access password can be changed in the Computer Access Configurations, however, all users that have access to the remote computer must be notified of the change, otherwise, they will not be able to access the computer anymore after the change.
Note: If you have already installed ISL AlwaysOn on the current machine and are just adding a new user - click on the Grant Access button.
Download Agent
Step 1

Click "Download Agent". Install "ISLAlwaysOn.exe" on the computers where you would like to have remote access.
On macOS click on the .dmg file to mount it and click the "ISL AlwaysOn" icon to begin the installation.
Important: To install ISL AlwaysOn, administrative privileges are required!
Important: In an environment where a Web Proxy is used, ISL Light and ISL AlwaysOn use Internet Explorer connection settings. Since ISL AlwaysOn and ISL Light with restart and resume enabled run under the system account, they use Internet Explorer settings for the system account. It might happen that Internet Explorer settings have not been set for the system account.