- Dashboard
- Edit Session
- System Info
- Start Recording
- Invite Operator
- Transfer Session
- Connect via RDP/SSH
- Settings
- Pause Session
- End Session

Dashboard
In dashboard you can create, delete and manage multiple sessions.
Step 1

Click the "Dashboard" button.
Step 2

Dashboard view opens. You can switch computers, start a new session or to connect to a current session.
Edit Session
You can edit the session details from the Session Menu in the toolbar.
Step 1

Click the "Edit Session" button.
Step 2

Edit the session details and click "Save".
System Info
Step 1

Click the "System Info" button to see quick system information about the computer you are supporting.
Step 2
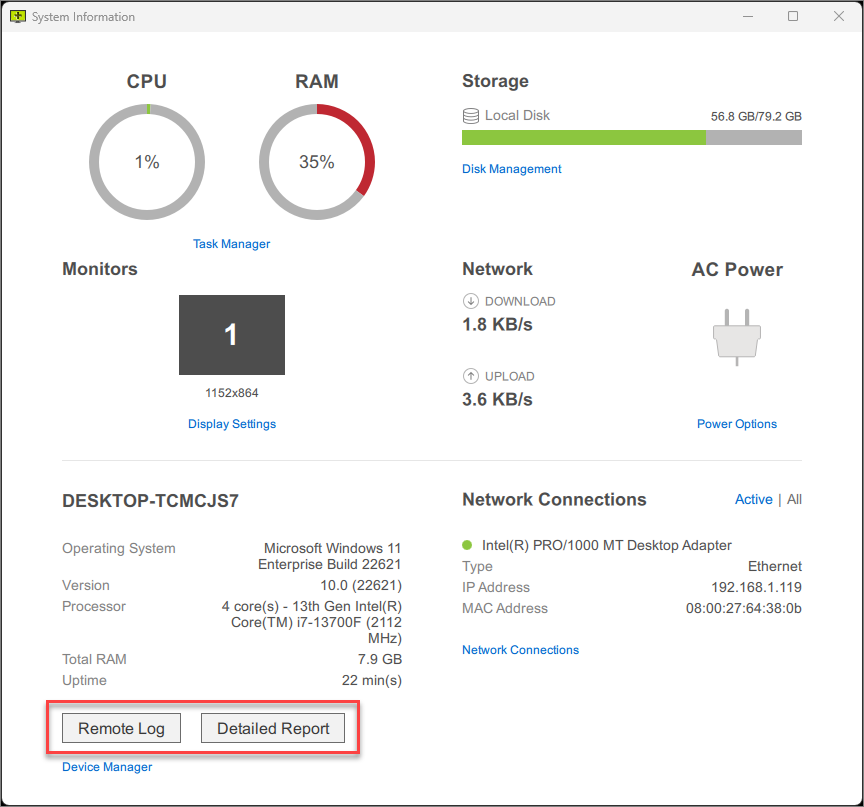
System Information window shows you the basic system information of the remote computer.
Click on the "Detailed Report" button to request more information or "Remote Log", which opens the ISL Light log of the remote computer (useful for troubleshooting).
Step 3
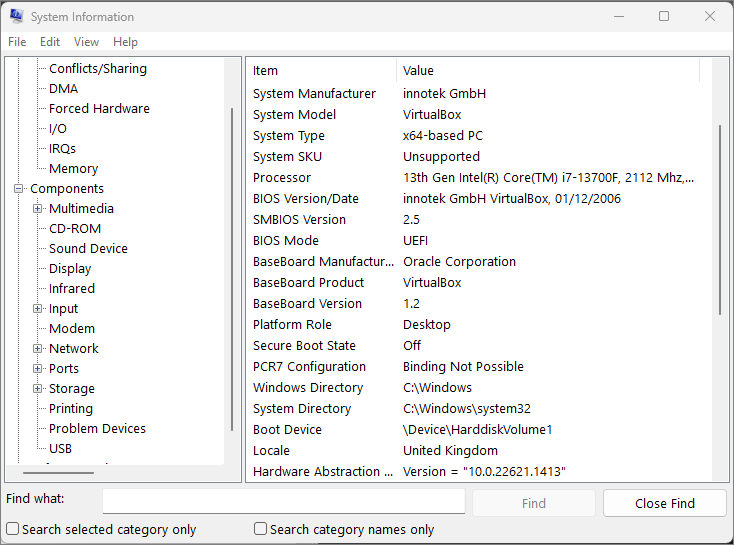
"Detailed Report" shows you the extensive hardware and software resources of the remote computer.
Note: After you click on the "Detailed Report" it can take a while for the report to be generated. Depending on the computer resources it could take up to several minutes.
Step 4
The system Information screen also includes a set of shortcut links that will open more specific settings of your operating system (Windows or macOS).
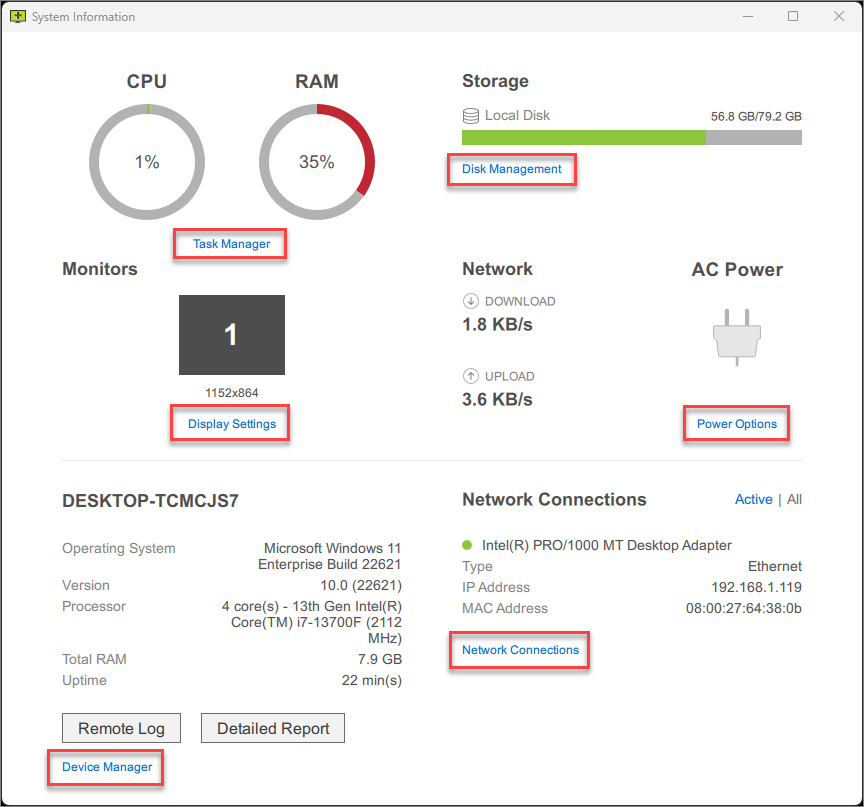
- Task Manager (Windows) / Activity Monitor (macOS)
- Disk Management (Windows) / Disk Utility (macOS)
- Display Settings (Windows) / Display (macOS)
- Power Options (Windows)
- Device Manager (Windows) / System information (macOS)
- Network Connections (Windows) / Network (macOS)
Even more system applications are available from the Quick Launch menu.
Note: The availability of the Quick Launch feature for remote support depends on the remote computer's operating system and software. When the remote computer is running ISL Light Client on Windows, the feature IS NOT currently supported. However, the feature is available when the remote computer is running ISL Light Client on macOS or Linux, or when using ISL Light with the Join window (Ctrl+J) or ISL AlwaysOn for remote access.
Start Recording
One way to enhance the security of your remote support sessions is by taking advantage of the session recording feature, which enables you to review the activity performed on a remote desktop and chat, for reference or auditing purposes. This is particularly important for organizations that handle sensitive data or need to comply with regulatory requirements.
Note: The recorded sessions are saved in a format called ISR, which supports high-quality recordings while keeping the file size small. You can then play back the recordings with ISL Player, which also offers editing and exporting options to AVI format. You can also enable or disable the session recording feature for all users or individual users, depending on your preferences and security policies.
For additional information about ISL Player, please refer to the ISL Player manual.
Note: You can also set up automatic session recording in ISL Light or ISL AlwaysOn settings. If you enable this feature in ISL Light settings, the recordings will be saved on the operator's computer. If you set it up in ISL AlwaysOn settings, the recordings will be saved on the remote computer.
Video Tutorial
User Manual
Step 1
Start the remote session via the session code or connect to the remote computer on your list.

Click the "Start Recording" in the toolbar to record the remote desktop.
Step 2

Click "Select folder" once you choose the location for the recording file (.isr) to be saved.
Step 3

Click the "Stop Recording" red button to stop recording the session. The recording will be stopped and saved to the selected location.
Invite Operator
If you need additional help supporting a customer, you can invite another supporter into the session. Unlike the Transfer Session option, you will not be disconnected once another operator joins, rather you will both be able to see and control the remote computer.
Note: The "Invite an Operator" feature is not available when connecting from ISL Light to ISL AlwaysOn (Unattended Access) unless the option "Download Client" is selected. This can be done in the ISL AlwaysOn Settings or Connect Options.
Note: The "Invite an Operator" option is only available for sessions you started.
Step 1

Click "Invite Operator > Send Invitation" from the Session Menu.
Step 2

Invite an Operator dialogue has the following options:
- "Disable mouse and keyboard control" to only allow an invited operator to view the remote screen.
- "Require consent to join from the operator" opens a window where the original operator can allow or deny joining the session.
- "Skip login authentication (guest operator)" enables the invitation of guest operators (without a user account) into their ISL Light sessions.
Type the email and click "Send" or share the "Session Invitation" link with an operator via other means.
Transfer Session
Step 1

Click "Transfer Session > Send Invitation" from the screen sharing drop-down.
Step 2
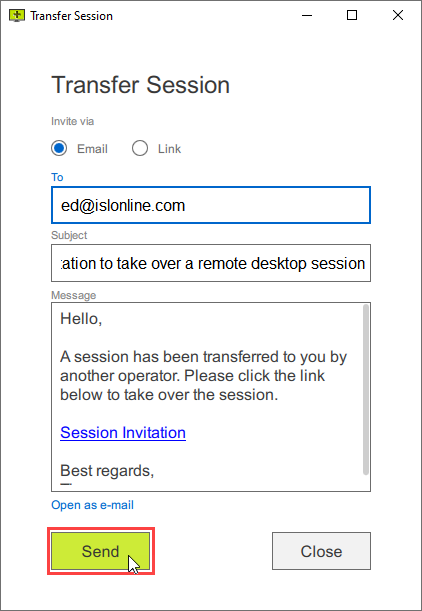
Type the email of the operator to whom you wish to transfer the session. You can also edit the body of the email. Click the "Send" button to send the invitation.
Step 3
![]()
A message will appear notifying you that the session has been transferred.
Connect via RDP/SSH
Connect via option allows you to use ISL Light port forwarding functionality to tunnel RDP, SSH and other connections to remote computers. The creation and usage of tunnels is described in depth in the following topics:

Click on "New Tunnel" to create a new tunnelled connection.
Settings
Step 1

Click on the "Settings" button.
Step 2

The Settings window is now open.
Pause Session
Video Tutorial
User Manual
Step 1

Click "Pause Session" button.
Step 2
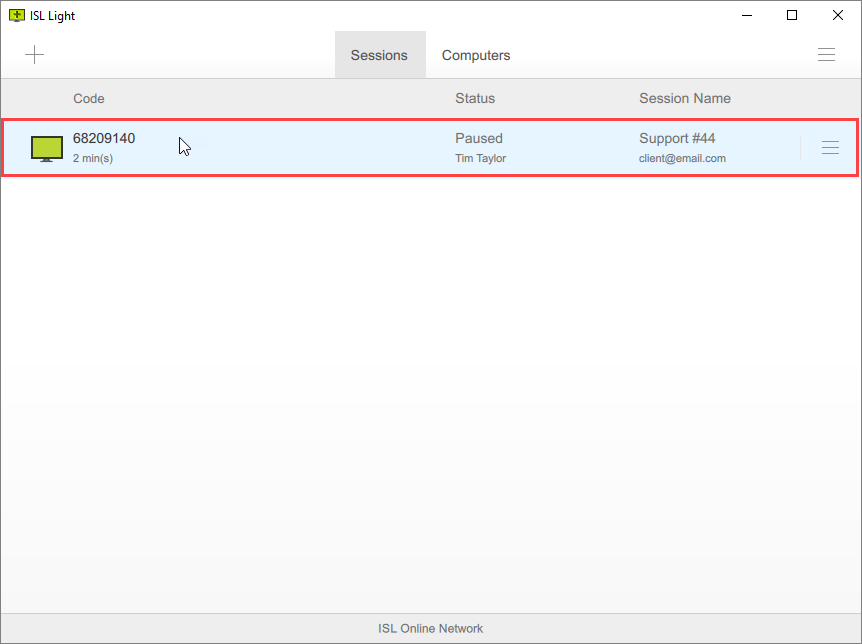
Click the paused session to resume a session.
Step 3
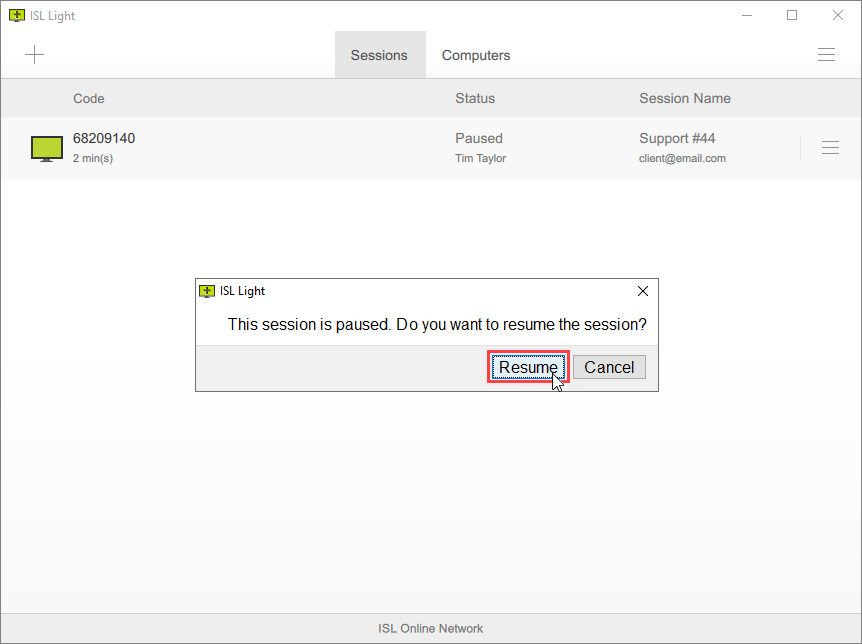
Click "Resume" to resume the session.
End Session
Step 1

Click "End Session" to end the session.
Step 2

Click "End" to confirm to end the session.