For easier deployment of ISL AlwaysOn to multiple computers, you can use one of the many different deployment tools available. In this guide, we will show you how to deploy ISL AlwaysOn on macOS computers via SimpleMDM.
Note: If you have customized ISL AlwaysOn that you wish to deploy, change the naming of files and paths accordingly to your customization.
ISL AlwaysOn can be deployed to macOS computers via a shell script (SimpleMDM Scripts).
Step 1
You will have to prepare an ISL AlwaysOn silent installer URL. Please check Custom Deployment Link manual on how to do that. Once you have the prepared URL, you will have to remove “+ignore_system_account” argument from the URL and add “&platform=mac” at the end of the URL. Here is an example on how the prepared ISL AlwaysOn silent installer URL should look like:
https://ICP_ADDRESS/download/ISLAlwaysOn?cmdline=%2FVERYSILENT+grant_silent+%22GRANT_BLOB%22+password+%22URL_ENCODED_PASSWORD%22&platform=mac
Note: You can use this example to prepare ISL AlwaysOn silent installer URL for your case. Please adjust ICP_ADDRESS, GRANT_BLOB and URL_ENCODED_PASSWORD to your use case.
Step 2
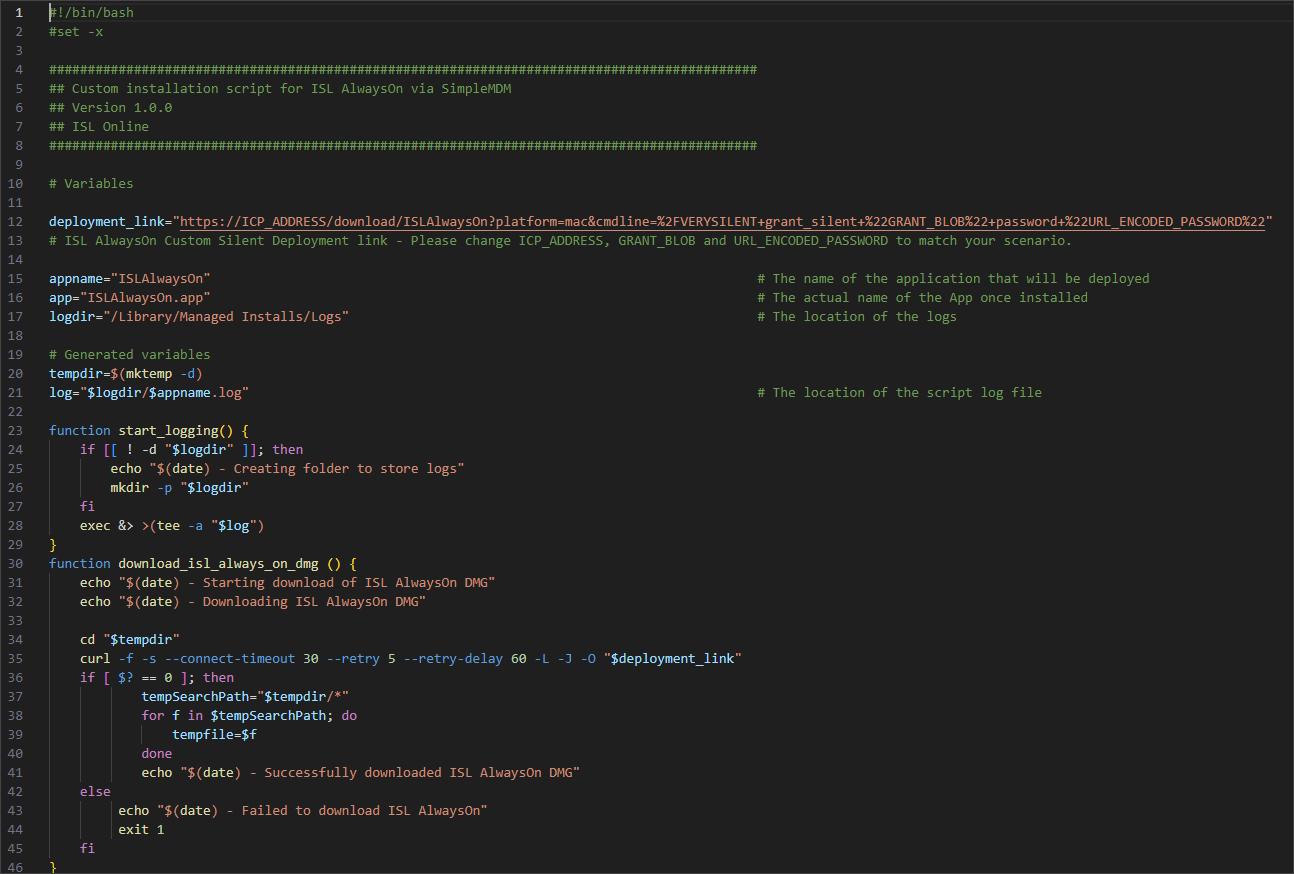
Download the shell script from here. Edit the downloaded script, replace the value of variable deployment_link with the URL that you have created in the previous step and save the adjusted script.
Note: If you are using a selfsigned certificate on your ISL Conference Proxy, you should add -k flag to curl command to allow “insecure” connections.
"curl -f -s -k --connect-timeout 30 --retry 5 --retry-delay 60 -L -J -O "$deployment_link""
Step 3
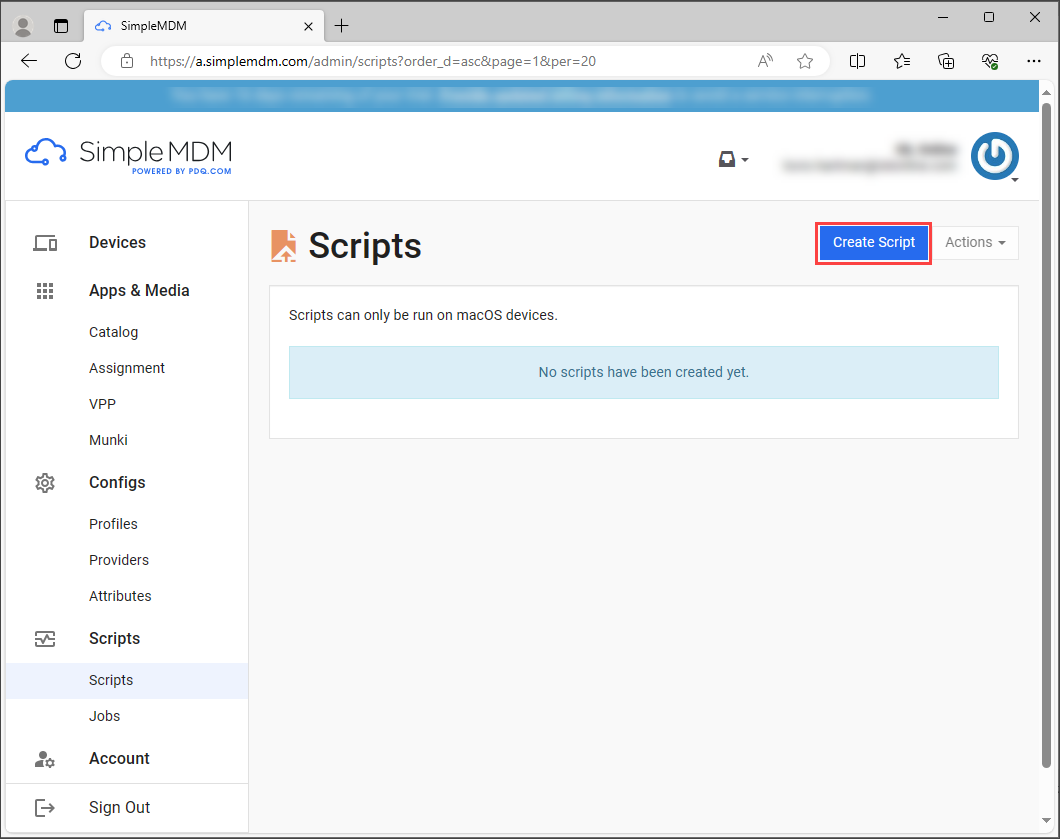
Navigate to SimpleMDM, select Scripts in the left menu and click on Create Script button.
Step 4
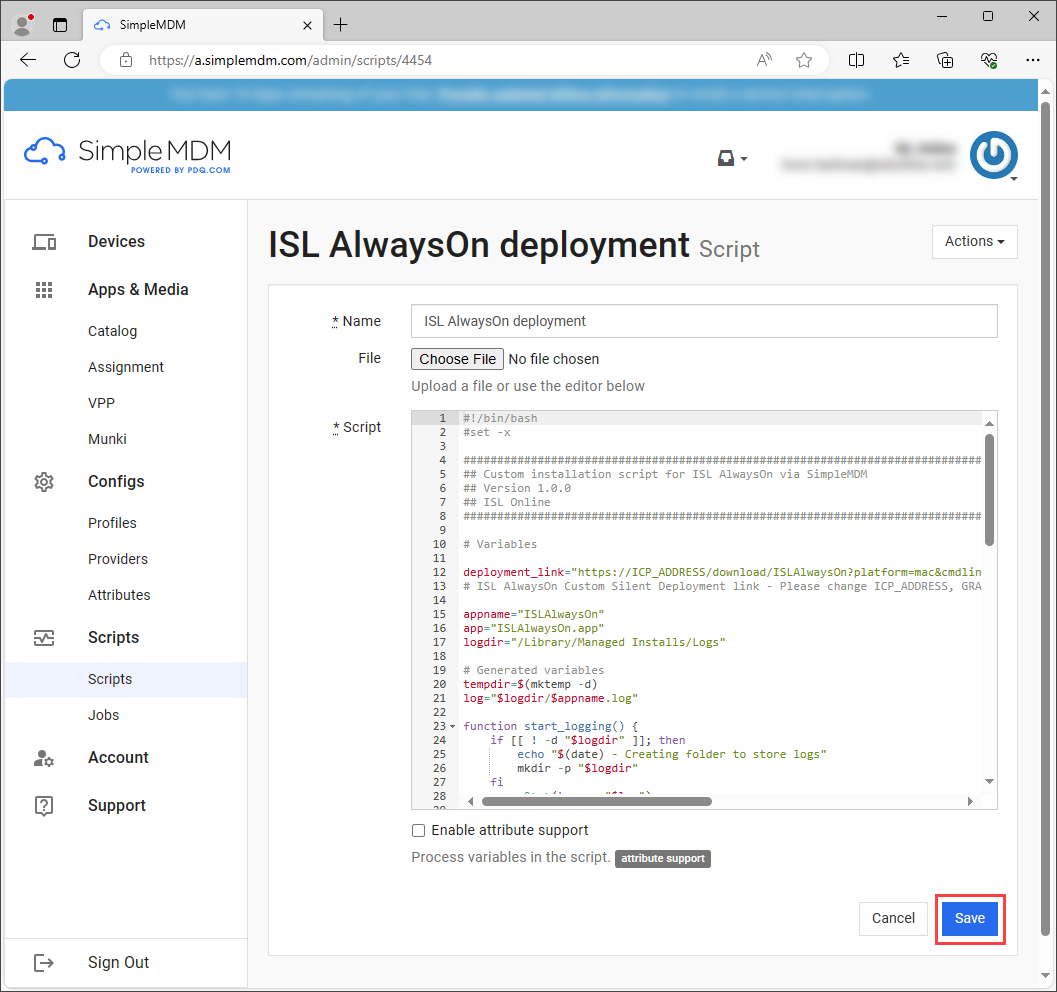
On the following page set the Name of the script, click on Choose File and upload the script file from Step 2. Click on Save button at the end to confirm changes. Once you have created the script, you will be able to use it to create a job to run it on your devices.
Step 5
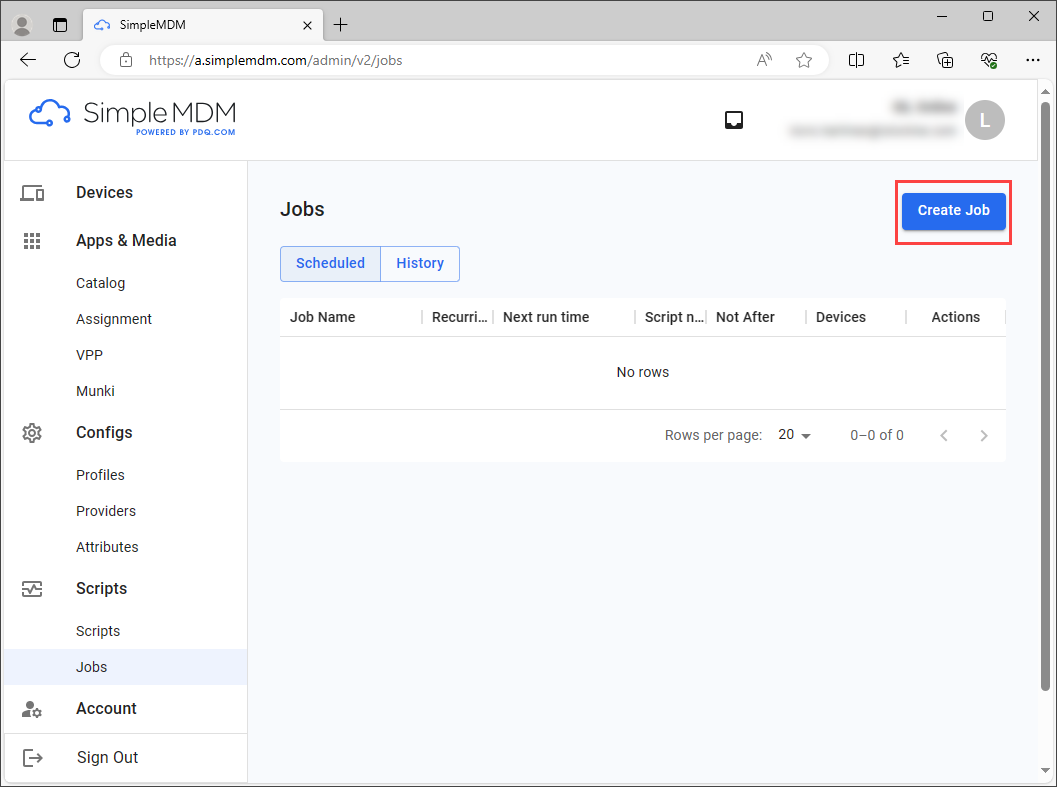
Select Jobs in the left menu and click on Create Job button.
Step 6
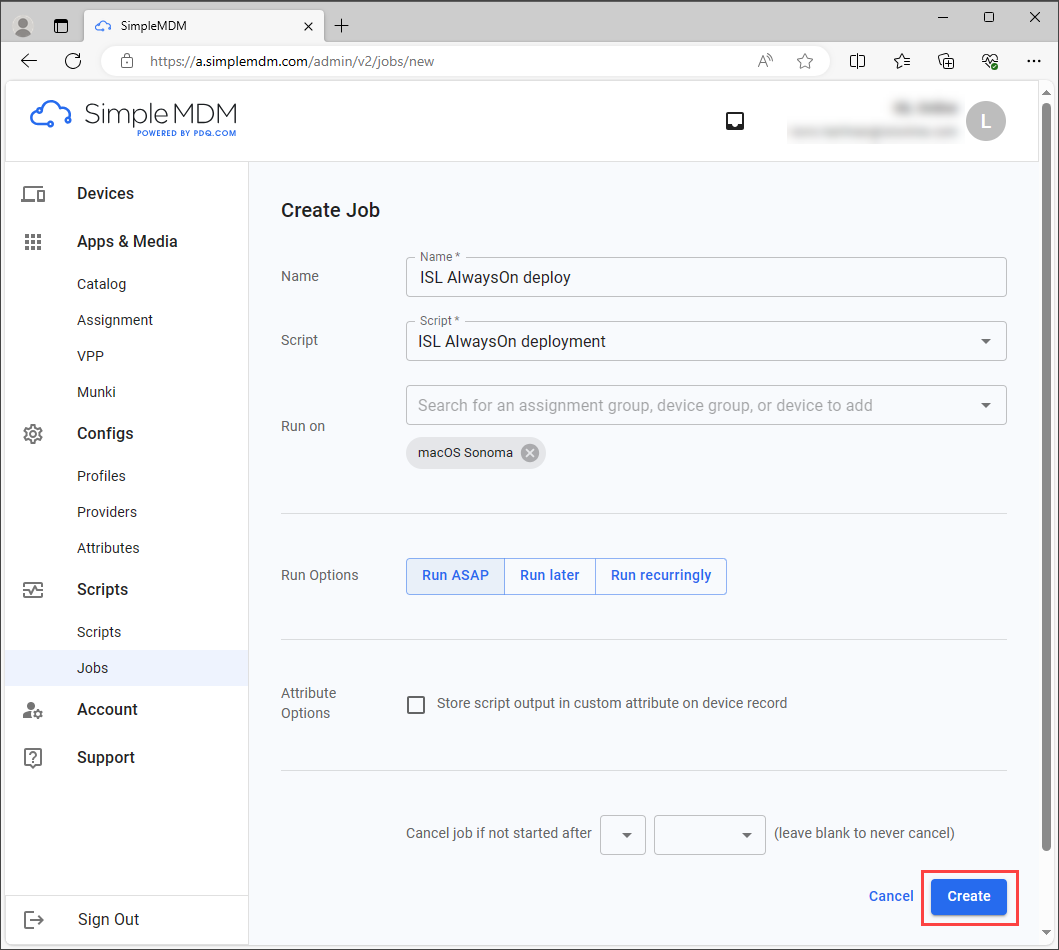
On the following page set the Name of the job, select Script you have created in Step 4 and set other options according to your needs (Run on, Run Options). Avoid using Run recurringly option to avoid issues with duplicate computer connections. Click on Create button at the end to confirm changes. Once the job is executed, you can review the job in the History tab.
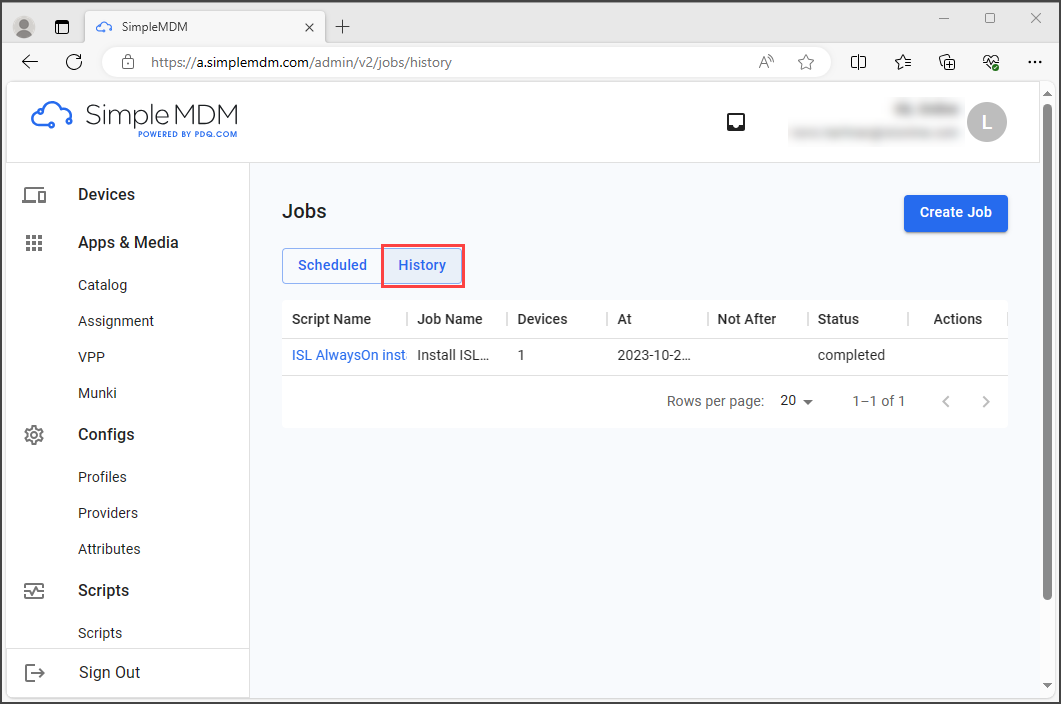
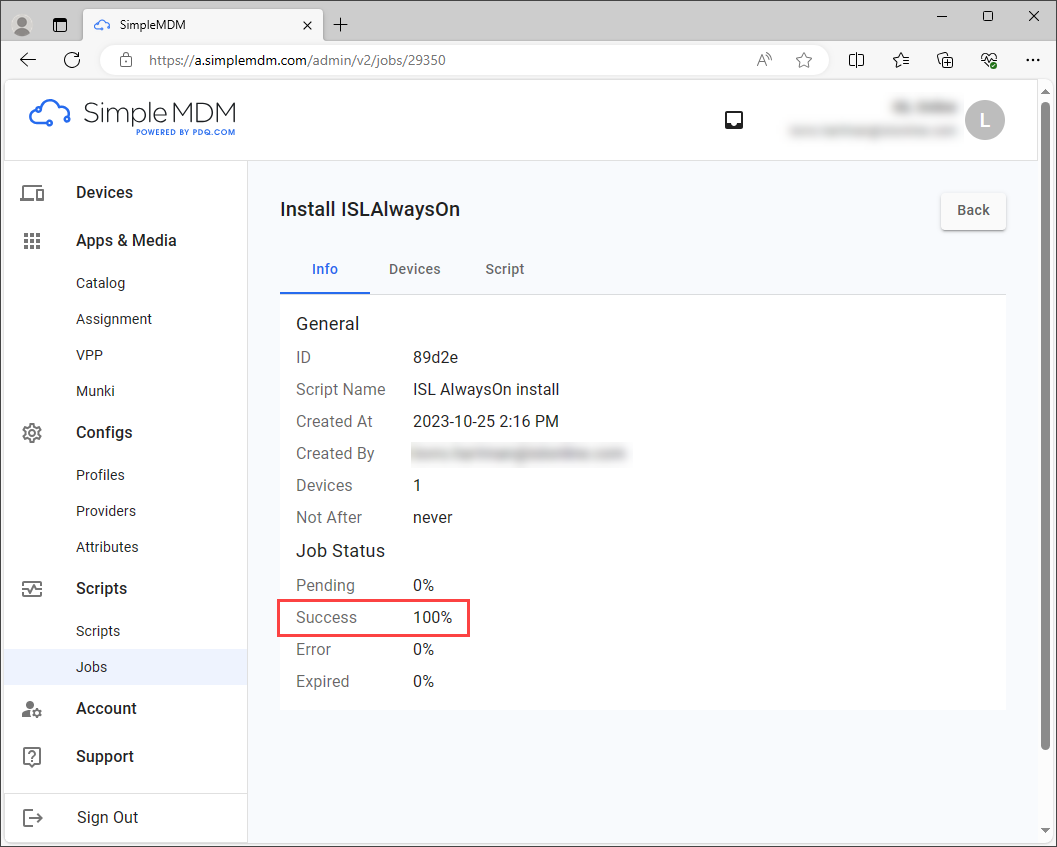
If the job was completed successfully, you have successfully deployed ISL AlwaysOn on macOS via SimpleMDM.