Some important factors to take note of before you set up Wake On LAN:
- Wake on LAN works on Windows, Mac or Linux
- Wake on LAN only works with wired network connections.
- At least one machine on the subnet needs to be online in order for Wake On LAN to work.
- Wake on LAN works by sending a wake-up frame or packet to a client machine from a server machine that has remote network management software installed (to use Wake on LAN technology you need a Wake on LAN network adapter, Wake on LAN enabled motherboard). Once a connection is started the Wake on LAN network adapter installed in the client receives the wake-up frame and turns on.
To run Wake Up Computer (via ISL Light) or Wake Up Computer (via website), you will need to enable Wake on LAN in ISL AlwaysOn and for your system.
Video Tutorial
Enable Wake On LAN in ISL AlwaysOn:

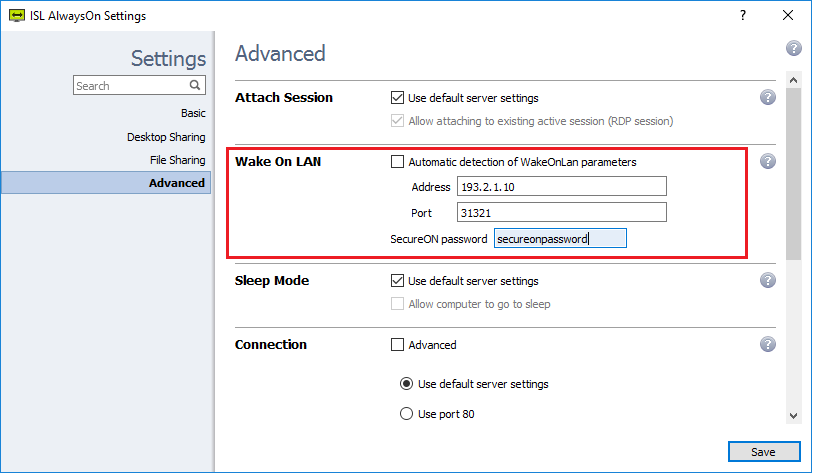
Open "Settings > Advanced" and check "Automatic detection of WakeOnLan parameters".
Note: If you wish to customize Wake on LAN to your own address and port numbers you need to untick the selection box. To make Wake On LAN secure, type in a password into the SecureON password box.
Enable Wake On LAN for your system:
Windows
Step 1

Enter BIOS setup on your machine and enable Wake on LAN from S5 option in BIOS.
Note: Accessing BIOS and the BIOS settings look differ from machine to machine, most commonly you will have to press one of the next keys: F2/F8/F10/DEL during system startup. Wake On LAN options are normally located inside Power tab in BIOS. If you have troubles locating the option please refer to the manual for your specific machine.
Step 2
Start up the computer normally to enable Wake on LAN feature from within Windows as well.
Step 3

Press "Windows Key" + "R" to bring up the Run pop-up. Enter "devmgmt.msc" and press "OK" to open Device Manager.
Note: There are many ways of accessing Device Manager, another option is to find in in Control Panel under "Control Panel" > "Hardware and Sound" > "Device Manager".
Step 4
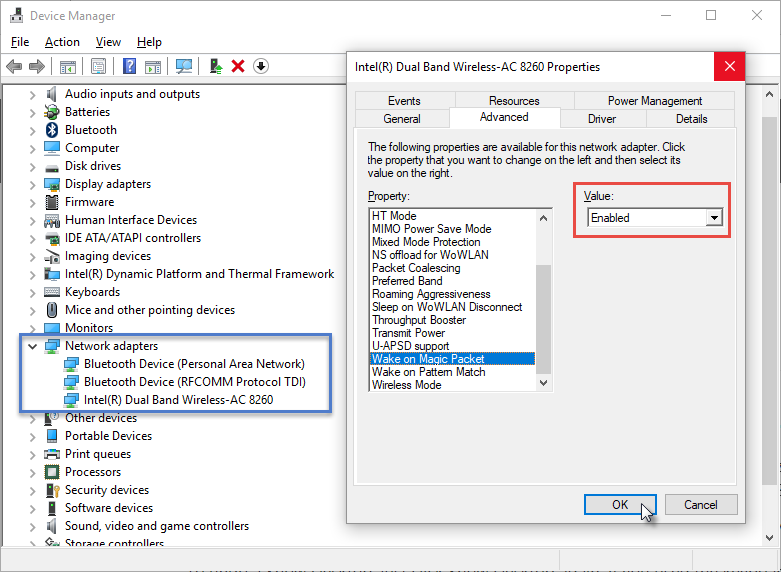
Click "Network adapter" and select network controller you are using. Open up the "Advanced" tab and set "Wake on Magic Packet" option to "Enabled" then click "OK".
Important: Depending on Windows version and your system this setting might not be present. If you can not see this option under "Advanced Settings" proceed directly to Step 5.
Important: To enable Wake on LAN capabilities on Windows 10, the "Fast Boot" option should be disabled. Fast boot options can be accessed under "Control Panel" > "Hardware and Sound" > "Power Options" > "System Settings"/ "Choose what the power buttons do".
Note: Wake on Magic Packet options differ depending on the Windows version of your system. On older version the setting is called "Wake Up Capabilities". In that case set the value to "Magic Packet".
Step 5

Now go back to the Network Adapter properties and this time click on the Power Management tab and enable and allow the Network adapter to wake computer up.
Note: If you skipped Step 4 then you just have to enable Wake On LAN option as seen above.
Your computer is now configured to be accessible with Wake On LAN.
OS X
Step 1
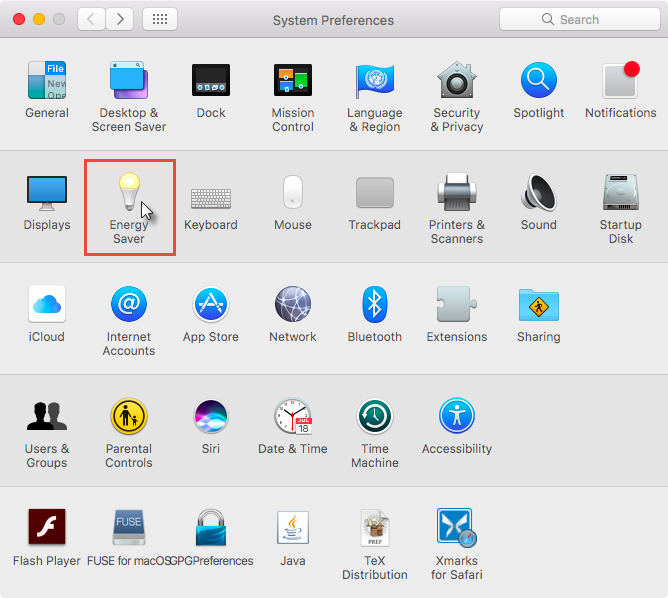
Open System Preferences and click "Energy Saver".
Step 2
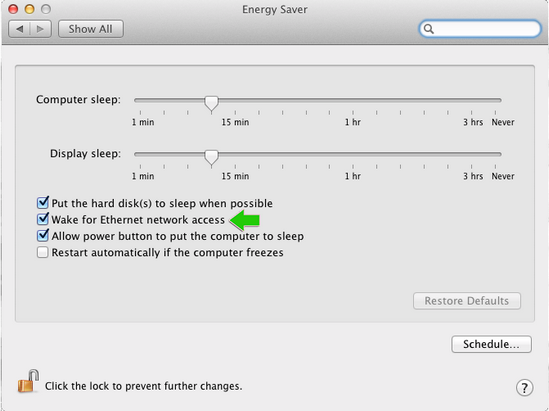
Make sure that the Wake for Ethernet network access is ticked.
Linux
To enable Wake on LAN functionality, select the one appropriate for your system:
- Ubuntu: https://help.ubuntu.com/community/WakeOnLan
- Debian: https://wiki.debian.org/WakeOnLan
- Arch: https://wiki.archlinux.org/title/Wake-on-LAN
Using Custom Address and Port
By default ISL AlwaysOn will automatically find appropriate broadcast address that will result in Wake On LAN packet reaching target computer. In cases where target computer is behind firewall, there must be at least one ISL AlwaysOn computer online behind same firewall and on same network that will act as proxy and will forward Wake On LAN packet to target computer.
In cases where user has intimate knowledge of Wake on LAN technology ( https://en.wikipedia.org/wiki/Wake-on-LAN), custom address and port can be used. One of such case is when user prepares Firewall rule so a packet from Internet on specific port is forwarded to Intranet to another broadcast address inside of organization.
Step 1
Prepare appropriate packet translation rule on your Firewall so packet will be forwarded to appropriate broadcast address inside organization.
Step 2
Use prepared address from Firewall rule in ISL AlwaysOn settings.
Step 3
Pressing Send WOL on web page results in sending Wake on LAN package directly to specified address without using proxy ISL AlwaysOn computer or finding broadcast address.
Important: In order to connect to a computer you need to install the ISL AlwaysOn client. Click here for more information on how to install a new computer.
Important: If the security software installed on the client's computer blocks Wake On LAN then you can configure ISL AlwaysOn to use UDP Port 7 or 9. This will ultimately enable the client computer to be woken even when protected by Firewalls/NAT. So instead of using automatic detection of Wake On LAN parameters you can untick the checkbox and in the Port box, enter UDP Port 7 or 9.
Related Articles: