For easier deployment of ISL AlwaysOn application permissions to multiple computers, you can use one of the many different deployment tools available. In this guide, we will show you how to deploy ISL AlwaysOn application permissions on macOS computers via Microsoft Intune.
Step 1
We have prepared a .xml configuration file which is configured to enable ISL AlwaysOn application permissions
- MacOS 26 (Tahoe): ISLAlwaysOn_application_permissions_macOS26.xml
- MacOS 15 (Sequoia) or older: ISLAlwaysOn_application_permissions.xml
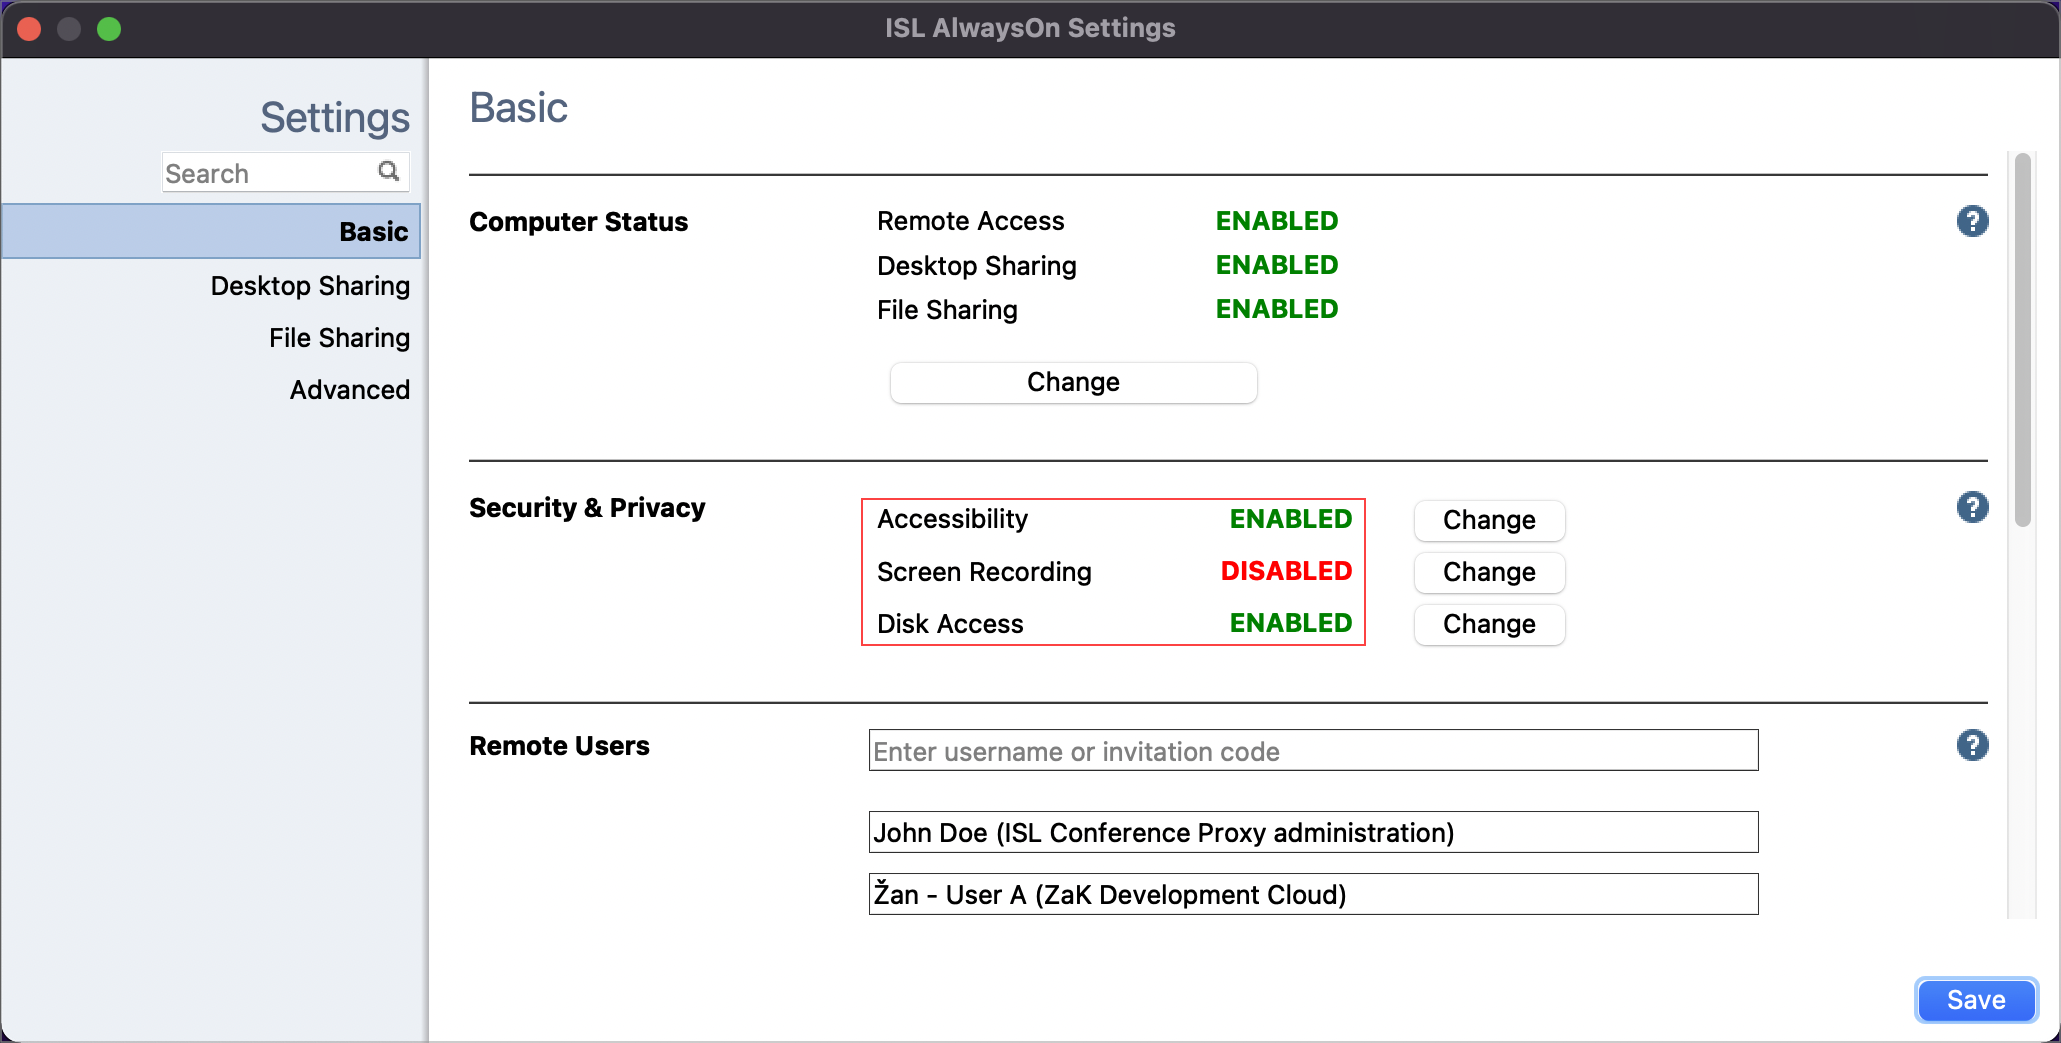
Note: When using MDM solutions, you can use Allow Authorization option for Accessibility and Full Disk Access TCC services. Screen recording TCC service can only be authorized to use Allow Standard User to Approve option, which means it still needs to be allowed manually by the user.
Step 2
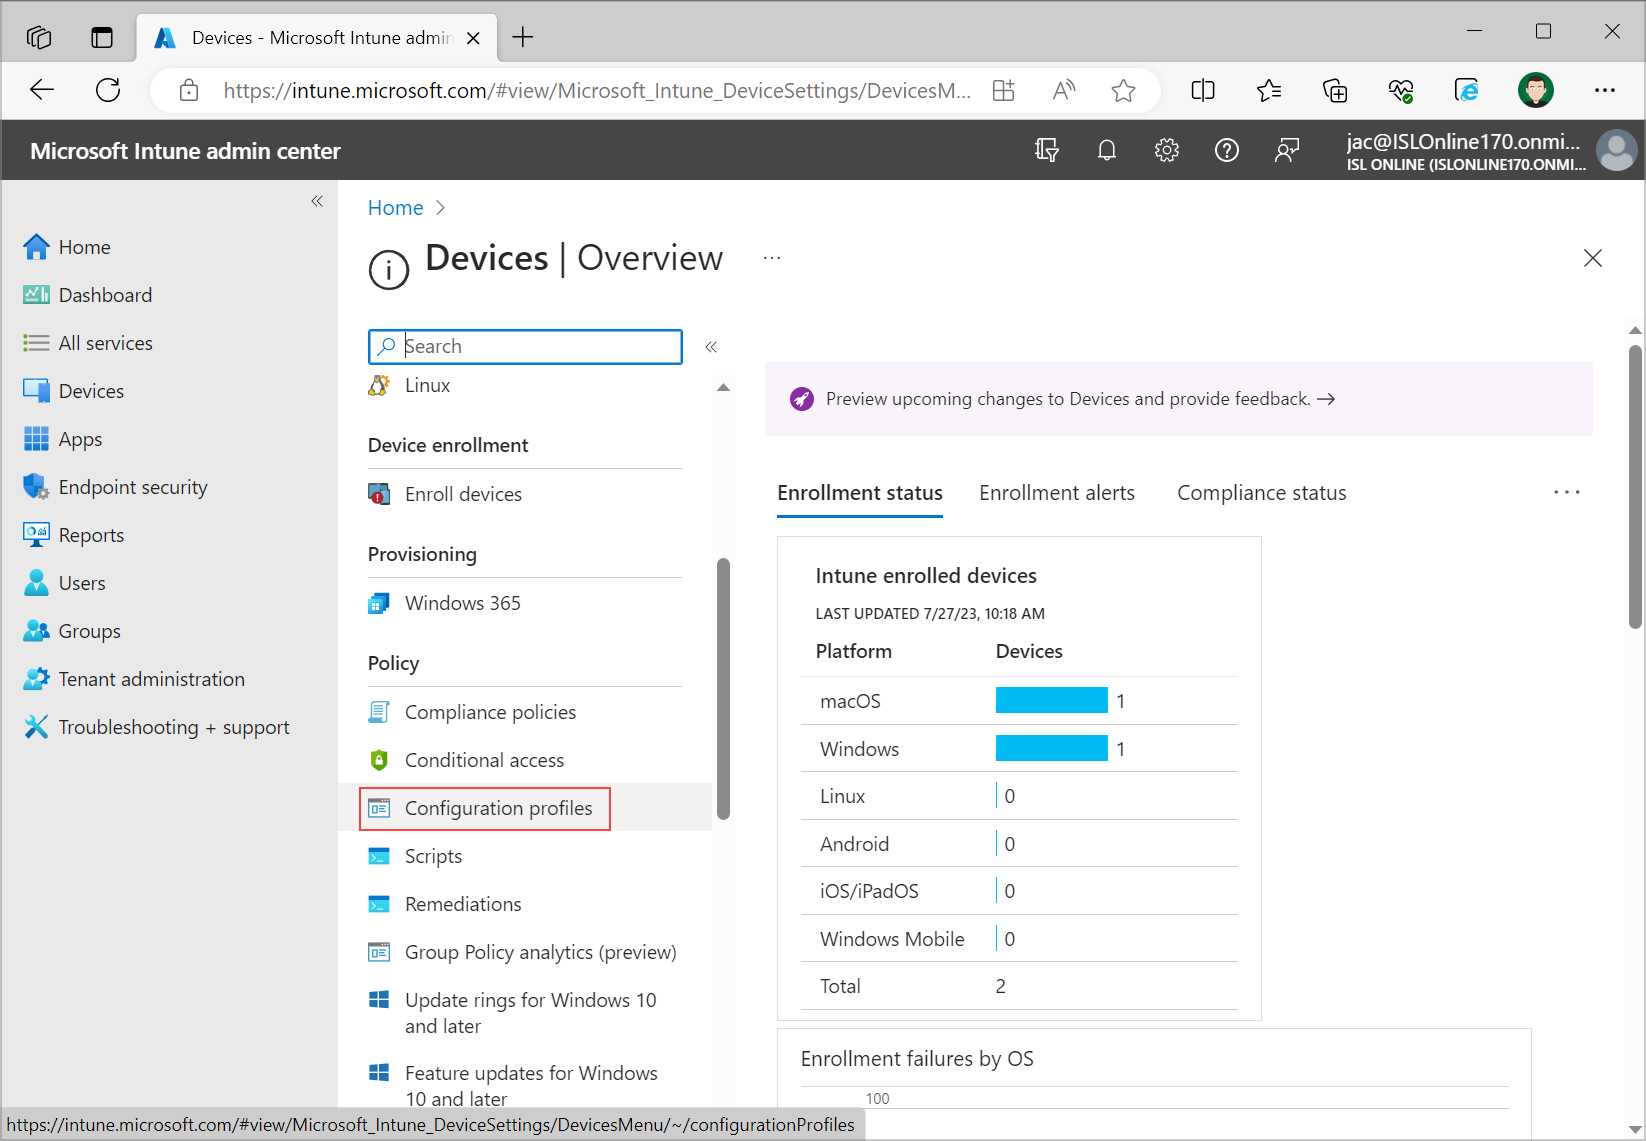
Open Microsoft Intune, select “Devices” from the left menu and click on “Configuration profiles”.
Step 3
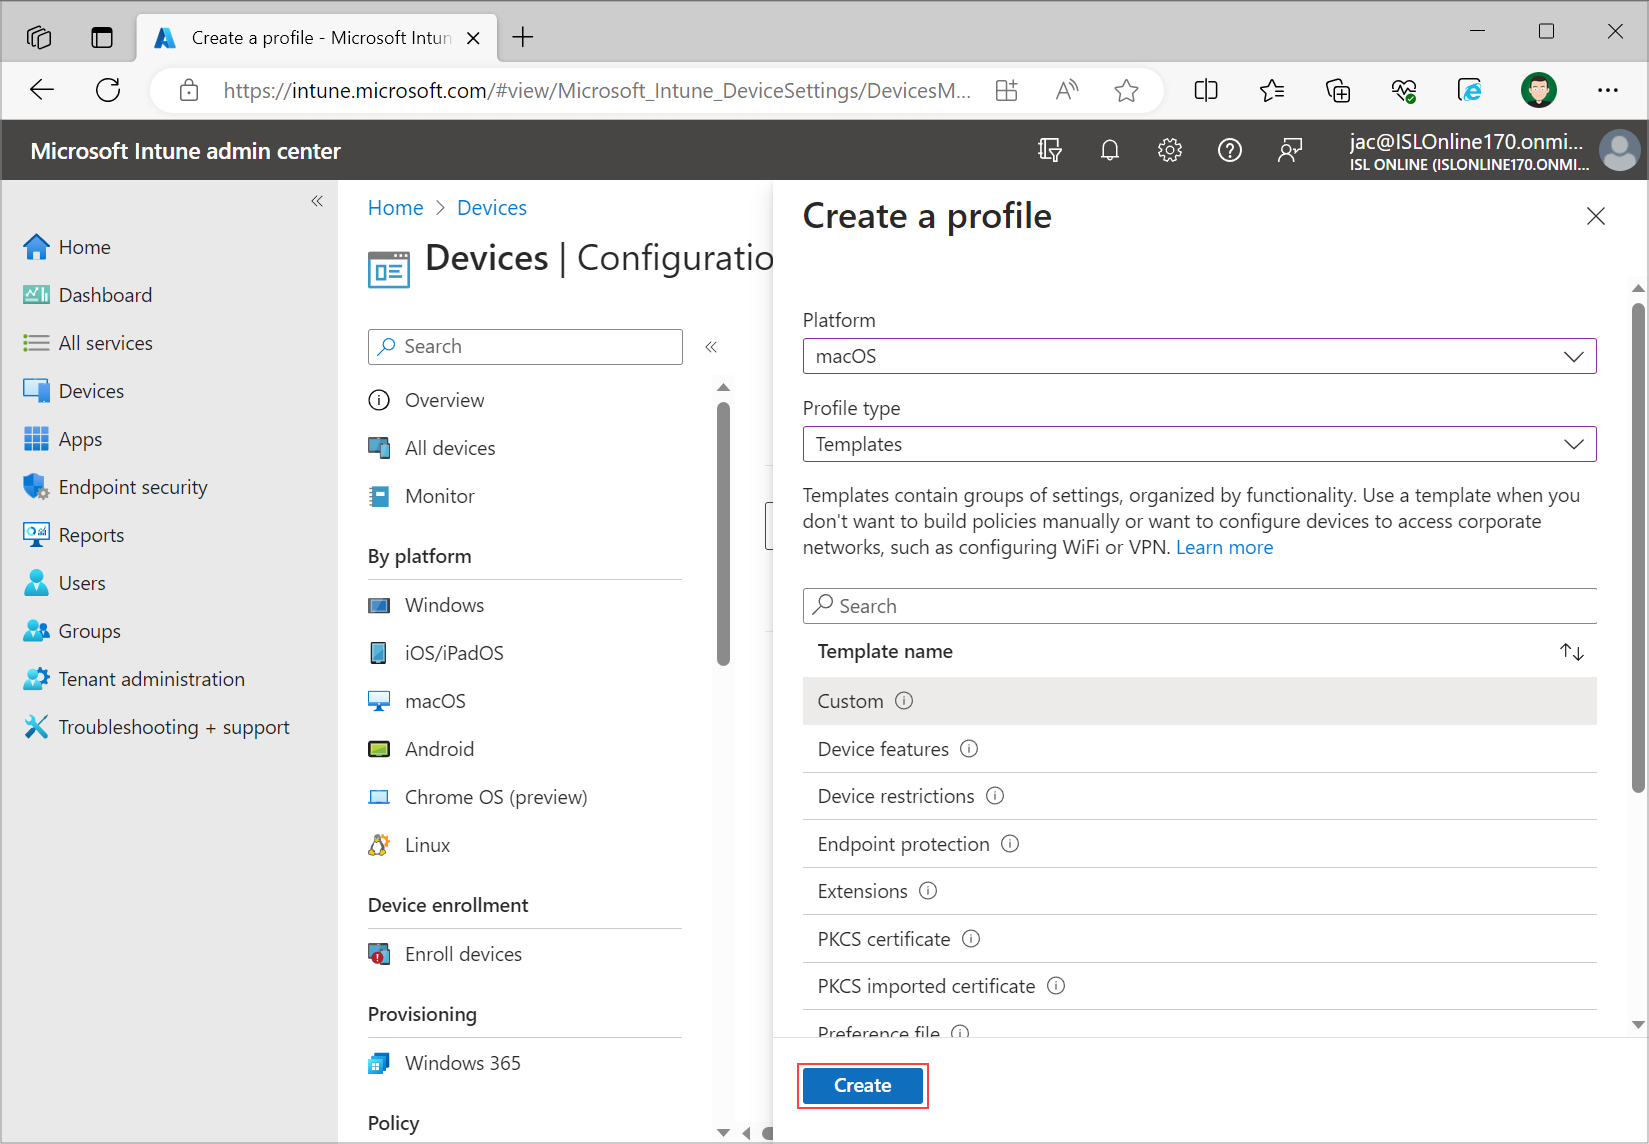
Click on “Create profile”. Select “macOS” for “Platform”, under “Profile type” select “Templates”. On the dropdown menu that is shown select “Custom” and click “Create”.
Step 4
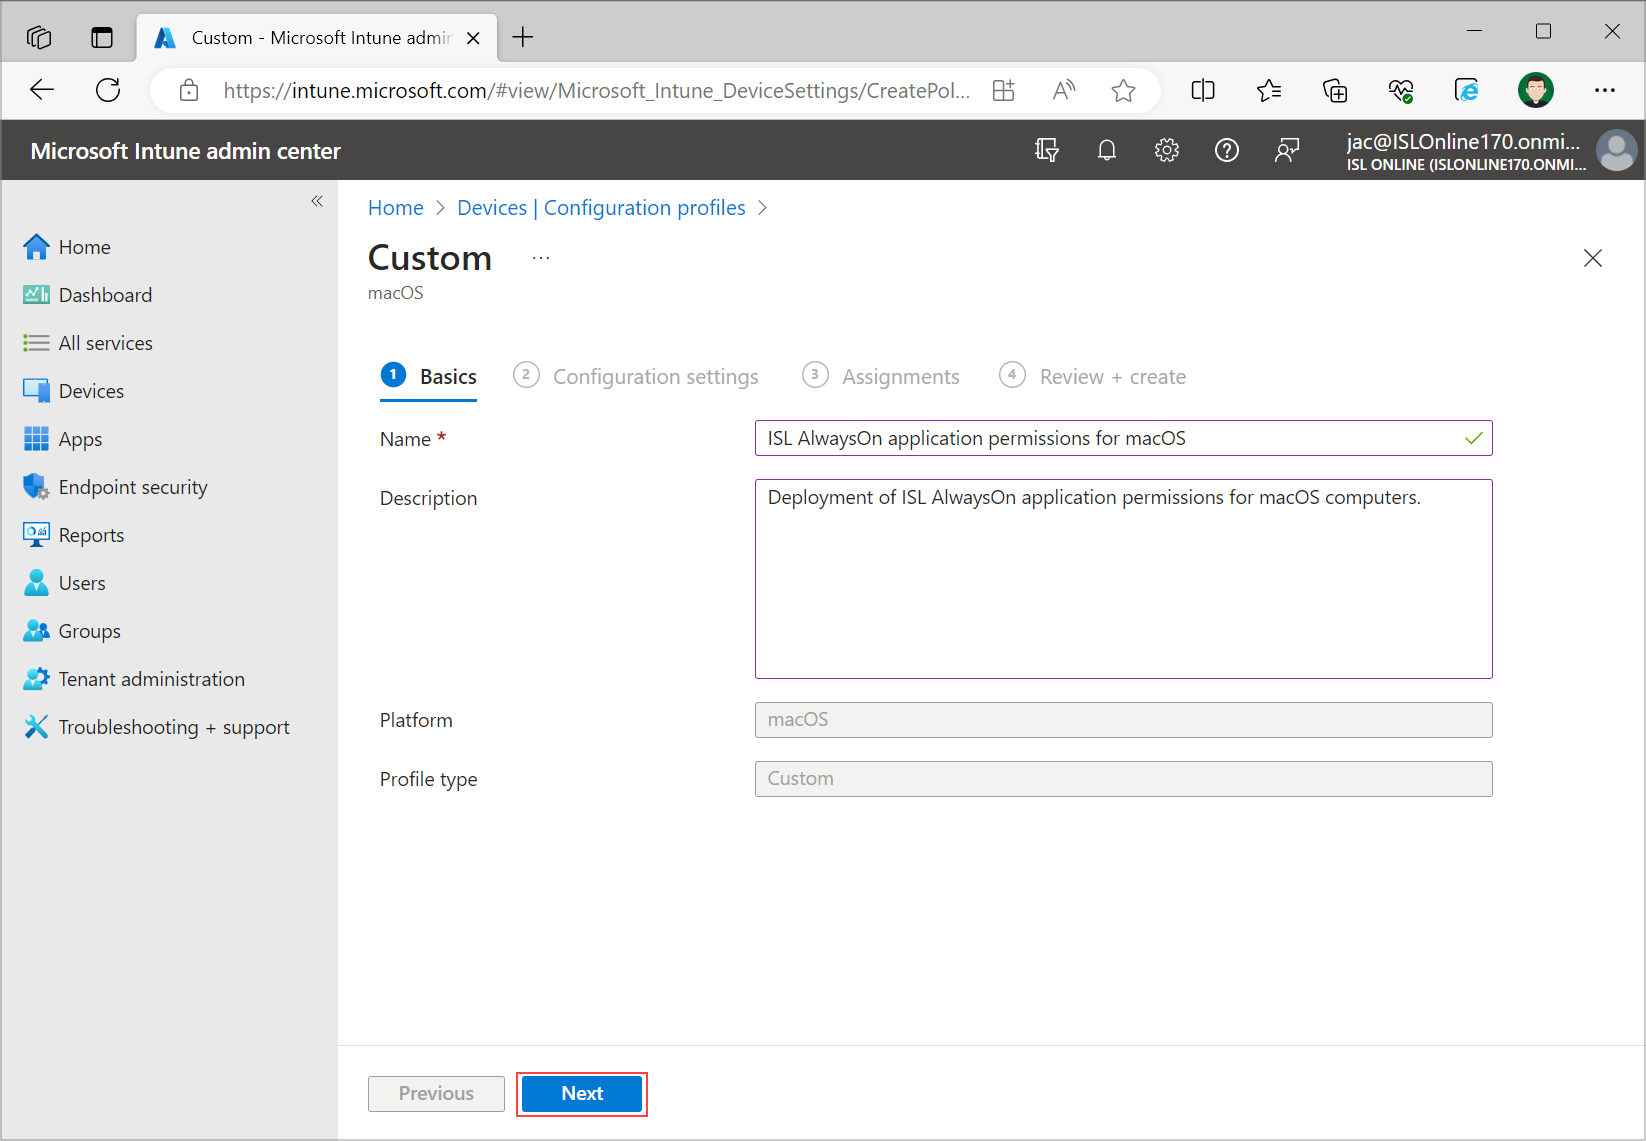
Set a “Name” for your configuration profile and add a description of the profile. Select “Next” to proceed to the next page.
Step 5
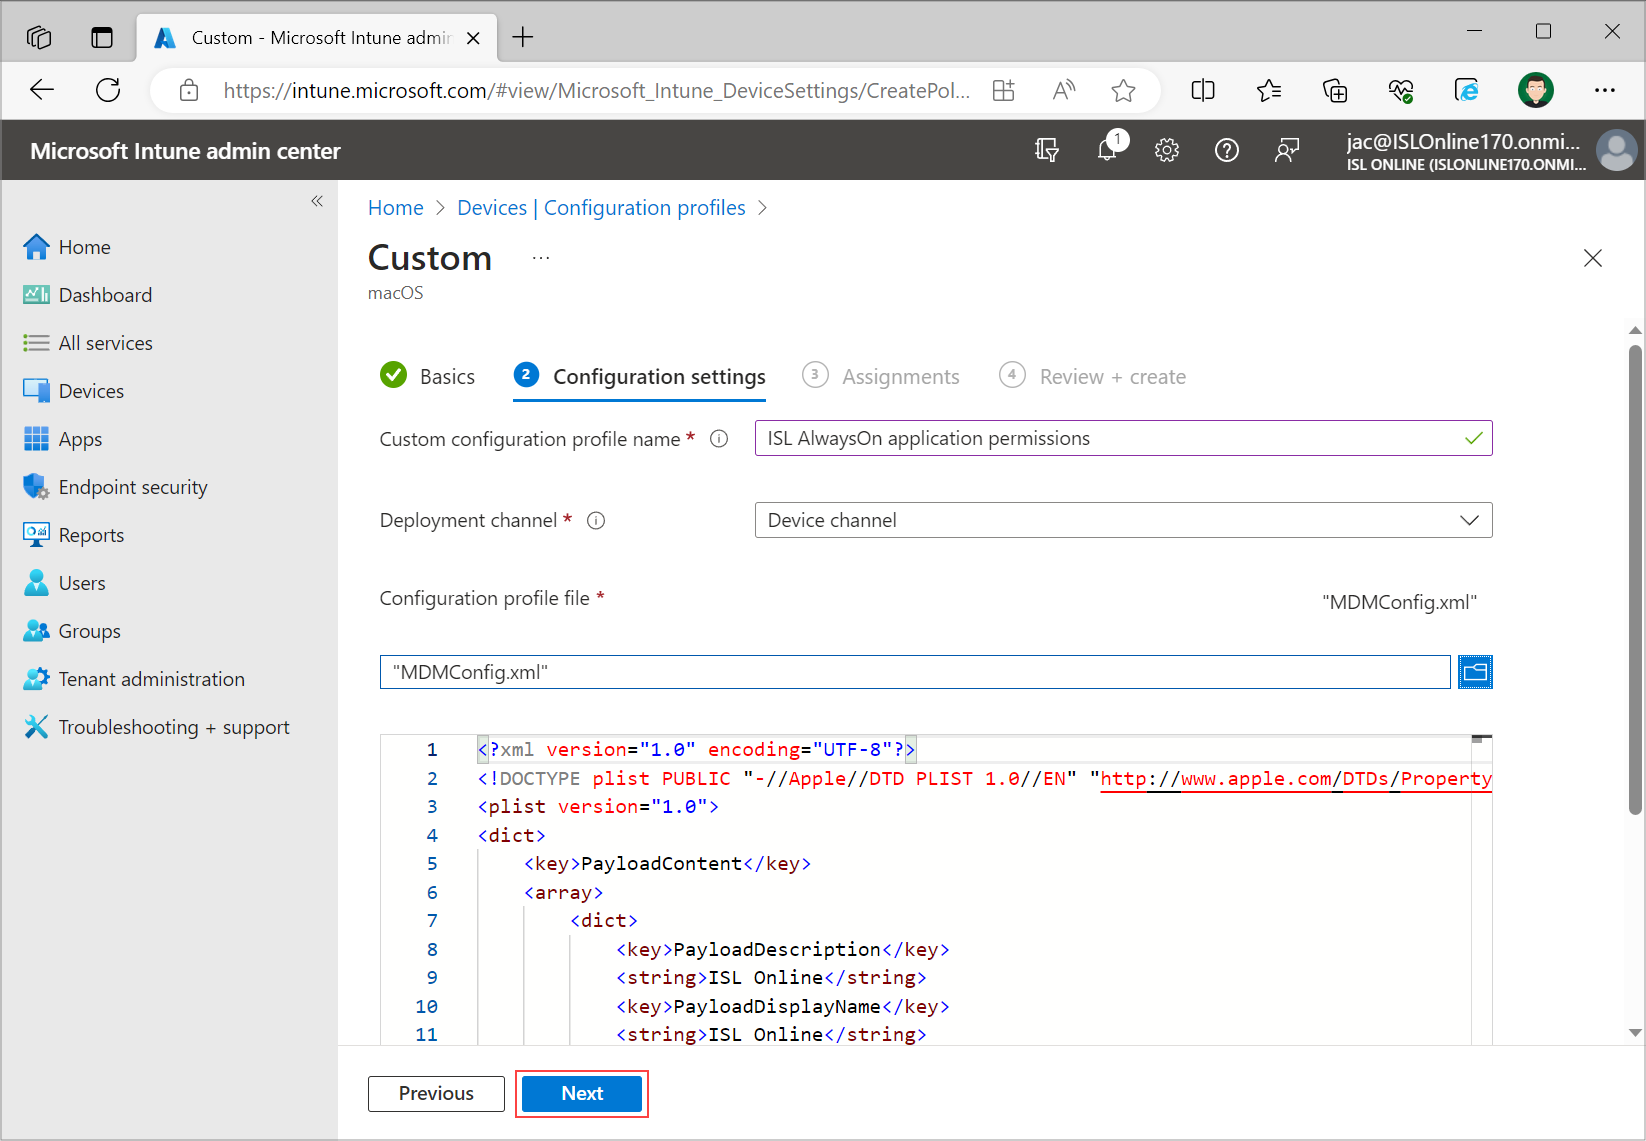
Set a “Custom configuration profile name” and set “Device channel” under “Deployment channel”. Upload the file that you have downloaded in step 1 and proceed to the next page with clicking “Next”.
Step 6
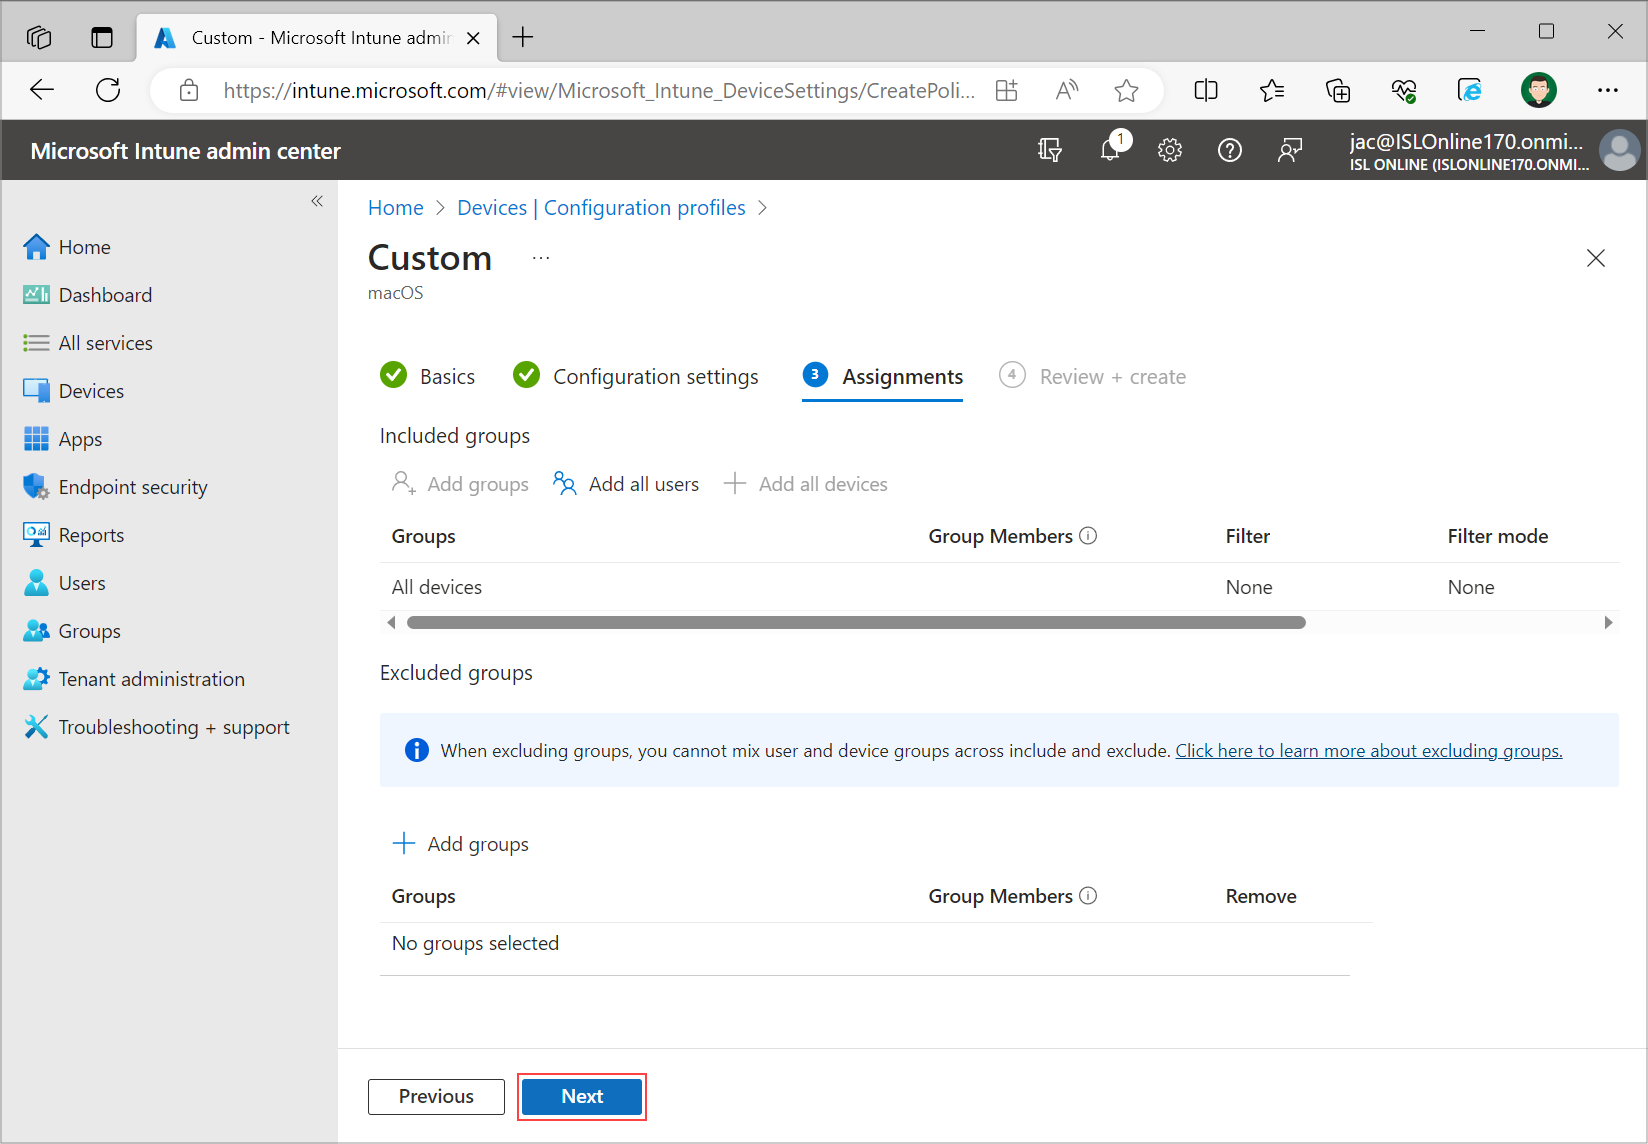
Under “Assignments” page set the groups, users or devices for which you want to deploy ISL AlwaysOn application permissions. Select “Next”.
Step 7
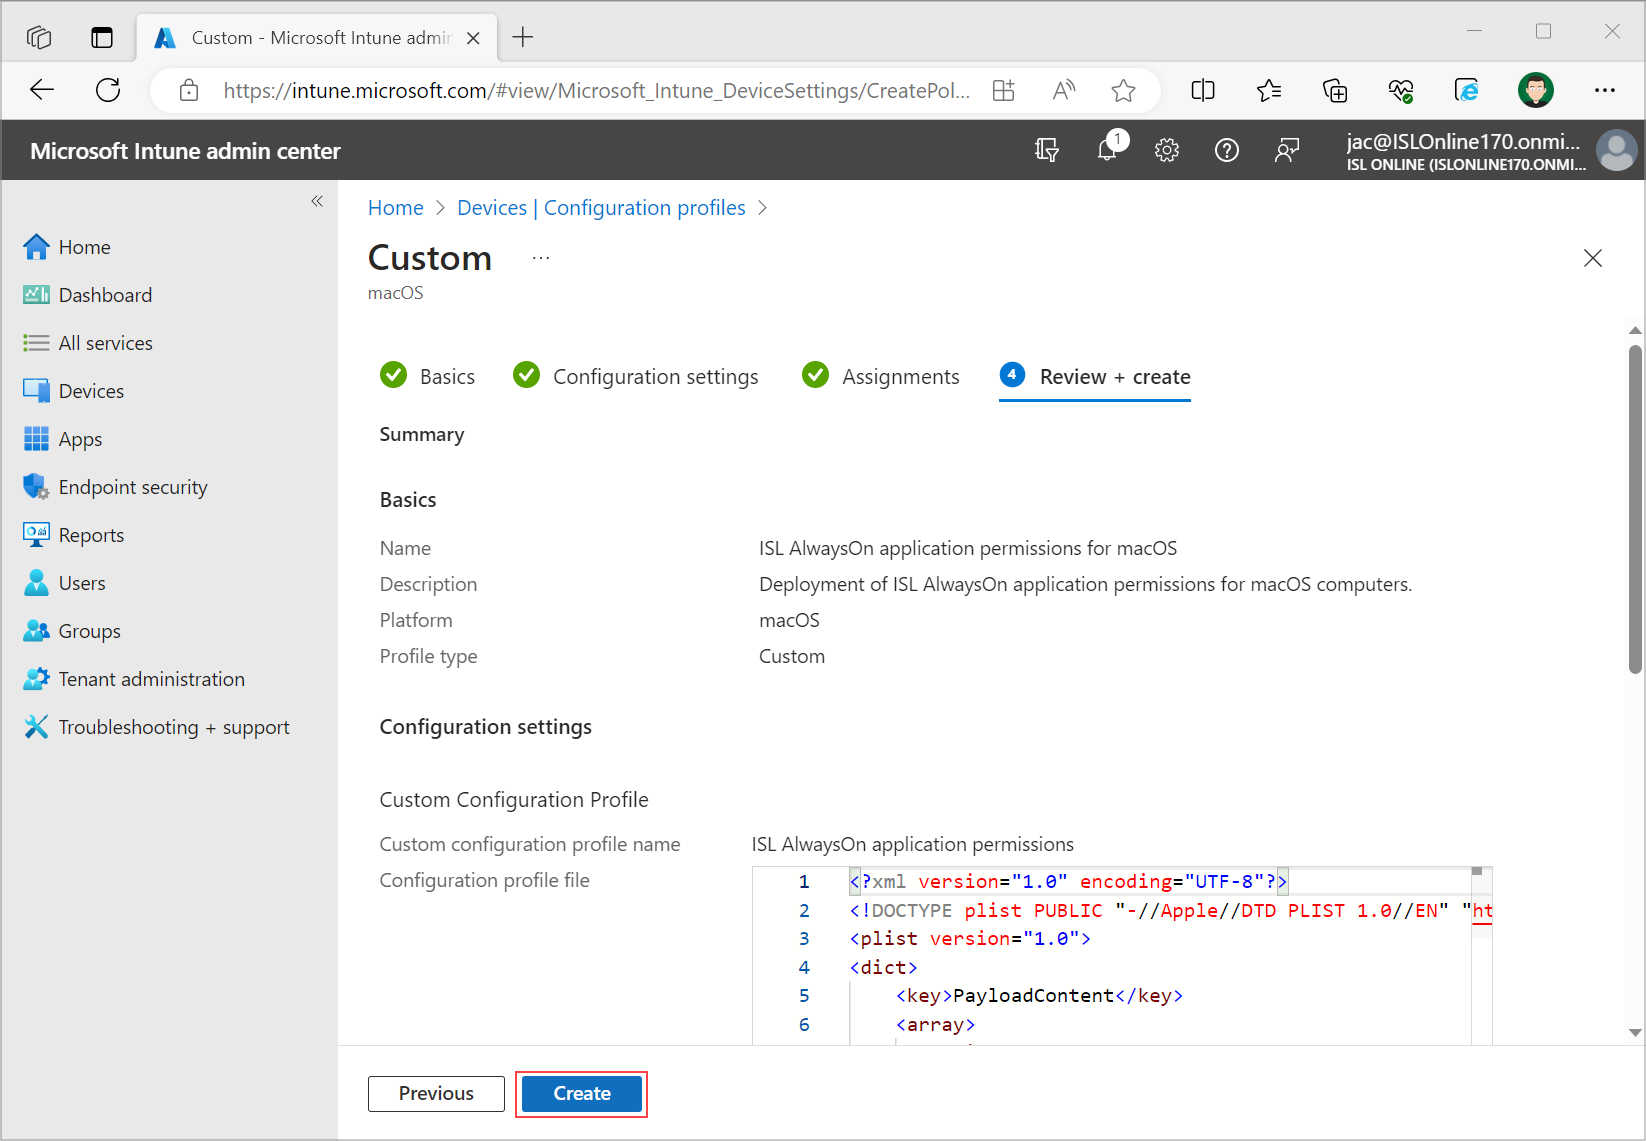
Review the configuration profile and click “Create”.
Step 8
You have successfully created ISL AlwaysOn application permissions deployment for macOS on Intune. Once the macOS machines are synchronized with Intune, the settings will be applied.