ISL AlwaysOn allows you to display a notification on a remote computer before a session is established, as well as give the client side the ability to allow or reject the connection.
Video Tutorial
User Manual
Step 1 (Remote Computer)
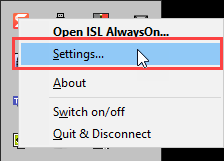
Click on “Settings” from the ISL AlwaysOn tray icon on the unattended computer.
Step 2 (Remote Computer)
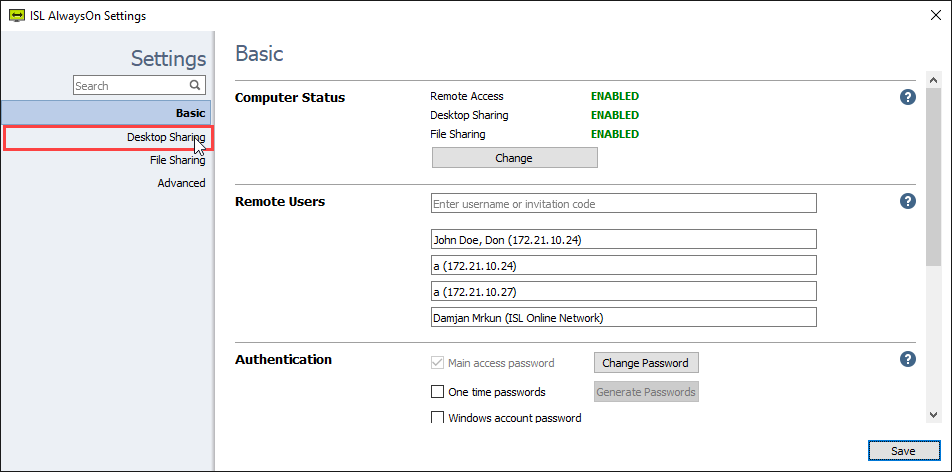
Navigate to “Desktop Sharing”.
Step 3 (Remote Computer)

There are a few options.
Show notification of incoming connection
Display a pop up on the remote computer for before a Remote Desktop session is established, as opposed to ISL AlwaysON’s default state, which just launches the connection when initiated.
Notification timeout
A determined number of seconds to show the notification on the remote computer.
Allow local user to reject connection
Allow the local user to reject the connection before the notification timeout. A prompt will be shown to the local user allowing them to reject the connection to their machine by the supporter.
Specify what happens if the user does not respond to the prompt before the notification timeout period expires.
Skip the notification and allow connection when no local user is logged in
When this setting is selected, the ISL AlwaysOn application will check if a local user is logged in. If so, the notification dialogue will be shown. If a user is not logged in, it will skip the notification and allow the supporter to connect as usual.
Please Note:
“Allow computer access without an access password (local consent required)” can be used via a command line argument to connect to a specific computer using local user consent instead of an access password.
Command line example:
ISLLight.exe --username "<isl_online_username>" --password "<password>" --connect-search "<computer_description>/<computer_name>" --consent-message “<message to be displayed>”
Click “Save” to confirm the changes.
Step 4 (Local Computer)
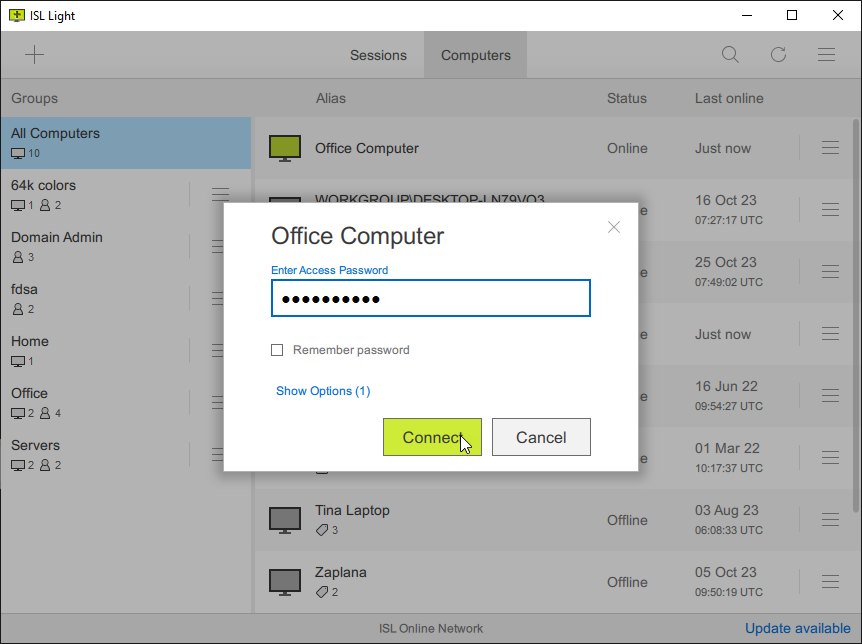
Open ISL Light and connect to the remote computer where we have configured the notification.
Step 5 (Remote Computer)

Meanwhile, on the client’s side, a notification is shown based on the preferences we have set before.
Client can either click “Allow” or “Reject”.