During and after the chat the supporter can fill out the custom fields and the values will be saved with the chat transcript for further references.
Defining custom fields
Fields are defined in .json file. For each field you have to define a label, which will be displayed next to custom field and a type. If type is set to "option" then values to choose from have to be provided as well.
Example of a text input custom field would look like this:
"f22": {
                 "label": "Comment about problem",
                 "type": "text"
         }
and an example of a multiple choice input field would look like this:
"f20": {
                 "label": "Type of support",
                 "type": "option",
                 "values": {
                         "1": "Network problems",
                         "2": "Software problems",
                         "3": "Hardware problems",
                         "4": "Other"
                         }
                 }
Displaying custom fields
After the fields object is defined, you have to specify which of the defined custom fields should be displayed. This is done with show_operator object. Additionally you can specify the relations between different fields as seen in the example bellow:
{
 "fields": {
         "f20": {
                 "label": "Type of support",
                 "type": "option",
                 "values": {
                         "1": "Network problems",
                         "2": "Software problems",
                         "3": "Hardware problems",
                         "4": "Other"
                         }
                 },
         "f21": {
                 "label": "Additional information",
                 "type": "option",
                 "values": {
                         "1": "Solved",
                         "2": "Not solved",
                         "3": "Will call back",
                         "4": "Compatibility issues",
                         "5": "Out of our domain",
                         "6": "Other"
                         }
                 },
         "f22": {
                 "label": "Comment about problem",
                 "type": "text"
         }
 },
 "show_operator": {
         "fields": [ "f20", "f21", "f22" ]
 },
 "relations": [
         {
                 "fields": [ "f20", "f21"],
                 "masks": [ ["1","1"], ["1","2"], ["1","5"], ["1","6"], ["2","1"], ["2","2"], ["2","4"], ["2","6"], ["3","1"], ["3","2"] ]
         }
 ]
}
Relations
Relations specify which options are shown in the option type custom fields, if they are related. Fields define for which custom fields the masks are defined. Masks take the following form:
e.g.: "masks": [ ["1","1"], ["1","2"], ["1","5"], ["1","6"], ["2","1"]]
["1","2"] : If field 1 of the first custom field is selected then field 2 of the second custom field will be available for selection. So in the example above if field 1 of custom field f20is selected then fields 1,2,5 and 6 of custom field f21 are available for selection.
Uploading to ISL Conference Proxy
You can upload the .json file defining the custom fields by logging into ISL Conference Proxy at : <server_address>:7615/conf and navigating to "Configuration" -> "ISL Pronto" -> "Custom client info data file".
Additionally you can upload the .json file trough XMLMSG interface available at: <server_address>:7615/xmlmsg_form.html. This requires the .json file to be base64 encoded and uploaded with the following call:
<?xml version="1.0" encoding="UTF-8"?>
<manipulateDatabase secret="dbSecret">
   <updateDomain mode="update" name="domainName">
       <prontoUserClientInfoCustomFieldDataFile fileName="fileName">
           Base64Encoded JSON file
       </prontoUserClientInfoCustomFieldDataFile>
   </updateDomain>
</manipulateDatabase>
Click send and the server should respond with <ok/> signaling the file was uploaded correctly.
Chat
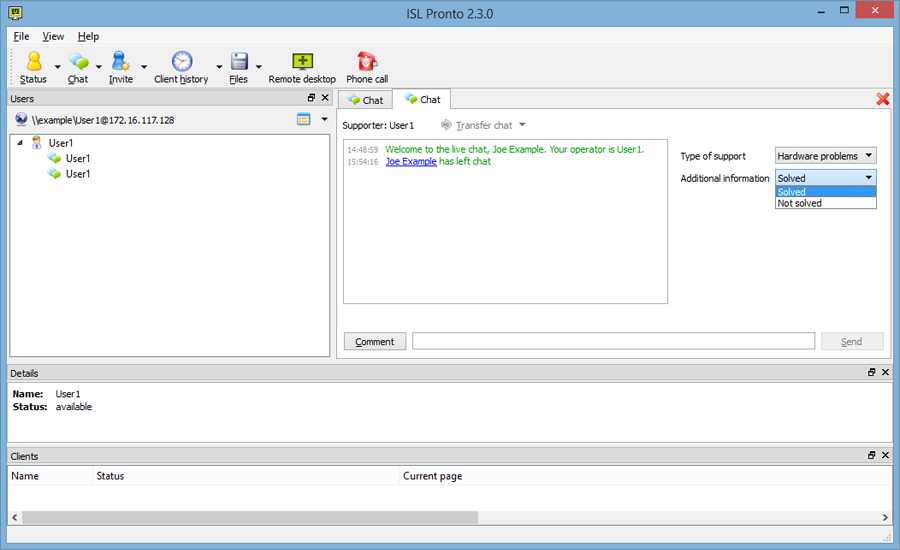
Defined custom fields will be added to ISL Pronto, allowing the supporter to select or enter appropriate information.
Custom fields in Chat Transcript
Information entered into custom fields during chat will be displayed together with the chat transcript for further reference.
Download example
Download example .json file used in this example custom_fields.json.