This topic provides a step by step guide on how to integrate a live chat to you webpage as seen on our homepage at islonline.com.
Note: All the files used in this guide are available for the download here: Live_chat.zip
Step 1
![]()
Prepare custom image which will be displayed during the chat. Name the image islpronto-logo.jpg and place it somewhere on your server where it is accessible.
Step 2
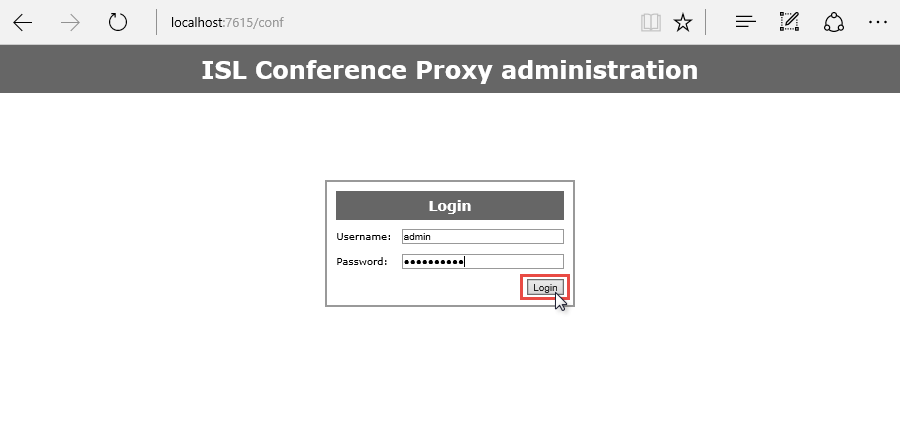
Log into ISL Conference Proxy as administrator at http://localhost:7615/conf.
Step 3
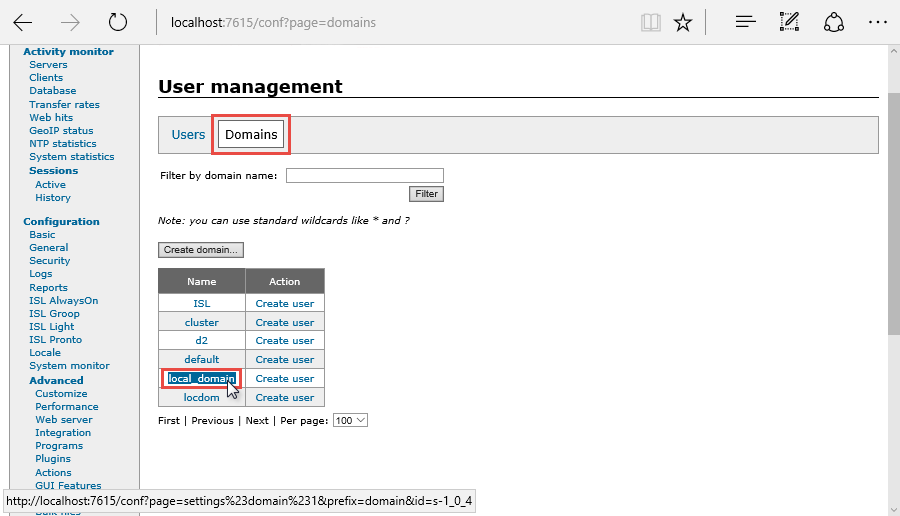
Click "User management" option in the menu on the left side. Then select "Domains" and select a domain which should take the chat.
Step 4
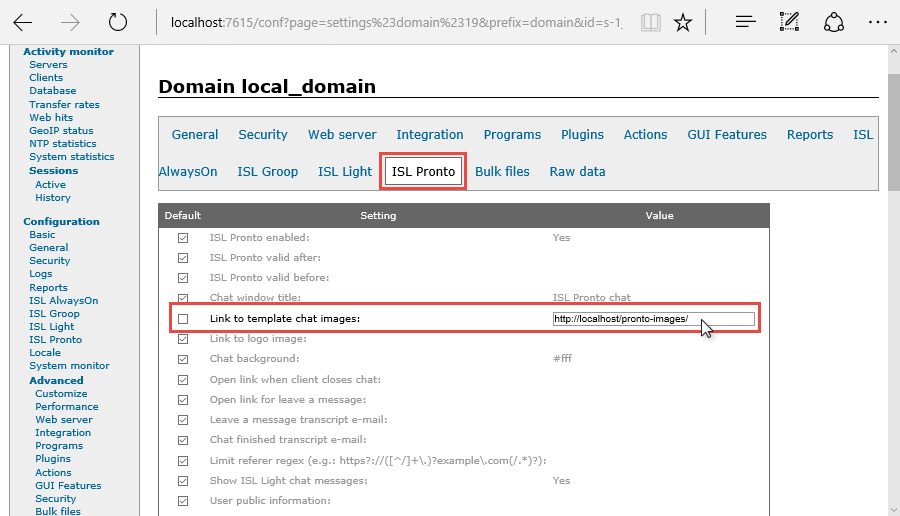
Click "ISL Pronto" in the domain settings and set the "Link to template chat images:" option to the address at which your image selected in Step 1 is located. Scroll to the bottom of the page and click "Save" to confirm the changes.
Note: This concludes the settings you need to change in ISL Conference Proxy, the following steps now describes the changes you need to make to your webpage on which you wish to include the live chat.
Step 5 (Setting the web page parameters)
Download and open the .zip containing the example files - Live chat.zip.
Open the index.html file, it should look like this:
<!DOCTYPE HTML>
<html>
    <head>
        <meta charset="UTF-8" />
        <link type="text/css" rel="stylesheet" href="styles/styles.css">
    </head>
    <body>
        Pronto live chat example.
        <div id="chat" class="isl_chat">
            <div class="bubble green" style="display:none;">
                <span class="close-modal">☓</span>
                <div>
                    Hey, we’re (company)<br/>
                    <small>Talk to us right here</small>
                    <span class="figure-operator"></span>
                    <a href="#" class="init-chat fill-parent"></a>
                </div>
            </div>
            <!-- Specify a URL to open if there are no supporters online to chat with -->
            <a href="http://www.islonline.com/company/leave-a-message.htm" class="button inactive init-chat" id="btn-chat" data-chat-text="<span>Chat with Us</span>">
                <!-- Message that appears if there are no supporters online -->
                <span>Leave a Message</span>
            </a>
        </div>
    </body>
</html>
<script type="text/javascript">
/******************************************/
/* Edit these options to match your needs */
/******************************************/

var language = "en", domain = "local_domain", chat_width = "500", chat_height = "330", server_adress="localhost:7615", filter="", protocol="http";
</script>
<script src="https://ajax.googleapis.com/ajax/libs/jquery/1.12.0/jquery.min.js"></script>
<script src="scripts/isl_chat.js"></script>
The following <div> contains the code used to display the chat button in the bottom right of the screen.
<div class="bubble green" style="display:none;">
                <span class="close-modal">☓</span>
                <div>
                    Hey, we’re (company)<br/>
                    <small>Talk to us right here</small>
                    <span class="figure-operator"></span>
                    <a href="#" class="init-chat fill-parent"></a>
                </div>
            </div>
            <!-- Specify a URL to open if there are no supporters online to chat with -->
            <a href="http://www.islonline.com/company/leave-a-message.htm" class="button inactive init-chat" id="btn-chat" data-chat-text="<span>Chat with Us</span>">
                <!-- Message that appears if there are no supporters online -->
                <span>Leave a Message</span>
            </a>
        </div>
Change the following part of the code to display a custom greeting:
Hey, we’re (company)<br/>
<small>Talk to us right here</small>
e.g. replace (company) with your company name.
Replace the web address in the following link:
<a href="http://www.islonline.com/company/leave-a-message.htm" class="button inactive init-chat" id="btn-chat" data-chat-text="<span>Chat with Us</span>">
so that the user is redirected to your webpage where he can leave a message for you if no operators are available at the moment.
Change the following text to set what is displayed to the users when no operators are available:
<span>Leave a Message</span>.
The following script is where you set all the important parameters (variables) which determine how ISL Pronto is started.
<script type="text/javascript">
/******************************************/
/* Edit these options to match your needs */
/******************************************/

var language = "en", domain = "local_domain", chat_width = "500", chat_height = "330", server_adress="localhost:7615", filter="islonline-hq,islonline-art", protocol="http";
</script>
- language - Set the language of ISL Pronto interface shown to the user. ISL Pronto uses ISO 639-1 language codes to determine the language - codes.
- domain - Set which domain should take the chat when supporter clicks the"Chat with Us" button. Enter one of the domains that you have set in ISL Conference Proxy.
- chat_width,chat_height - Set the dimensions of the chat window that is opened when client clicks on the chat button.
- server_address - Enter the address of your ISL Conference Proxy server trough which the chat will be established.
- filter - Set which groups inside the domain should take the call. Only the operators that are inside the specified groups will be prompted to take the chat. If you specify multiple filters separate them by a comma, but do not add any spaces. Filter parameter is mandatory, so if you do not wish to specify any groups enter the empty quotes (filter="").
- protocol - Set which protocol should be used to communicate with your ISL Conference Proxy when downloading necessary script to start ISL Pronto. By default the protocol used is http, you can change that to https if your ISL Conference Proxy server is configured to support it.
Note: When setting a domain, make sure that you enter the name of the domain for which you set the custom image in Step 4. If you enter another domain then chat will still work but custom image won't be displayed since a different domain will take the chat.
Note: Depending on how your ISL Conference Proxy server is configured you might need to add a port at which the server should be contacted. By default ISL Conference proxy will use ports 80,443 and 7615, if port 80 is used by another application then you can enter e.g. server_adress="server_ip:7615".
Step 6

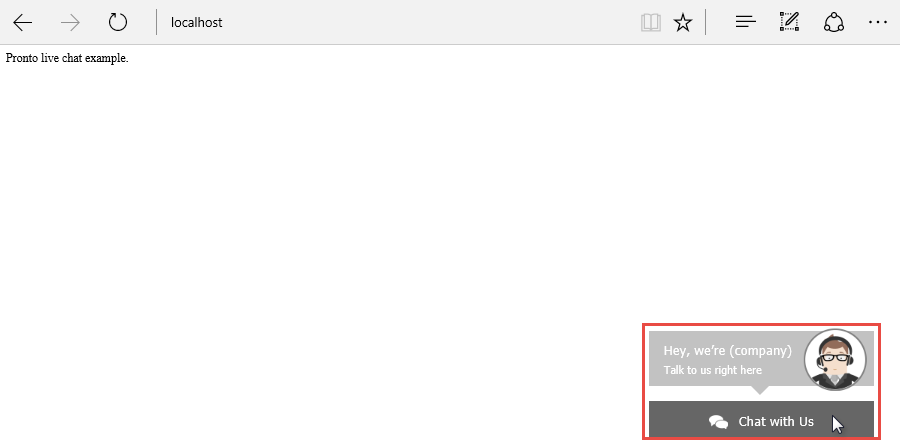
If you set the parameters correctly and there are available operators for the specified domain, then a chat button should be displayed at your web page.
Click the "Chat with Us" button to test the setup. After entering your name and email, then the operators of the specified domain should be prompted to take the chat.