This is a step-by-step guide on how to use OpenLDAP external authentication with search approach on ISL Conference Proxy Server. These instructions assume that you have a Ubuntu Server machine with working ISL Conference Proxy Server installed and empty OpenLDAP installed and turned on. In this tutorial we will use phpLDAPadmin for OpenLDAP administration.
Bind User
OpenLDAP sometimes doesn't allow us to connect anonymously. Because of that, we have to first create a user that will connect to server and search for other users.
Step 1
Open phpLDAPadmin, i.e. http://example.com/phpldapadmin/ and log in as administrator.
Step 2
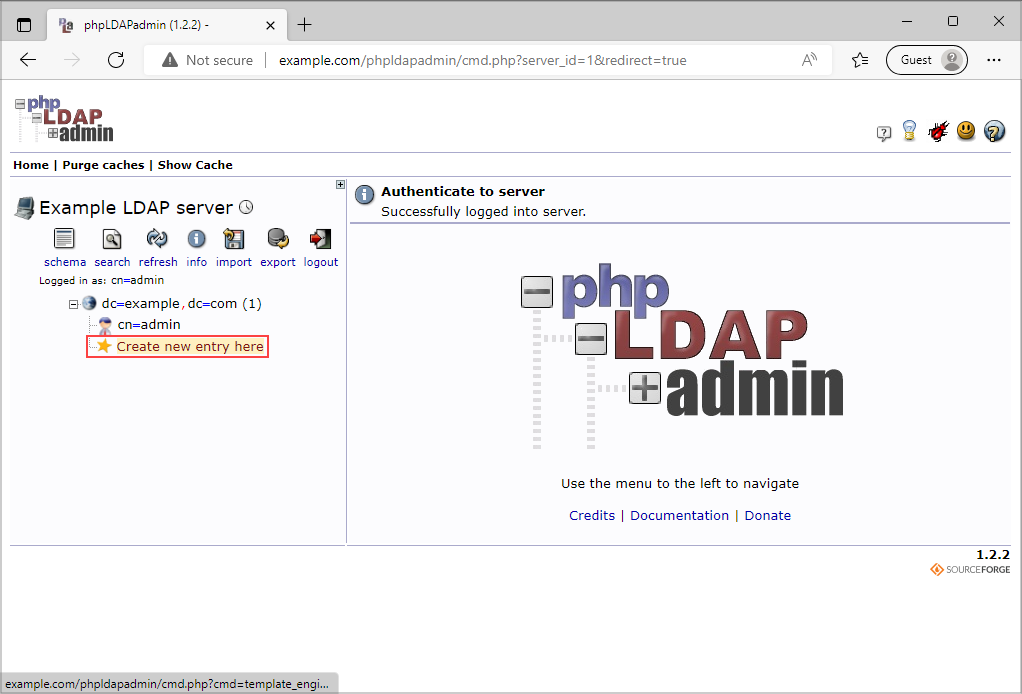
Click Create new entry here and then add Generic: Organisational Unit, e.g. Users.
Step 3
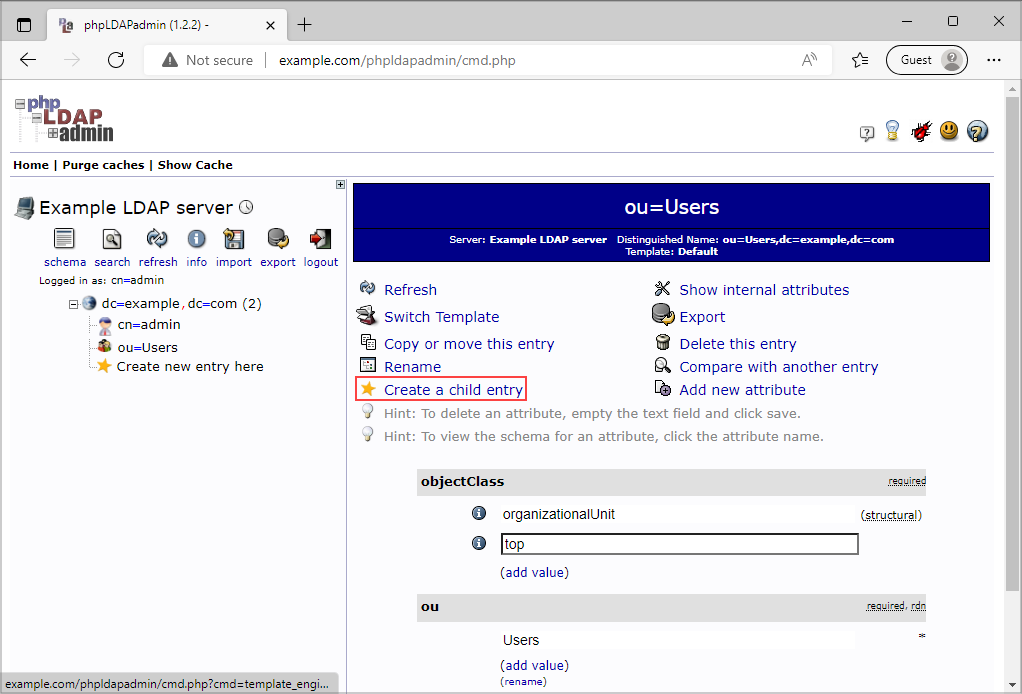
Select the newly created entry ou=Users, click Create a child entry and then add Generic: Posix Group, e.g. icpusers.
Step 4
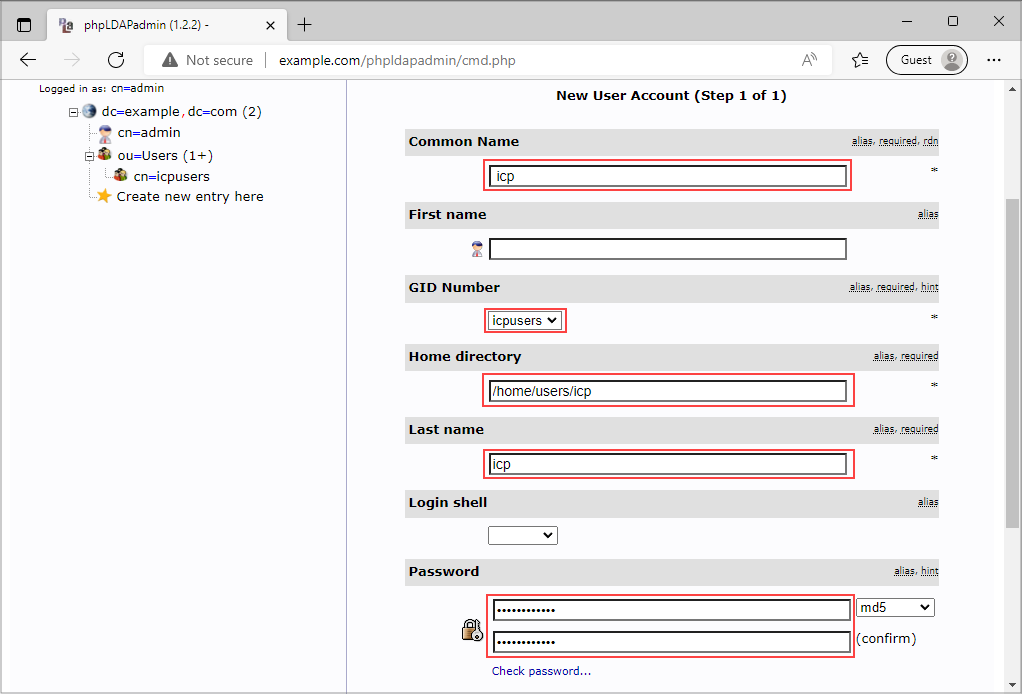
Select ou=Users again, click Create a child entry and then add Generic: User Account and fill in following attributes:
- Last name, e.g. icp.
- GID Number, e.g. icpusers.
- Password, e.g. Xconference!.
Click Create object at the bottom of the page. Do not click Commit just yet.
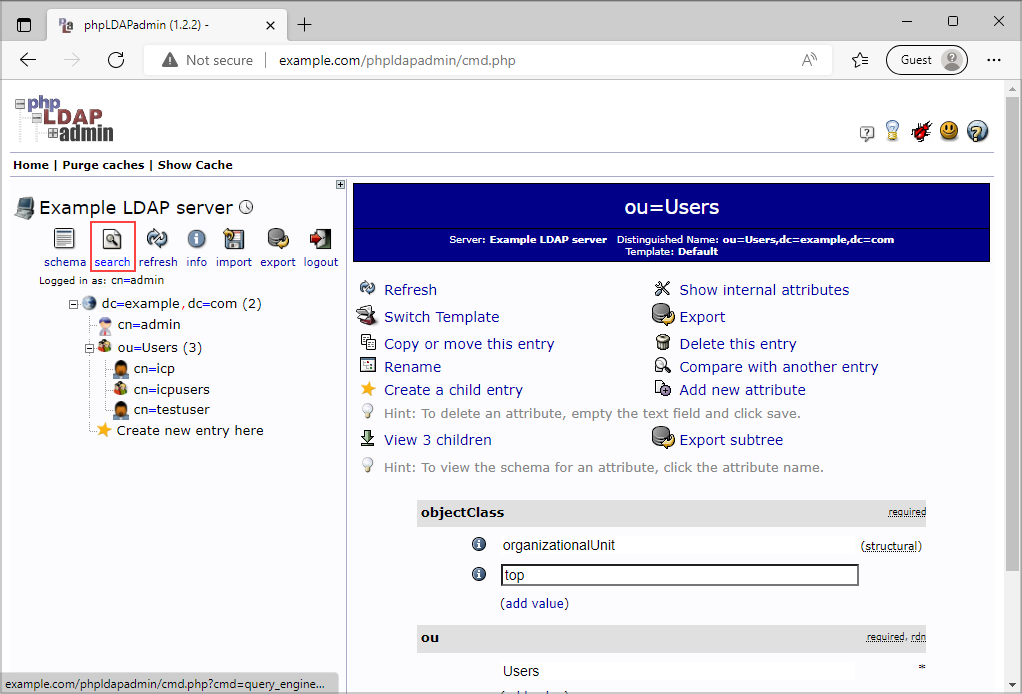
Step 5
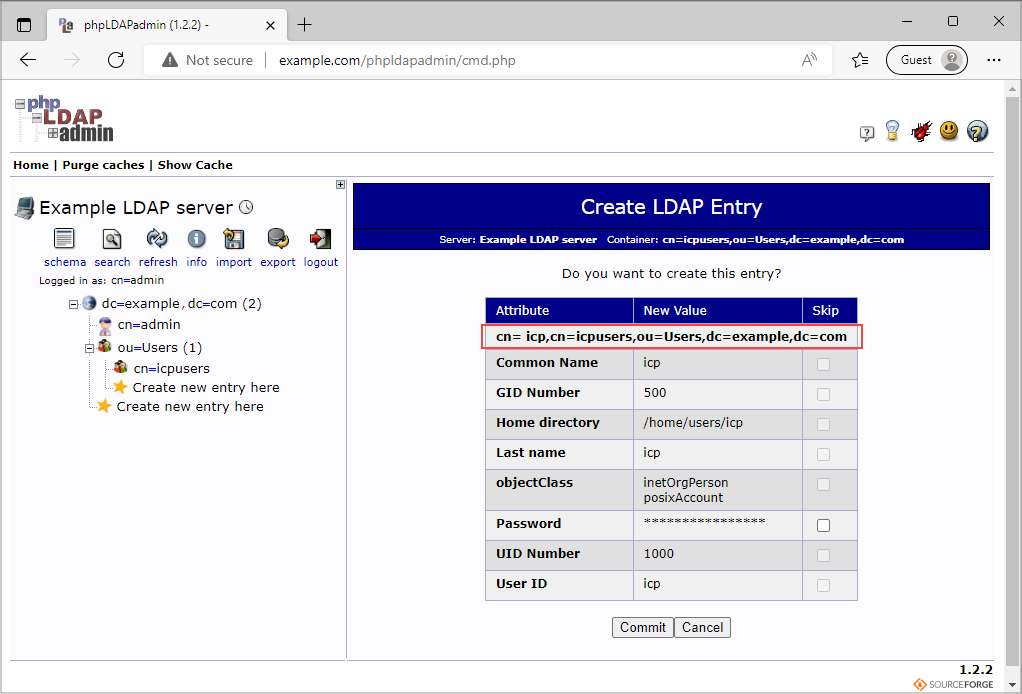
Before clicking Commit, make sure you write down the field marked in the image above (we will use it later on).
Step 6
Repeat Step 4 and 5 to create another user, having testuser as username and Xtesting! as password.
Test Search Filter
Next we have to create and check our binding user's credentials and create a search filter.
Step 1
Open phpLDAPadmin and click Search.
Step 2
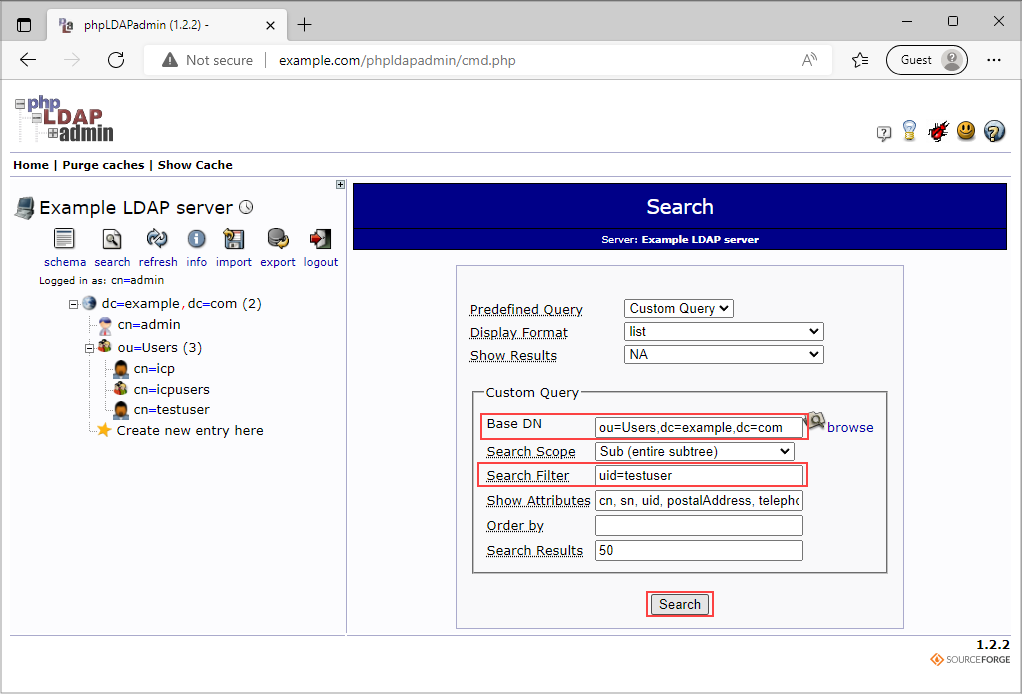
Fill in the following fields:
- Base DN, e.g. ou=Users,dc=example,dc=com.
- Search Filter, e.g. uid=testuser.
and click Search.
Step 3
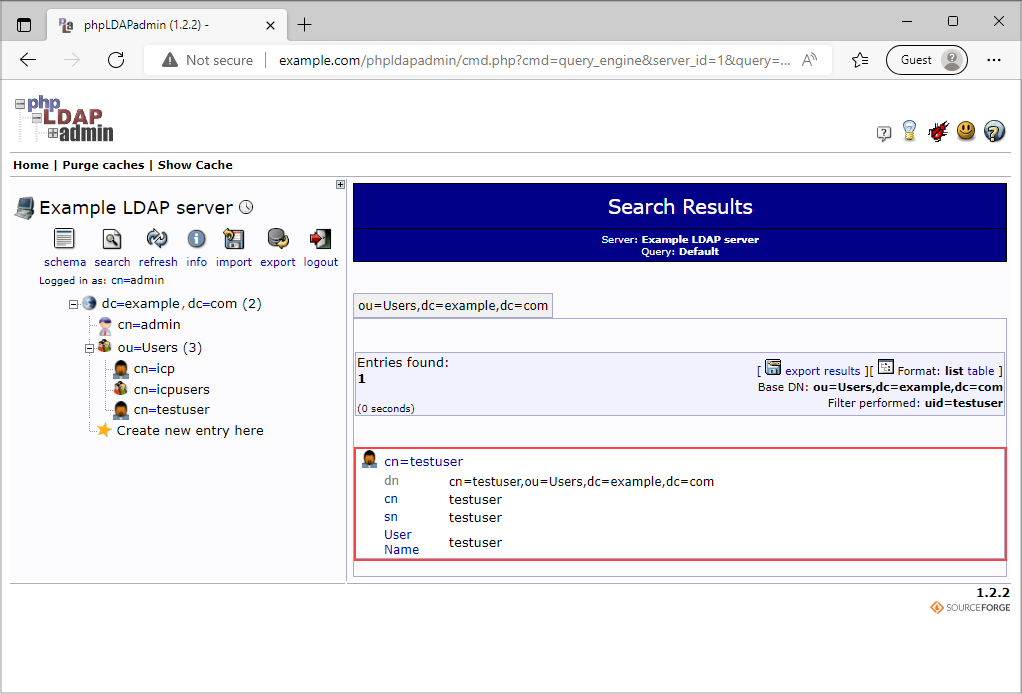
If our search filter was set correctly, we will get a result as in the image above.
Create Search Filter
Now we will check our binding credentials and search filter with command line program that is used by ISL Conference Proxy.
Step 1
Open terminal and go root.
sudo su
Step 2
Change directory to ISL Conference Proxy installation directory (/opt/confproxy on newer installations, /var/confproxy/ on older installations, you can run confproxyctl installdir to find out).
cd /opt/confproxy/
Step 3
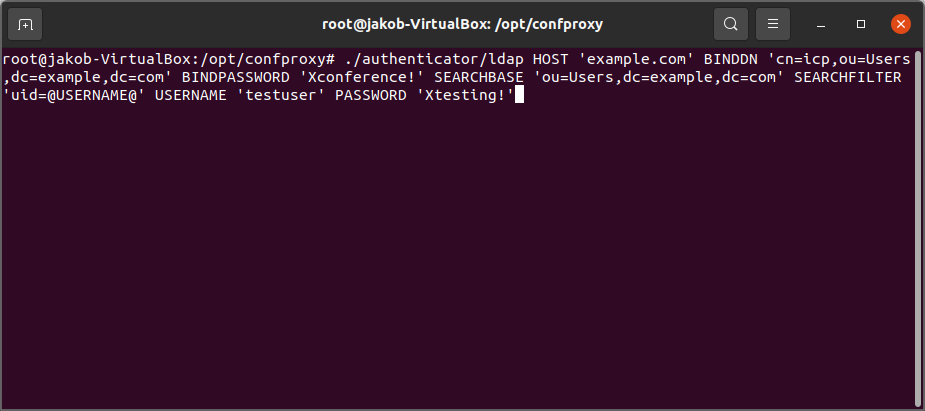
Run authenticator/ldap with following command line arguments:
- HOST, e.g. HOST 'example.com'
- BINDDN, e.g. BINDDN 'cn=icp,ou=Users,dc=example,dc=com'
- BINDPASSWORD, e.g. BINDPASSWORD 'Xconference!'
- SEARCHBASE, e.g. SEARCHBASE 'ou=Users,dc=example,dc=com'
- SEARCHFILTER, e.g. SEARCHFILTER 'uid=@USERNAME@'
- USERNAME, e.g. USERNAME 'testuser'
- PASSWORD, e.g. PASSWORD 'Xtesting!'
./authenticator/ldap HOST 'example.com' BINDDN 'cn=icp,ou=Users,dc=example,dc=com' BINDPASSWORD 'Xconference!' SEARCHBASE 'ou=Users,dc=example,dc=com' SEARCHFILTER 'uid=@USERNAME@' USERNAME 'testuser' PASSWORD 'Xtesting!'
Press Enter. If the arguments are correct, we should get <authenticationResponse><result>OK</result></authenticationResponse> at the bottom of the terminal.
Prepare the encoded bind password
You should encode the chosen bind password before using it as a part of the external authenticator setting, to avoid having it exposed in plain text in ISL Conference Proxy administration.
Step 1
Open terminal and go root.
sudo su
Step 2
Change directory to ISL Conference Proxy installation directory (/opt/confproxy on newer installations, /var/confproxy/ on older installations, you can run confproxyctl installdir to find out).
cd /opt/confproxy/
Step 3
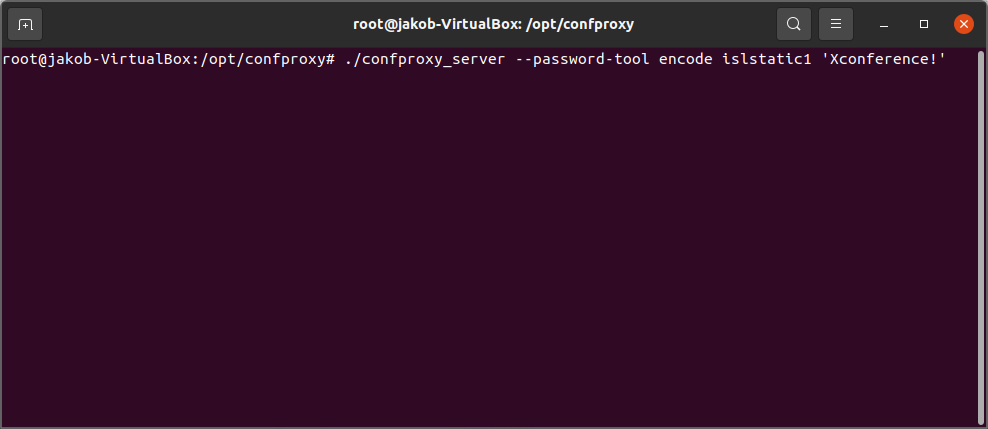
Run confproxy_server with following command line arguments:
- --password-tool (enables the password tool mode)
- encode (indicates that you wish to encode a password)
- islstatic1 (indicates that the target format should be islstatic1)
- '<bind_password>' (your chosen bind password, defined in the "Bind User" section, e.g. 'Xconference!')
./confproxy_server --password-tool encode islstatic1 'Xconference!'
Press Enter. If the arguments are correct, you should get the encoded password in the chosen format, looking like this:
[^|islstatic1|^]ytCdipKE05uwIfbeYfGNUmawm8/YAwRN
Copy that whole line, you will need it in the following section.
Configure ISL Conference Proxy
Step 1
Open ICP administration page, i.e. http://localhost:7615/conf and log in as administrator.
Step 2
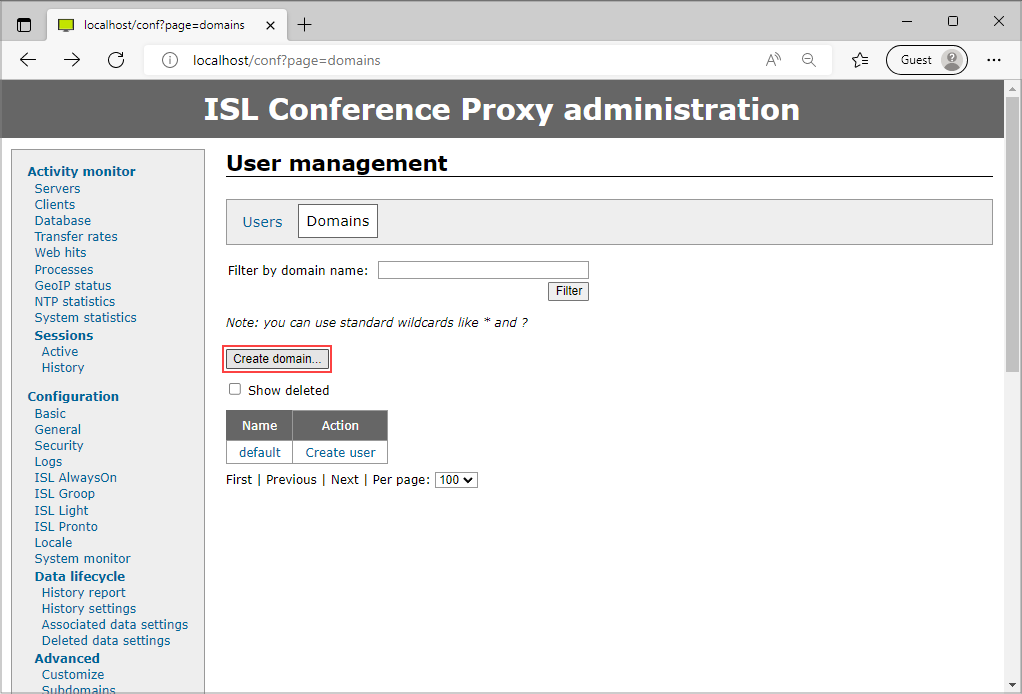
Go to User management > Domains, and select an existing domain or add a new one, e.g. ldapusers, by clicking Create domain....
Step 3

In Security tab uncheck External authenticator and paste the appropriate command for external authentication like in the terminal example (remove quotes and USERNAME, PASSWORD arguments, replace spaces with semicolons and add a semicolon at the end, replace the value for BINDPASSWORD with the encoded bind password from the previous section, make sure to include - as the first argument so that the remaining arguments will be passed through standard input rather than as command line arguments).
authenticator/ldap;-;HOST;example.com;BINDDN;cn=icp,ou=Users,dc=example,dc=com;BINDPASSWORD;[^|islstatic1|^]ytCdipKE05uwIfbeYfGNUmawm8/YAwRN;SEARCHBASE;ou=Users,dc=example,dc=com;SEARCHFILTER;uid=@USERNAME@;
With the important note above in mind, the resulting setting value for this example would be:
authenticator/ldap;-;HOST;example.com;BINDDN;cn=icp,ou=Users,dc=example,dc=com;BINDPASSWORD;[^|islstatic1|^]ytCdipKE05uwIfbeYfGNUmawm8/YAwRN;SEARCHBASE;ou=Users,dc=example,dc=com;SEARCHFILTER;uid=@USERNAME@;REMAP;\\ldapusers\@uid@;
Do not forget to save your changes by clicking the Save button in the bottom right corner.
Step 4
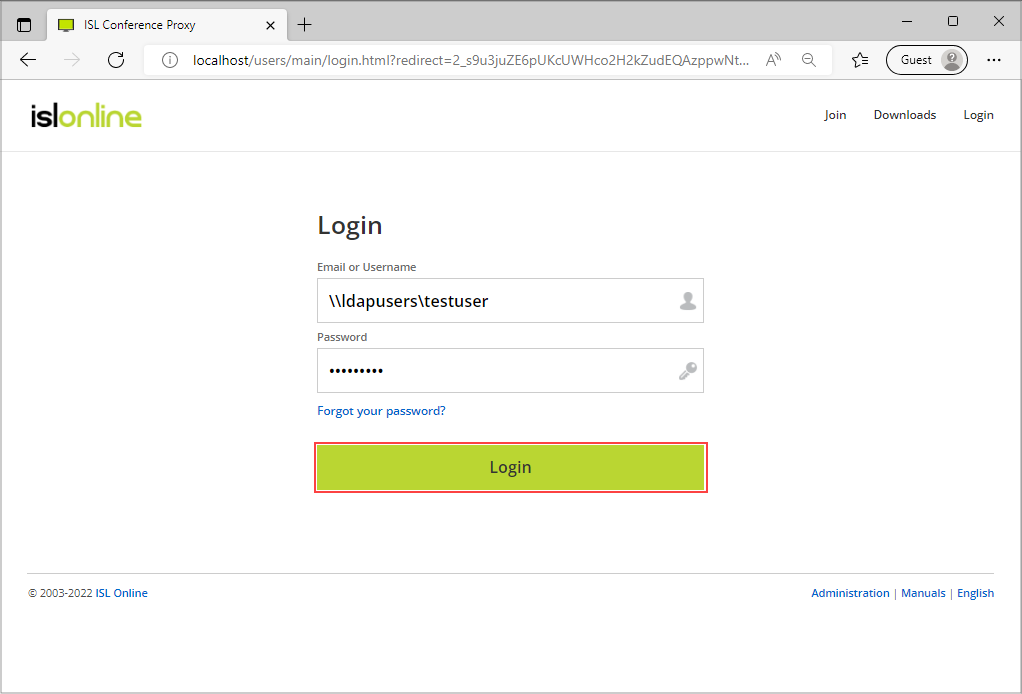
Go to ICP login page and try logging in using \\domain\username, e.g. \\ldapusers\testuser, and password.
Useful hint: If you do not want to type the domain prefix (\\domain\, e.g. \\ldapusers\) when entering your username, you can open ISL Conference Proxy administration and adjust the setting Configuration > General > Default domain for user authentication from its default value (default) to the appropriate custom value (domain, e.g. ldapusers). After that, try logging in just with username (e.g. testuser) and the appropriate password.