You can deploy registry file to multiple machines to adjust the customized settings without having to do this manually on each separate computer.
ISL AlwaysOn settings are stored in the registry. Therefore, it's possible to make changes to ISL AlwaysOn settings by adjusting their stored values in the registry. Additionally, it's possible to set the settings inside of the ISL AlwaysOn settings window, then export the correct registry path and edit the created registry file which can then be used on other machines. This registry file can also be deployed to multiple machines at once using deployment tools to then adjust the required settings without having to do this manually on each separate computer.
Video Tutorial
User Manual
Step 1
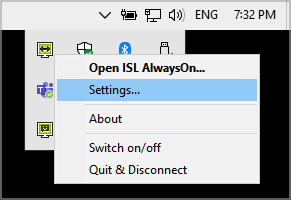
Open ISL AlwaysOn settings on the tray icon and click "Settings".
Step 2

Open the "Desktop Sharing" section on the left side.
Step 3
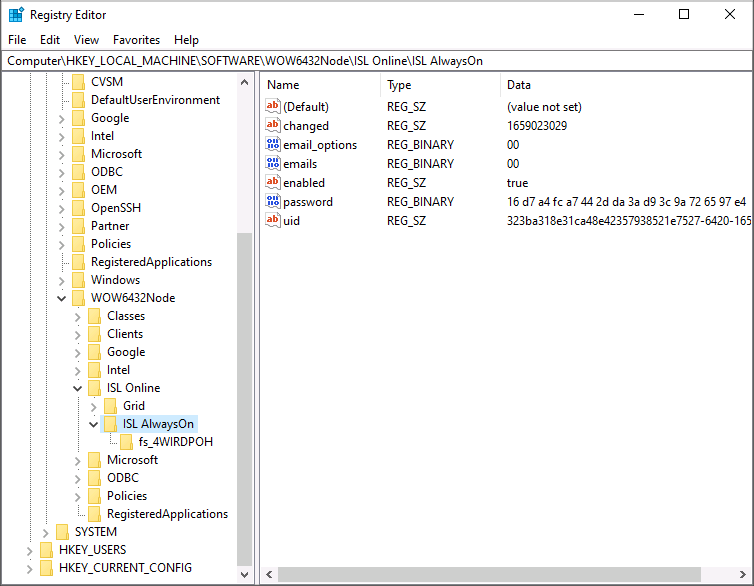
Open “Registry Editor” and navigate to "Computer\HKEY_LOCAL_MACHINE\SOFTWARE\WOW6432Node\ISL Online\ISL AlwaysOn".
Note: Some settings, namely those under the Connection section of Advanced Settings like proxy are stored in the following key "Computer\HKEY_LOCAL_MACHINE\SOFTWARE\WOW6432Node\ISL Online\AutoTransport\Connect options". Proxy settings are encrypted, which means we can simply use the entire encrypted part.
Step 4

Right-click on the ISL AlwaysOn folder and click "Export" then choose a location to store the exported registry file.
Step 5
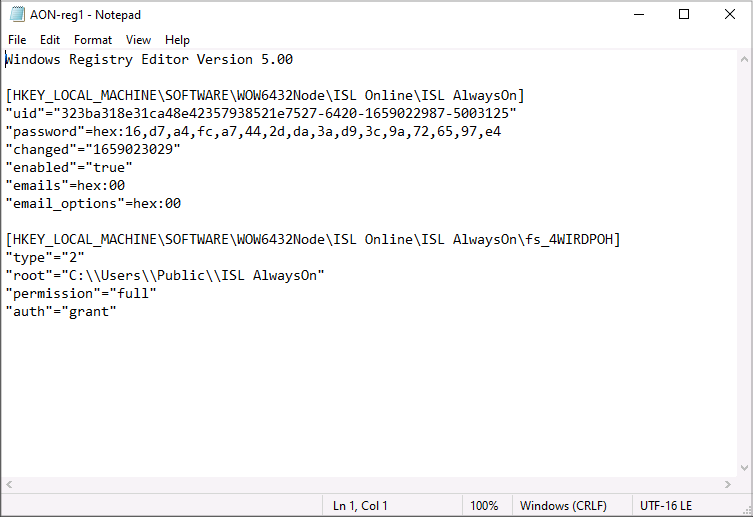
Open the exported registry file which contains all the registry entries which are stored in the ISL AlwaysOn folder.
Step 6

Go back to the ISL AlwaysOn settings, adjust the desired settings, and "Save" the changes.
For this example, we will enable and adjust the following settings under Desktop Sharing:
- Show notification of incoming connection
- Notification timeout: 20
- Allow local user to reject connection
- Default: Reject
Step 7
Go back to the Registry Editor, right-click on the ISL AlwaysOn folder and click "Export" then choose a location to store the exported registry file.
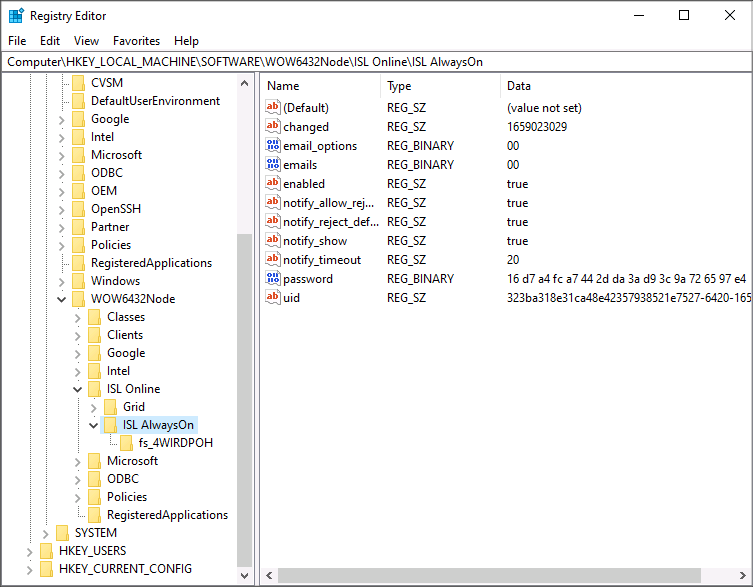
Look at the window panel on the right and take note of the new settings:
- "notify_allow_reject"="true"
- "notify_reject_default"="true"
- "notify_show"="true"
- "notify_timeout"="20"
Step 8
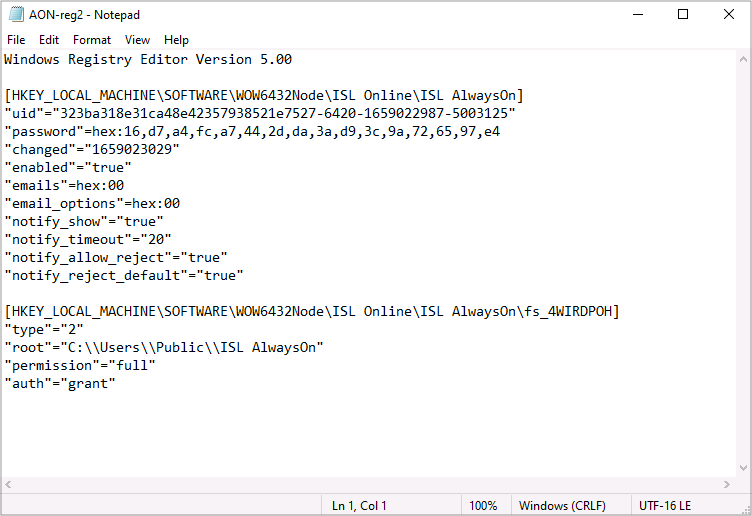
Note the changes in the exported registry file, which now contains the new changes as well as all the registry entries which are stored in the ISL AlwaysOn folder.
Step 9
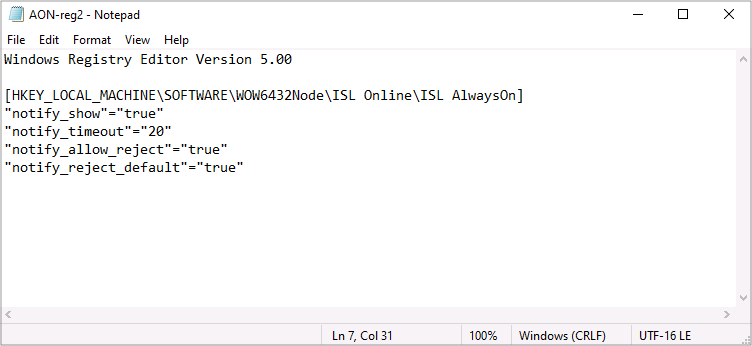
Clean the created registry file as seen in the example pictured above by removing all unnecessary entries. Only the new/changed settings are needed along with the path and the first line "Windows Registry Editor Version 5.00".
Important: You should keep only the changes and remove everything else except the path and the first line - if this process is not done, the deployed registry file could break the ISL AlwaysOn connection/installation.
Note: You have a lot of different ways of comparing the two files to find the differences between them. You can use a command line tool such as "File Compare" (fc file1 file2) on Windows or a graphical tool such as "Beyond Compare".
If you are unsure whether you have cleaned and prepared the registry correctly, you are welcome to contact us and we will help you by double-checking your created registry file.
Step 10
You can now copy and run the cleaned-up file on another PC with installed ISL AlwaysOn to duplicate those settings.
Important: We strongly suggest testing the created registry on a computer to which you have access (via SSH, RDP, ...) and confirm that the created registry works as expected.