With the help of filters you are able to setup two (or more) groups of supporters, e.g. group 1 (filter sales) represents sales supporters and group 2 (filter tech)represents technical supporters. You can then put two chat live buttons on your web page, one for sales and the other for technical support.
Creating Filters
Step 1
 Click "Configure Live Chat" from my account's "Users" tab.
Step 2
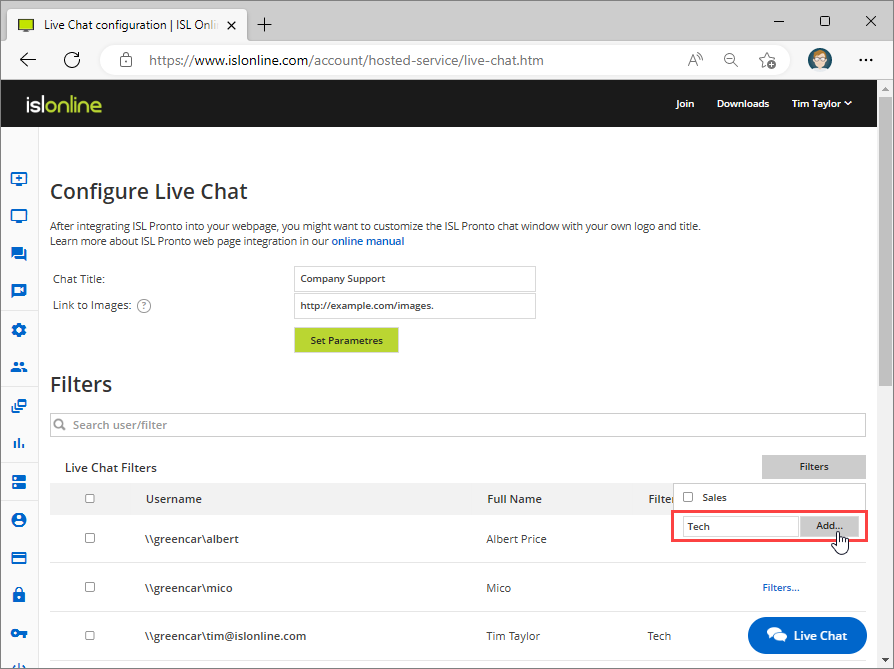 Click "Filters" button and enter new filter name. Than click "Add" button.
Step 3
 Click the "Filters..." link from the user row and check the "Tech" filter.
Step 4
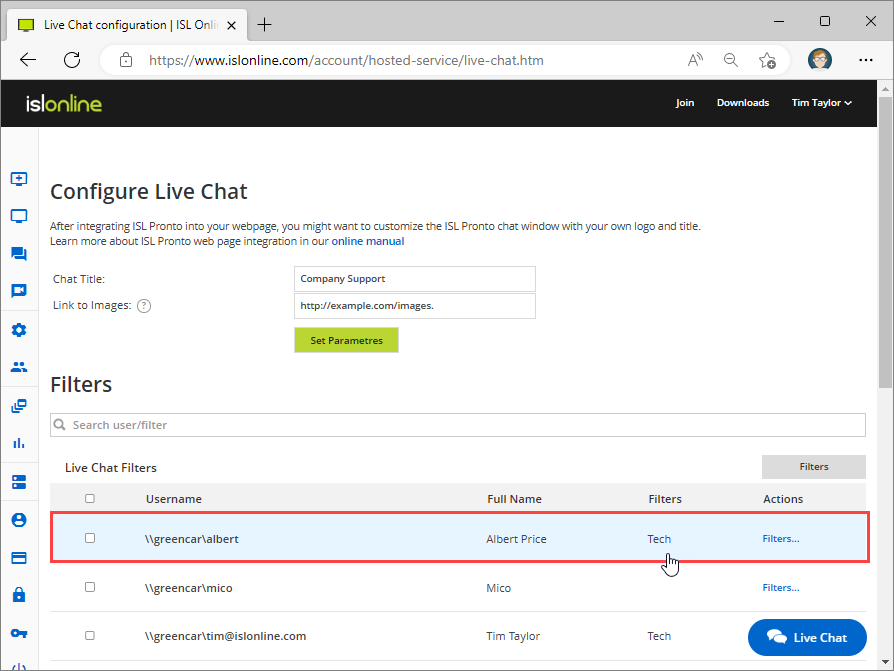 The user has been added to the "Tech" filter.
Note: You can assign more than one filter to a user.
Step 5

The user has also been added to the "Tech" filter in ISL Pronto.
Modifying website code
Let us assume you have ISL Pronto setup on a certain webpage (e.g. your online shop section) and would like the ISL Pronto button on that page to trigger only a certain filter - this can be achieved by adding a special parameter filter=FILTERNAME to your ISL Pronto script line, like this (replace FILTERNAME with the filter you created, e.g. sales):
<script type="text/javascript" src="http://islpronto.islonline.net/live/islpronto/public/chat.js?d=XXXDOMAINXXX&filter=FILTERNAME"></script>
Our next example will show you how to modify your web page to include two ISL Pronto buttons, one for sales support and the other for technical support:
- Put this script code at the bottom of the page, just before </body>:
<script type="text/javascript" src="http://islpronto.islonline.net/live/islpronto/public/chat_info.js?d=XXXDOMAINXXX"></script>

<script type="text/javascript">

function checkFilter(name, txt) {

 var link = document.getElementById('pronto_' + name);

 var info = ISLProntoInfo.active_filters[name];

 if(info != null) {

         link.onclick = info.onchat;

         link.href = 'javascript:void(0)';

         while(link.firstChild)

                 link.removeChild(link.firstChild);

         link.appendChild(document.createTextNode(txt));

 }

}

checkFilter('sales', 'Chat live: Sales');

checkFilter('tech', 'Chat live: Tech support');

</script>- Put this code in a location where you wish to have the ISL Pronto chat buttons:
<p><a href="mailto:sales@YOUR_DOMAIN.com" id="pronto_sales">Leave a message (sales)</a></p>

<p><a href="mailto:tech@YOUR_DOMAIN.com" id="pronto_tech">Leave a message (tech support)</a></p>
Hide clients not matching the filter
Lastly we can hide clients not matching supporters filter. For example: We don't want the sales supporters to receive tech clients and vice versa. To enable this feature please contact us via e-mail at support@islonline.com.