ISL Light supports the installation of ISL AlwaysOn on the remote computer from within a session. This comes in handy if you will need to make repeated connections to the same remote computer. Please follow the steps below to learn how to add a remote computer into your list of ISL AlwaysOn computers:
Step 1
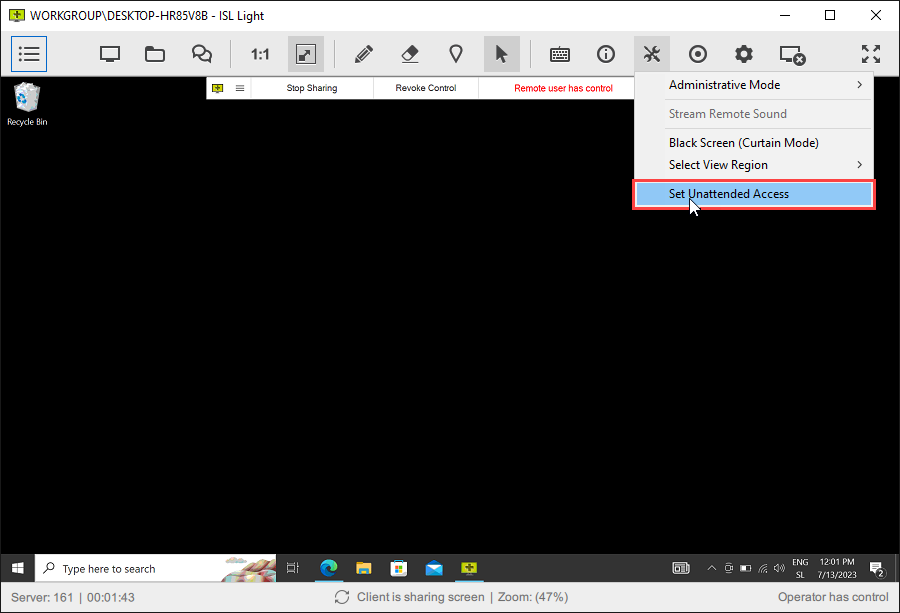 Click on "Set Unattended Access" item from the "Tools" menu.
Note: If the computer is already at your computer list, "Set Unattended Access" won't be shown in the dropdown.
Step 2
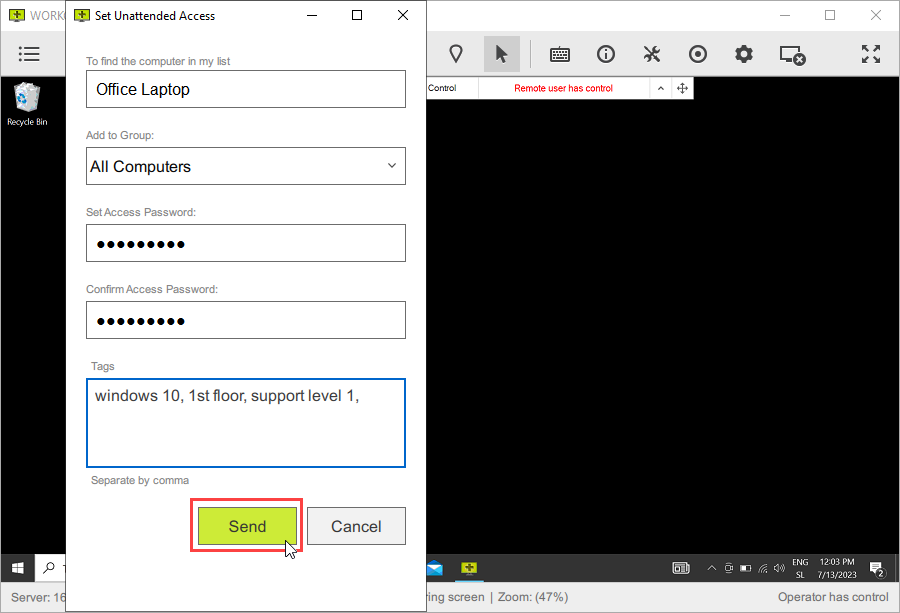
In the window that opens, enter the computer name for the remote computer. This alias will be shown in your list of ISL AlwaysOn computers, so it is advisable to select a descriptive name.
Note: You can leave computer name blank, in that case a name will be generated and used in the form WORKGROUP\*.
Select which group you wish to place the remote computer. Groups shown here are the groups you created in ISL Light for the remote computers.
Note: You do not need to select a group. If a group isn't selected, the computer is placed in the default All Computers group.
Enter the access password that will be used to connect to the remote computer. You can also specify tags, separated by comma, which will help you search for the computer in ISL Light.
Important: Depending on if ISL AlwaysOn is already installed on the remote computer, different access passwords might be set. If ISL AlwaysOn is already installed then only the Connection access password (used when connecting to the remote computer from your ISL Online account) will be set to the password your entered. If ISL AlwaysOn is installed for the first time on the remote computer then Connection access password as well as the Main access password (used when connecting to the remote computer with any ISL Online account) will be set to the password your entered.
Step 3
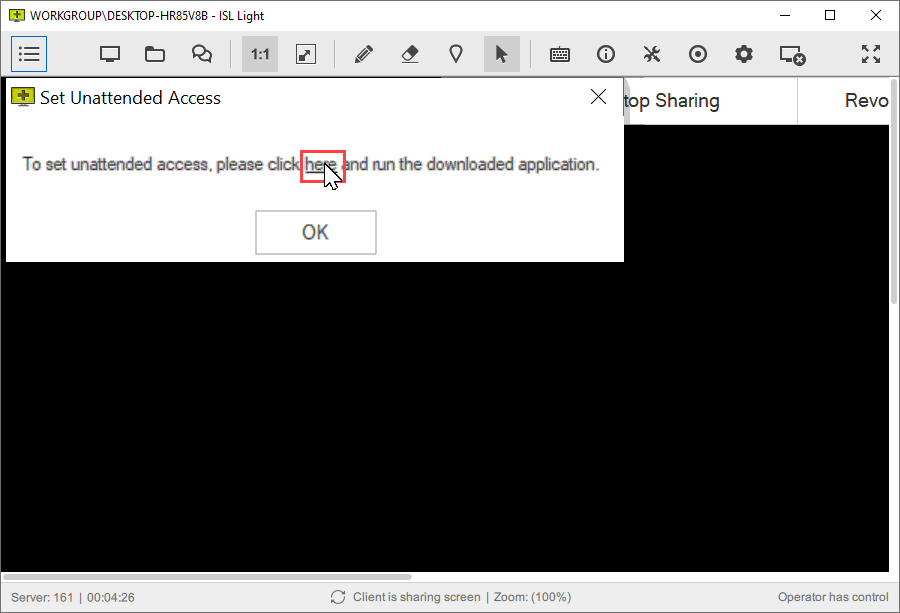
Click "here" to install ISL AlwaysOn or right click on "here" to open the "Copy Link Location" prompt (which copies the download link to your clipboard).
Important: In this step 3 different options may happen, depending on the Operating system and version of ISL Light on the remote computer:
- On macOS the installation of ISL AlwaysOn will start automatically without any pop-up window and you can continue with Step 7.
- On Windows the pop-up will appear on the remote computer and you will need to click on "here" link to download ISL AlwaysOn.
- If the pop-up cannot be displayed on the remote computer it is displayed on your local computer. In that case you will have to copy this link ("here") and send it to the remote side via mail, shared clipboard, chat etc.
Step 4
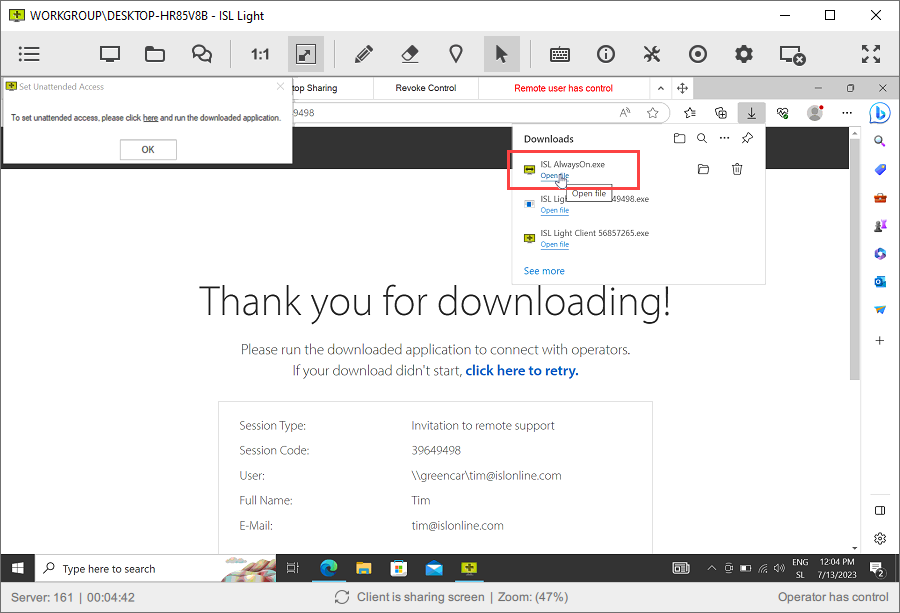
Run the ISL AlwaysOn.exe. Follow the installation wizard and click Finish.
Step 5
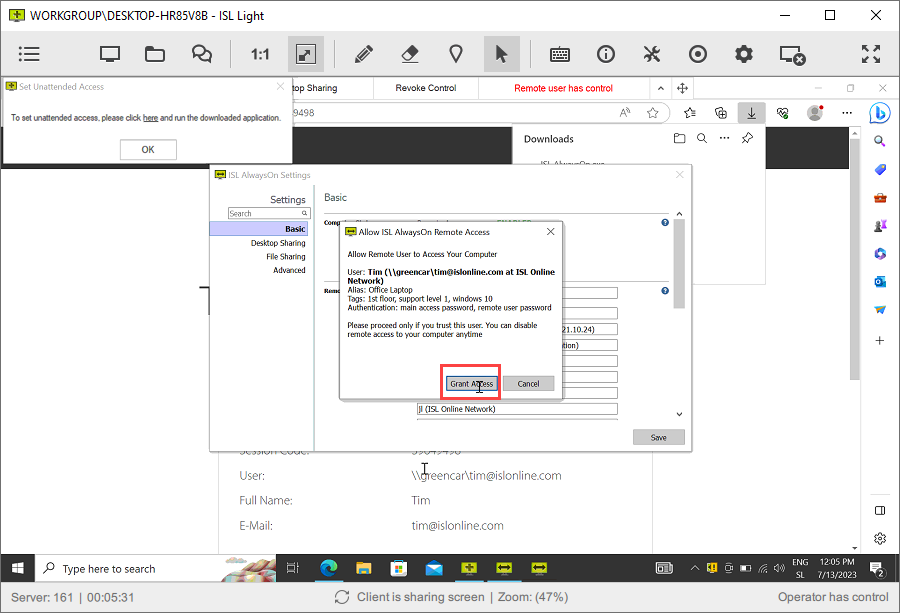
Click "Grant Access" to add the computer to the ISL Always on list and grant access to it.
Important: Review the changes that will take place and make sure you are granting the access to the right user before allowing the access.
Step 6
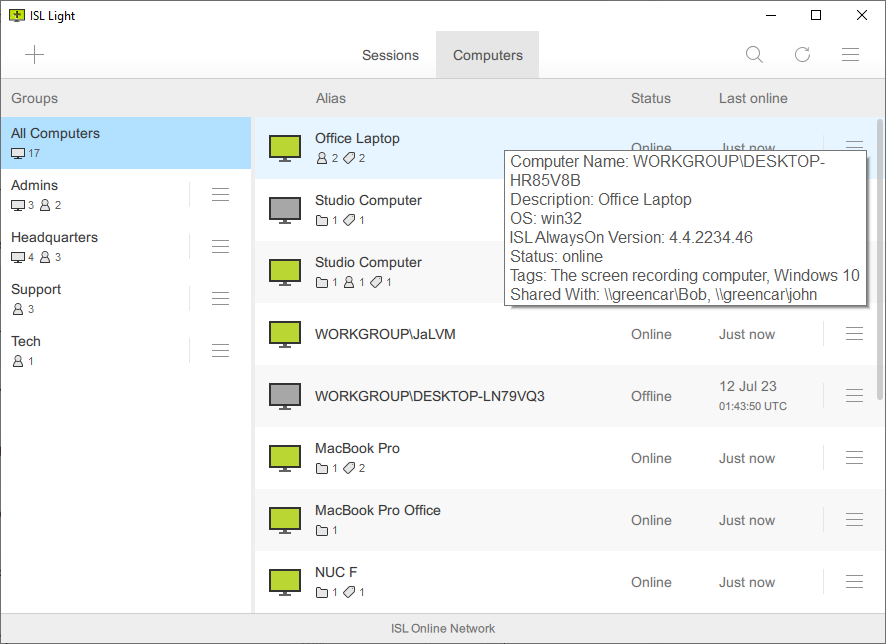
You can now connect to the remote ISL AlwaysOn computer.
Related Articles:
To connect to unattended computer(s) you can install remote agent (ISL AlwaysOn) also via other methods:
via ISL Light
- Add this Computer
- Set Unattended Access via Email
- Set Unattended Access via Link
- Set Unattended Access via Code
- Set Unattended Access in Session (this page)
via My Account
via Direct download link
Important: When using the direct download link unattended access needs to be set manually via methods described above or in ISL AlwaysOn > Add Remote User.