This option provides access to the online update functionality.
You are presented with a table that lists all modules, installed version and release date (if not installed, it states not installed) and action.
The following actions are available:
- Default (the default action - it is set to automatic install)
- No change (by selecting this action, you tell the update system that you do not wish to change this item)
- Automatic install (this action automatically installs a newer version if it is available)
- Manual install (this action opens a list of all available modules / programs / plugins and you can (de)select the desired entries manually)
- Uninstall (this action uninstalls the module and all its components)
Note: Manual install is the only way to install beta releases, since Automatic install only updates to a newer stable release and ignores beta releases.
Note: Most upgrades will require ISL Conference Proxy restart. Please do so, when the notification appears. Be sure to check online updates again, when upgrading ISL Conference Proxy itself, since more module updates might be available afterward.
Note: Online update will also work with HTTP Proxy, but additional setting has to be set before you can start the Online update. Make sure that you set the HTTP Proxy for web client to your proxy server under the following tab on the left hand side: ISL Conference Proxy -> Administration -> Configuration -> Security -> HTTP proxy for web client. Depending on your HTTP proxy, the information should be entered in one of two ways: proxyaddress:proxyport or username:password@proxyaddress:proxyport if you need to specify username and password.
Important: If you have manually updated your server at any point, it's important to reset the "Software update URL" setting to its default value before proceeding with an online update. The setting can be found here: ICP_ADDRESS/conf -> Configuration -> General -> "Software update URL:". Check the checkbox next to the setting and select "Save" at the bottom of the page.
Below the table there is a button Apply changes - click it to perform the desired actions. When you click it, it will dim your web browser's window and show a progress bar while it performs the actions.
For more information follow the example bellow:
Step 1
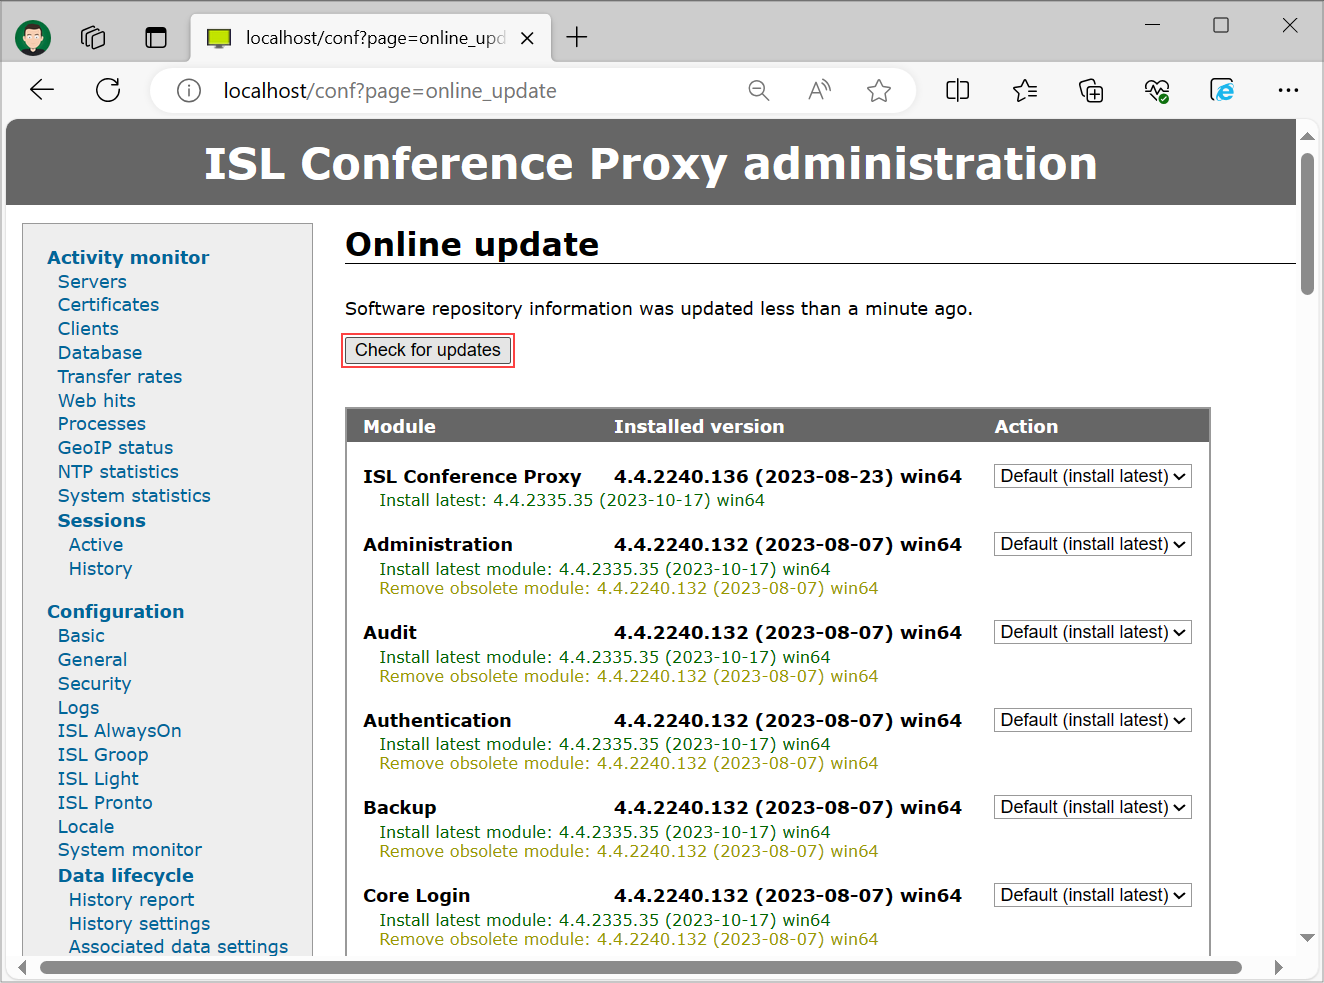
In the side menu go to Manage Software -> Online update and the following table will be displayed, showing you all the installed modules and available updates. Press the Check for updates button to check for latest available releases of ISL Conference proxy modules.
Step 2
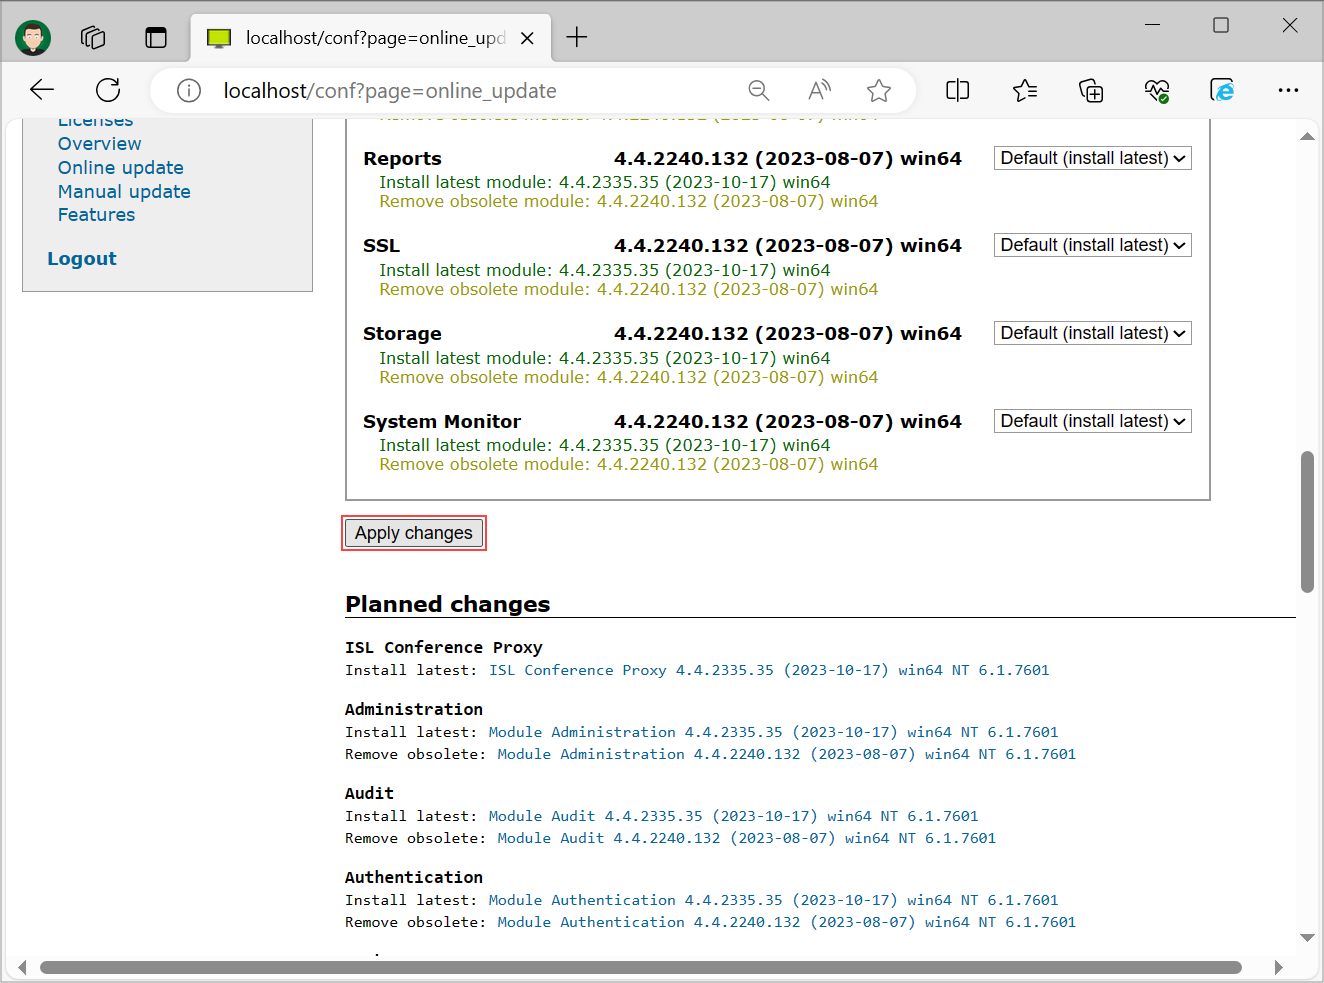
Bellow the Apply changes button, there will be a more detailed description of what will take place during the update. Which modules will be removed or added and their description.
Step 3
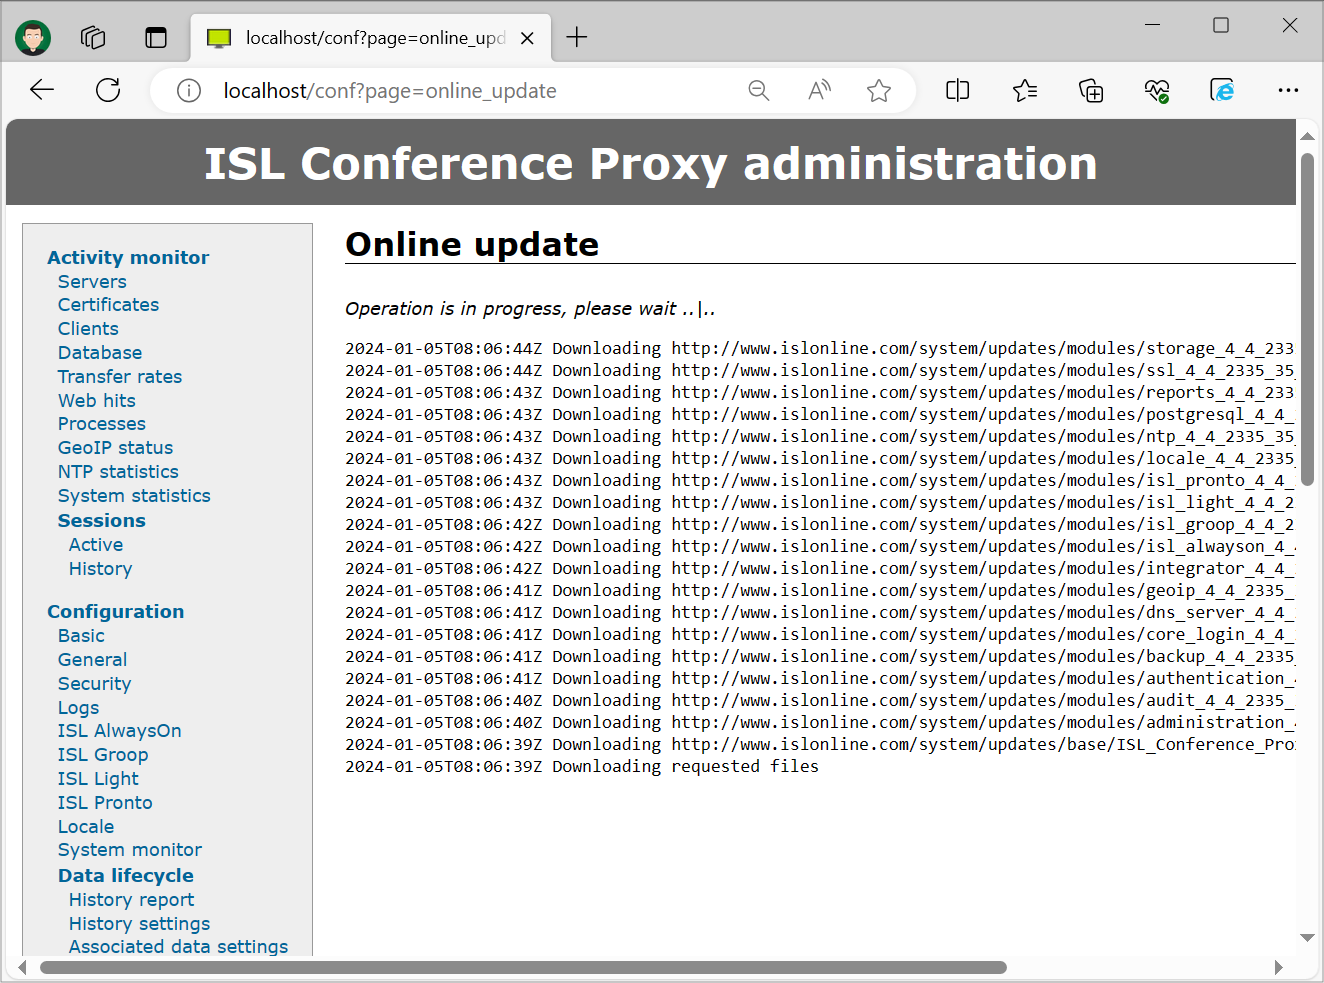
First all the new files will be downloaded.
Step 4
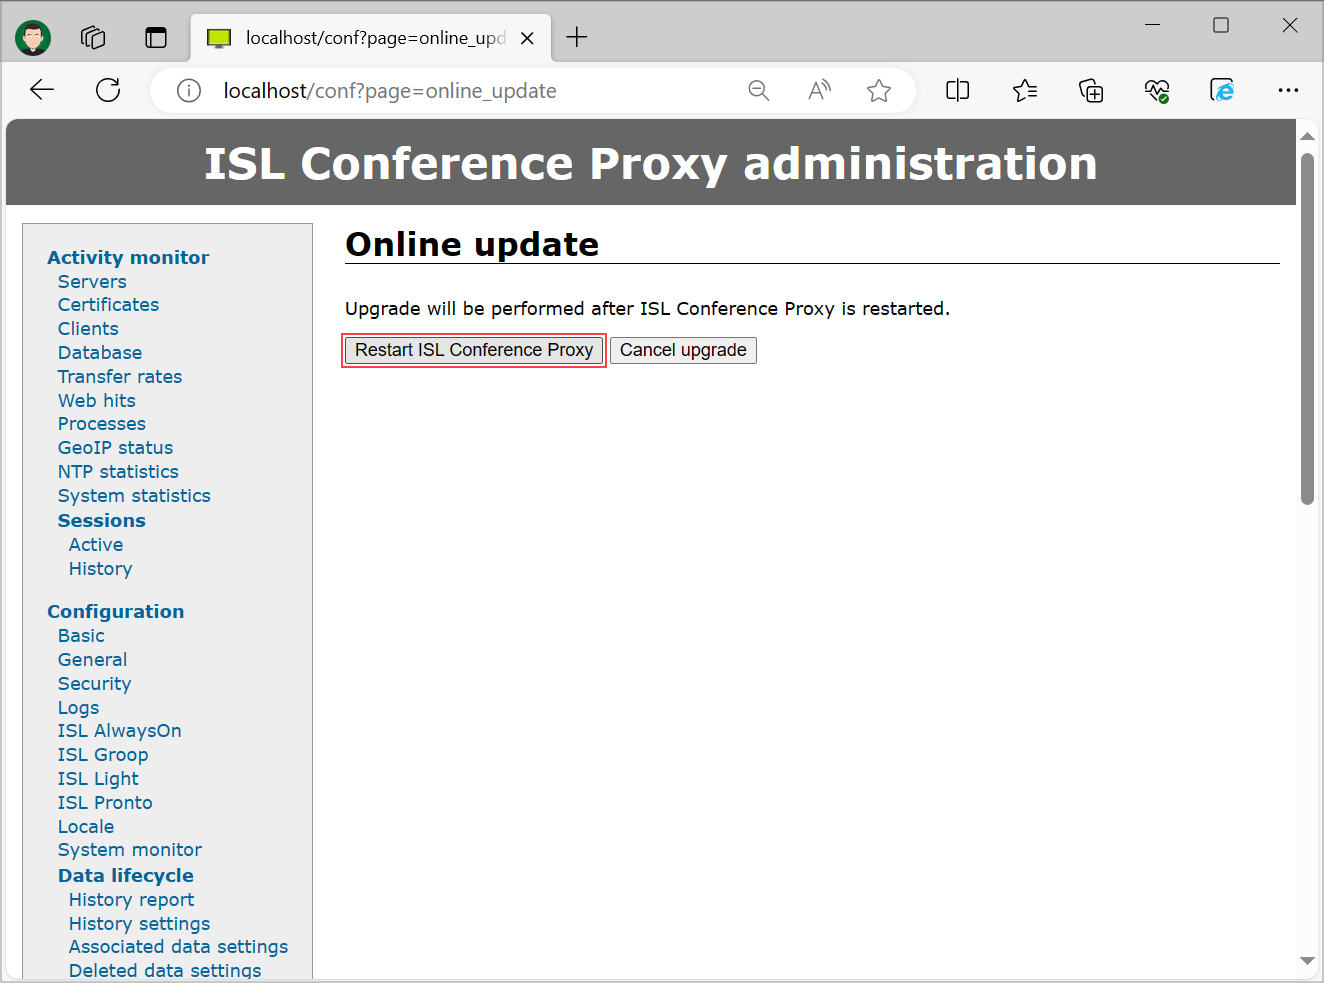
Once the files are downloaded, you will be prompted to restart the server in order for the update to be installed.
Step 5
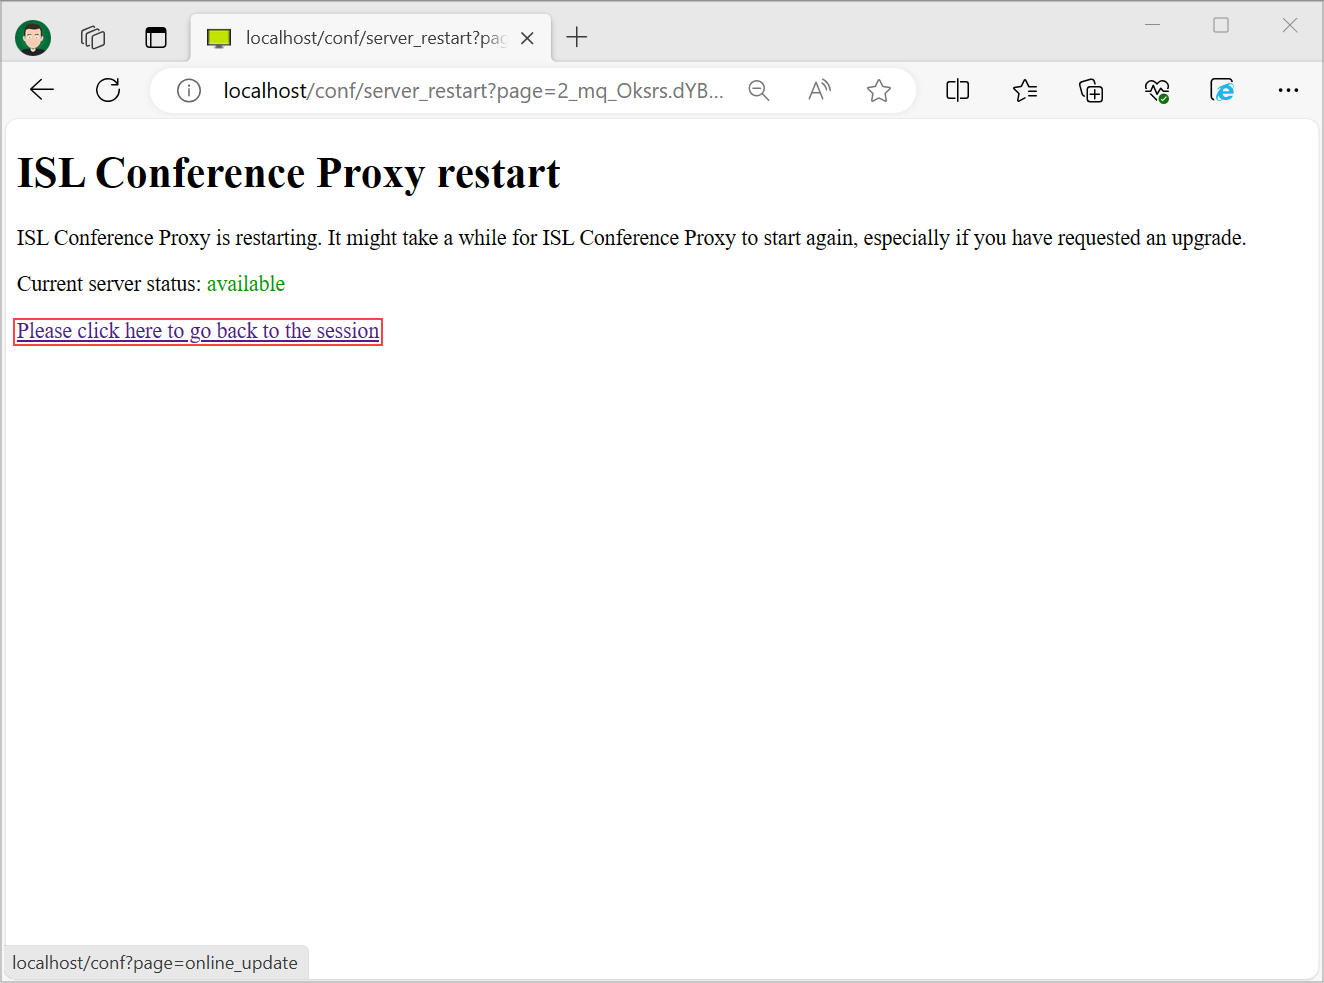
During the update the server will not be available, but server status will be displayed (restarting->checking->unavailable->available) once the server is back online, you can click the "Please click here to go back to the session" link, to return to the basic server overview.