The following options are available in the Desktop Menu:

View Desktop

Click "View Desktop" from the desktop drop-down to begin viewing the remote desktop. Alternatively, you can click on the green button "View Remote Desktop" in the middle of the application window.
Note: If you are connected to your own computer then viewing your own screen will cause it to be displayed as a nested image within itself. You will be prompted to confirm this action.
Share Desktop
Note: "Share Desktop" feature is not available when connecting from ISL Light to ISL AlwaysOn (Unattended Access).
Step 1

Click "Share Desktop" from the desktop drop-down to share your screen.
Step 2

Click the "Show" button to confirm.
Step 3
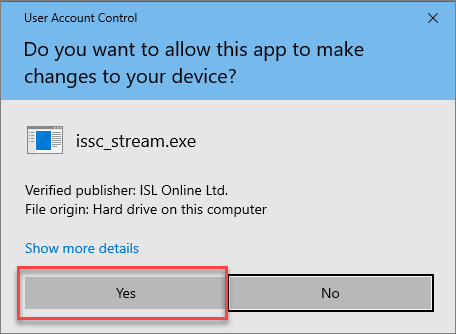
Confirm UAC by clicking the "Yes" button.
Step 4

You are now sharing your screen with the other side.
Share particular screen region, application or monitor
You can also share only one monitor, application or particular region of your screen.
Step 1

Click "Share Desktop" from the desktop drop-down to share your screen.
Step 2

In order to share only a particular monitor, application, or screen region, click on "Show Options".
Step 3

Click the "Choose" button.
Step 4
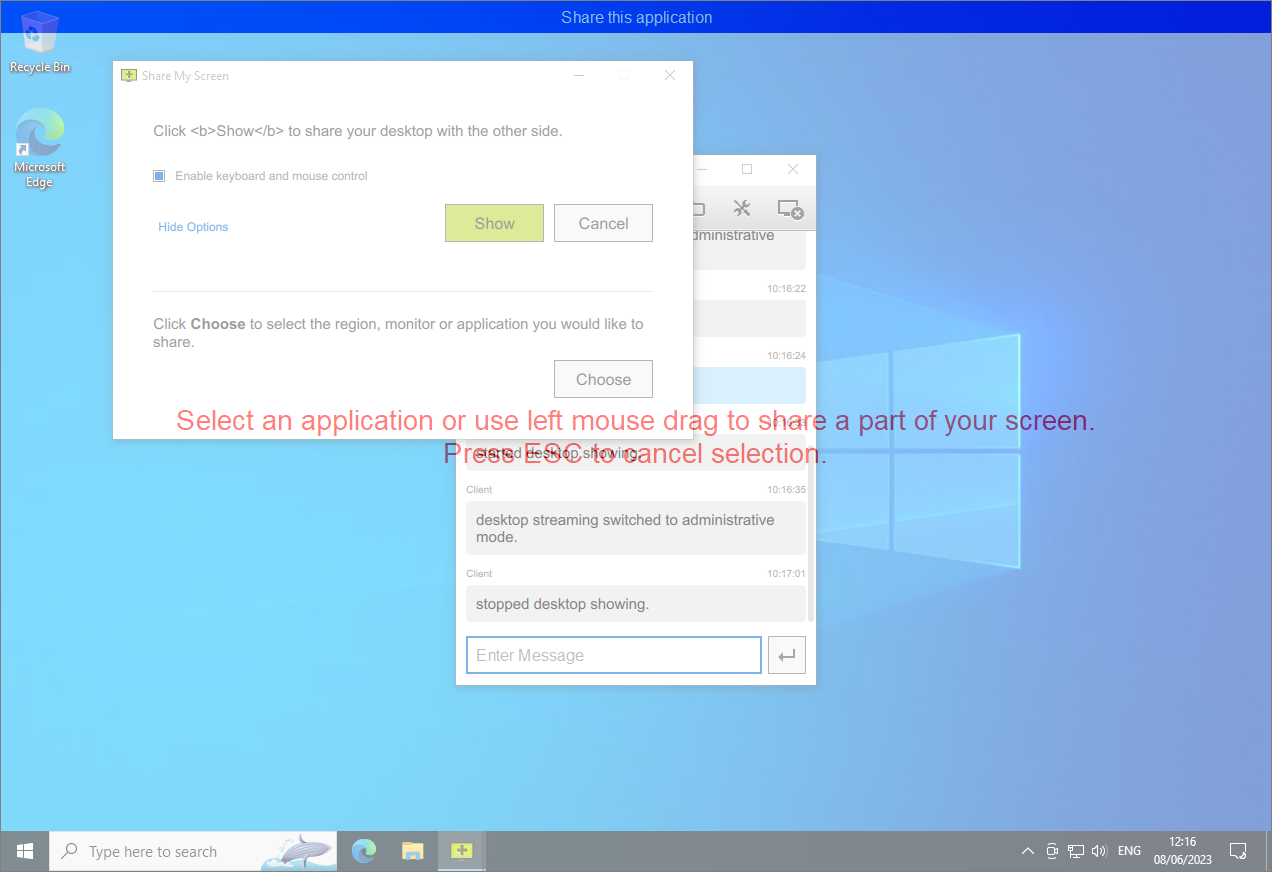
Select the screen region, application or monitor you wish to share with your client.
Request control

If you do not have control of the remote computer (e.g. it was disabled or not allowed in the first place) you can Request Control. Remote user will have to approve this action.
Display Area
You can choose between viewing the entire remote screen or only a custom region of the remote desktop.

Stop Desktop Streaming

To stop desktop sharing, press on the "Stop Dekstop Streaming" in Desktop drop-down menu.