Introduction
ISL AlwaysOn is controlled through command line parameters. When installing ISL AlwaysOn through product pages, the same parameters are used as a whole command line in the CGI parameter cmdline.
Important: These command line arguments are discarded when passed to push upgrade of ISL AlwaysOn from ISL Conference Proxy, so you cannot use them when doing a push upgrade. They are also not used when the ISL AlwaysOn management dialog or setup is started from a non-admin or non-system account. In order to allow the ISL AlwaysOn management dialog (and use command line arguments) under system account please add the command line option ignore_system_account.
Easiest way to obtain a valid ISL AlwaysOn grant link is shown in the following manual:
Set Unattended Access via Link
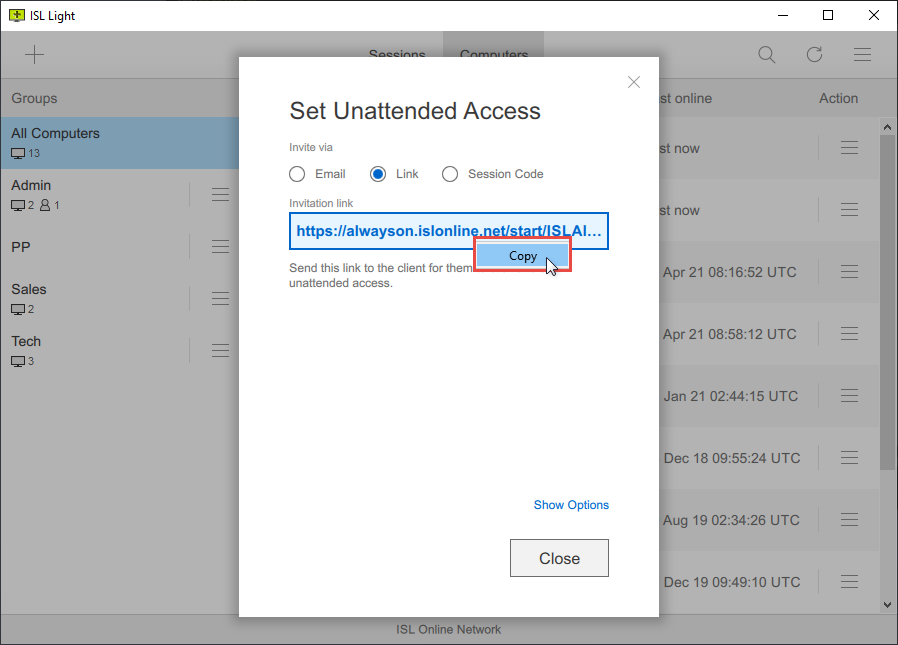
The link will have one of the following formats:
https://www.islonline.net/start/ISLAlwaysOn?cmdline=grant+%22GRANTBLOB%22
or
https://alwayson.islonline.net/start/ISLAlwaysOn?cmdline=grant+%22GRANTBLOB%22
where GRANTBLOB represents your unique grant blob, telling the program to which user to add the computer. Wherever you see a reference to a blob or grant blob in the examples below, replace it with the appropriate value for your case.
Mass Deployment: ".../start/..." in the link above means the ISL AlwaysOn will be downloaded during the installation process, which is NOT recommended if you will be using it as part of mass deployment tools. For that purpose, the 'start' should be replaced with ‘download’. This way the full version of ISL AlwaysOn will be downloaded before the installation.
Commands:
These command lines are used when installing or running once ISL Light.
| Command |
Description |
|---|---|
| grant | grant_silent |
"grant" is inserted by default together with GRANTBLOB and defines who will be given access remote access to the computer. If you replace grant with grant_silent then the final step of the ISL AlwayOn installation procedure where the user has to manually click "Grant" to allow remote connection for a specific user is skipped and connection is granted automatically. Note: This is a verification step where the local user can verify who will be given access to the current computer, and should be disabled only in specific situations - e.g. automatic deployment of ISL AlwaysOn where you don't want or can't have a user interaction during the installation procedure. Example: ISLAlwaysOn.exe grant "zeJwVzk1tKBDEQAFCKAVeuBPcNs3bIP5W1IigigidIVplvajpDuB7mnRS3hm8Z3gVYDn8dGnhyHT4z7P02te5AbOXA/w9P4y3Y9eZZXOMr2t4/tngwvW2XNV/a6Ec4t3IA9BnZ15ILEqhodES6JEMVXTE2VI3WaaeM9YVR6xwyxWCEFAZHyBxEYUmOqkrRB4qKk7XRcLDVpKgTkxFBoxNG9FwSmkjKB2eJxLAzZF3V4mNSWoVf2AA+M5/aNo8+ty53Rb5OPJZb2AEywP6f1spZ9C4YFeM1XMEfyNxJxA==" |
| /SILENT |
Installer will not display the wizard and the background window. Note: The setup will not be started if ISL AlwaysOn is already installed on that computer. Example: ISLAlwaysOn.exe /SILENT |
| /VERYSILENT |
Installer will not display the wizard and the background window. The installation progress window will not be shown as well. Note: The setup will not be started if ISL AlwaysOn is already installed on that computer. Example: ISLAlwaysOn.exe /VERYSILENT |
| password <default password> |
Set the Main Access Password of the computer if the password has not been set yet. Important: We strongly recommend changing the Access Password once you have completed the installation of unattended access. If ISL AlwaysOn is already installed on the remote computer, the Connection Access Password will be set instead, while the Main Access Password will remain unchanged. Example: ISLAlwaysOn.exe password "topsecret_password" |
| password_md5 <md5[default password]> |
Set the Main Access Password of the computer by providing a md5 hash of the selected password instead of providing it via plaintext. Important: We strongly recommend changing the Access Password once you have completed the installation of unattended access. If ISL AlwaysOn is already installed on the remote computer, the Connection Access Password will be set instead, while the Main Access Password will remain unchanged. You can use one of the following commands to obtain the md5 hash: Important: Make sure you are using single quotes (') and not double quotes (") - using double quotes (") may result in incorrect MD5 hash being generated. Linux Terminal: echo -n '<your-password>' | md5sum Note: Only copy the hash, without "-" character at the end of the output - that represents the input (stdin) and is not part of the md5 hash. MacOS Terminal: echo -n '<your-password>' | md5 Windows PowerShell: Get-FileHash .\<file-with-your-password> -Algorithm MD5 Note: To use the Get-FileHash function on Windows, you need to type your desired password in an empty file, and then call the function with the file as the input. |
| description <computer description> |
Specify the description of the computer. Description text can also specify environment variables that are available to the ISL AlwaysOn process and some additional variables. Variables have the following for $[<variable-name>]:
Example: ISLAlwaysOn.exe description "$[USERNAME] $[OS]" |
| tags “tag1, tag2, tag3” |
Comma separated tags that should be added to the computer and are accessible when viewing the computer list. Example: ISLAlwaysOn.exe tags "windows, 1st floor, south, corner office" |
| push_upgrade (true|false) |
Enable or disable automatic software updates initiated from the ISL Conference Proxy server - this option is useful for corporate environments where the administrator wants to update multiple computers simultaneously. Example: ISLAlwaysOn.exe push_upgrade=true |
| grant_password <connection_password> |
Define a new granted Connection Access Password. Example: ISLAlwaysOn.exe grant_password "top_access_password" |
| grant_password_md5 <md5[connection_password]> |
Define a new granted Connection Access Password by providing a md5 hash of it instead of providing it via plaintext. You can use one of the following commands to obtain the md5 hash: Important: Make sure you are using single quotes (') and not double quotes (") - using double quotes (") may result in incorrect MD5 hash being generated. Linux Terminal: echo -n '<your-password>' | md5sum Note: Only copy the hash, without "-" character at the end of the output - that represents the input (stdin) and is not part of the md5 hash. MacOS Terminal: echo -n '<your-password>' | md5 Windows PowerShell: Get-FileHash .\<file-with-your-password> -Algorithm MD5 Note: To use the Get-FileHash function on Windows, you need to type your desired password in an empty file, and then call the function with the file as the input. |
| ignore_system_account |
Specify this option to allow the ISL AlwaysOn management dialog (and use of command line arguments) when running the executable from a non-privileged account. Example: ISLAlwaysOn.exe ignore_system_account |
|
skip_check_start |
Upgrade the ISL AlwaysOn program first and then perform actions that are specified with parameters. Example: ISLAlwaysOn.exe skip_check_start |
| share <path> |
Option share is used to add a shared folder - during installation, a dialog for adding a new file share will pop up, with the provided location already entered, allowing you to set the authentication and access parameters, then confirm it by clicking OK. Example: ISLAlwaysOn.exe share "C:\Users\Sam\ISLAlwaysOnMap" |
| record <path to recordings> |
Specify the session recordings folder. When an ISL Light session is recorded the recordings will be placed in the specified folder. Example: ISLAlwaysOn.exe record <path to recordings> |
| shutdown | shutdown_silent |
Specifying the shutdown parameter will stop all ISL AlwaysOn services on the local computer. Use shutdown_silent to disable user interaction. Example: ISLAlwaysOn.exe shutdown |
|
install_missing |
In certain scenarios, when setting up ISL AlwaysOn on a Linux system, users may encounter missing libraries necessary for installation. By including this argument during ISL AlwaysOn installation, users prompt the installer to automatically identify and install any missing libraries. If this argument is omitted, the installation process will fail and notify the user about the specific missing library. Example: ISLAlwaysOn.exe install_missing |
Steps for preparing a custom executable
These are general steps that need to be done:
- Get the default link for granting access to your user as described in the introduction section above, this will be your starting point.
- Make a list of the desired command line arguments that you wish to use (check the syntax section).
- URL-encode your command line arguments from the previous step. You can use any URL-encoding page, but we also have a page for this purpose: Link for URL encoding
- Insert the command line arguments before the grant+%22GRANTBLOB%22 part of the link replace grant with grant_silent if desired.
Note: To ensure the command line arguments are passed and handled correctly the grant/grnt_silent argument should be the last part of the generated link.
Example
The following example will show you how to create a silent installer which could be used for deployment:
- Obtain an ISL AlwaysOn grant link as shown in the introduction:
https://www.islonline.net/start/ISLAlwaysOn?cmdline=grant+%22GRANTBLOB%22
- Select your password and obtain an md5 hash of it:
tim@Desktop:~$ echo -n topsecret | md5sum
ea847988ba59727dbf4e34ee75726dc3  -
- Select the other command line parameters. We will use the following, to make the install silent and set the description and password of the computer:
/VERYSILENT password_md5 "ea847988ba59727dbf4e34ee75726dc3" description "Deployed: $[name] - $[OS]"
- URL Encode command line parameters:
%2FVERYSILENT+password_md5+%22ea847988ba59727dbf4e34ee75726dc3%22+description+%22Deployed%3A+%24%5Bname%5D+-+%24%5BOS%5D%22
- Add encoded arguments to the link. Insert them at the beginning of the cmdline section and add a trailing + (encoded space):
https://www.islonline.net/start/ISLAlwaysOn?cmdline=%2FVERYSILENT+password_md5+%22ea847988ba59727dbf4e34ee75726dc3%22+description+%22Deployed%3A+%24%5Bname%5D+-+%24%5BOS%5D%22+grant+%22GRANTBLOB%22
- To make the installer completely silent, replace grant with grant_silent (this will skip the last step in installation where user has to click "Grant"):
https://www.islonline.net/start/ISLAlwaysOn?cmdline=%2FVERYSILENT+password_md5+%22ea847988ba59727dbf4e34ee75726dc3%22+description+%22Deployed%3A+%24%5Bname%5D+-+%24%5BOS%5D%22+grant_silent+%22GRANTBLOB%22
- Deploy the executable to the remote machine and run it. The computer(s) will appear in the list with a customized name and an access password set.
